If you’re a WordPress site owner, ensuring the safety of your valuable content through regular backups is essential. In this step-by-step guide, we’ll walk you through the process of effortlessly backing up your WordPress site to Backblaze B2 using the powerful Green Backup plugin.
Prerequisites: Get Green Backup Pro
Before we dive in, make sure you have the Green Backup Pro version to unlock the full potential of your backups. Head over to Green Backup Pro to upgrade your plugin.
P.S.: The free version of Green Backup doesn’t support saving backups to Backblaze B2.
You need to choose a plan from the three PRO plans based on how many websites you can install on the plugin.
Step 1: Install Green Backup Pro
Begin by installing Green Backup Pro on your WordPress site. Activate the plugin and navigate to the Green Backup settings, focusing on the Backblaze B2 tab.
Step 1: Once you have purchased the right plan for you, log in to your GreenWPX member area to download the plugin and copy the activation key.

- Download and save the plugin zip file to your desktop.
- Copy your Serial key.
Step 2: Install the plugin on your WordPress site.
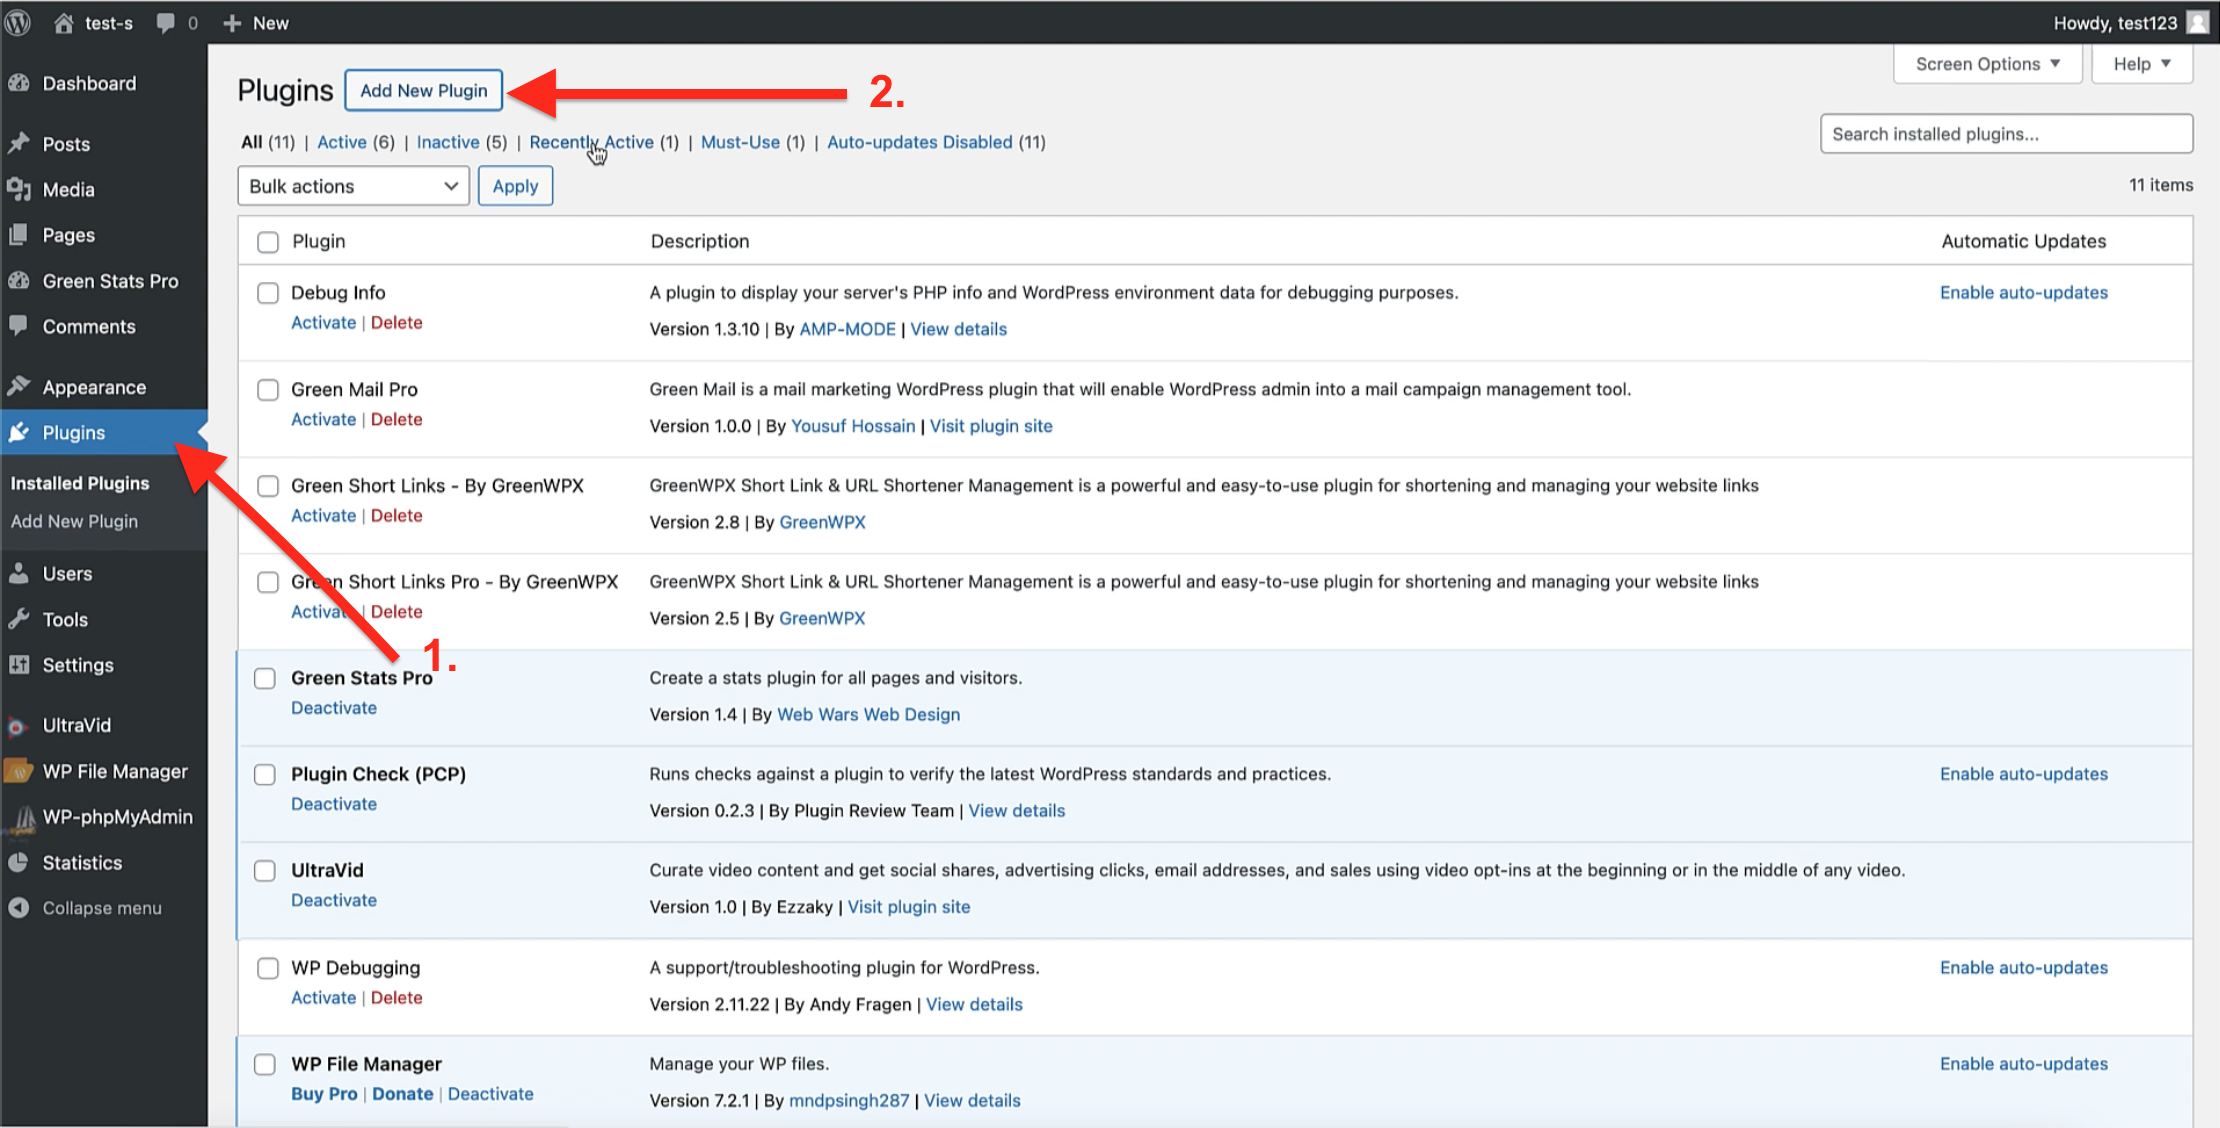
- On your WordPress Dashboard click on the Plugins on the left side menu.
- On The Plugins page click “Add New Plugin”.
Step 2.1 : Import the zip file of the downloaded plugin.
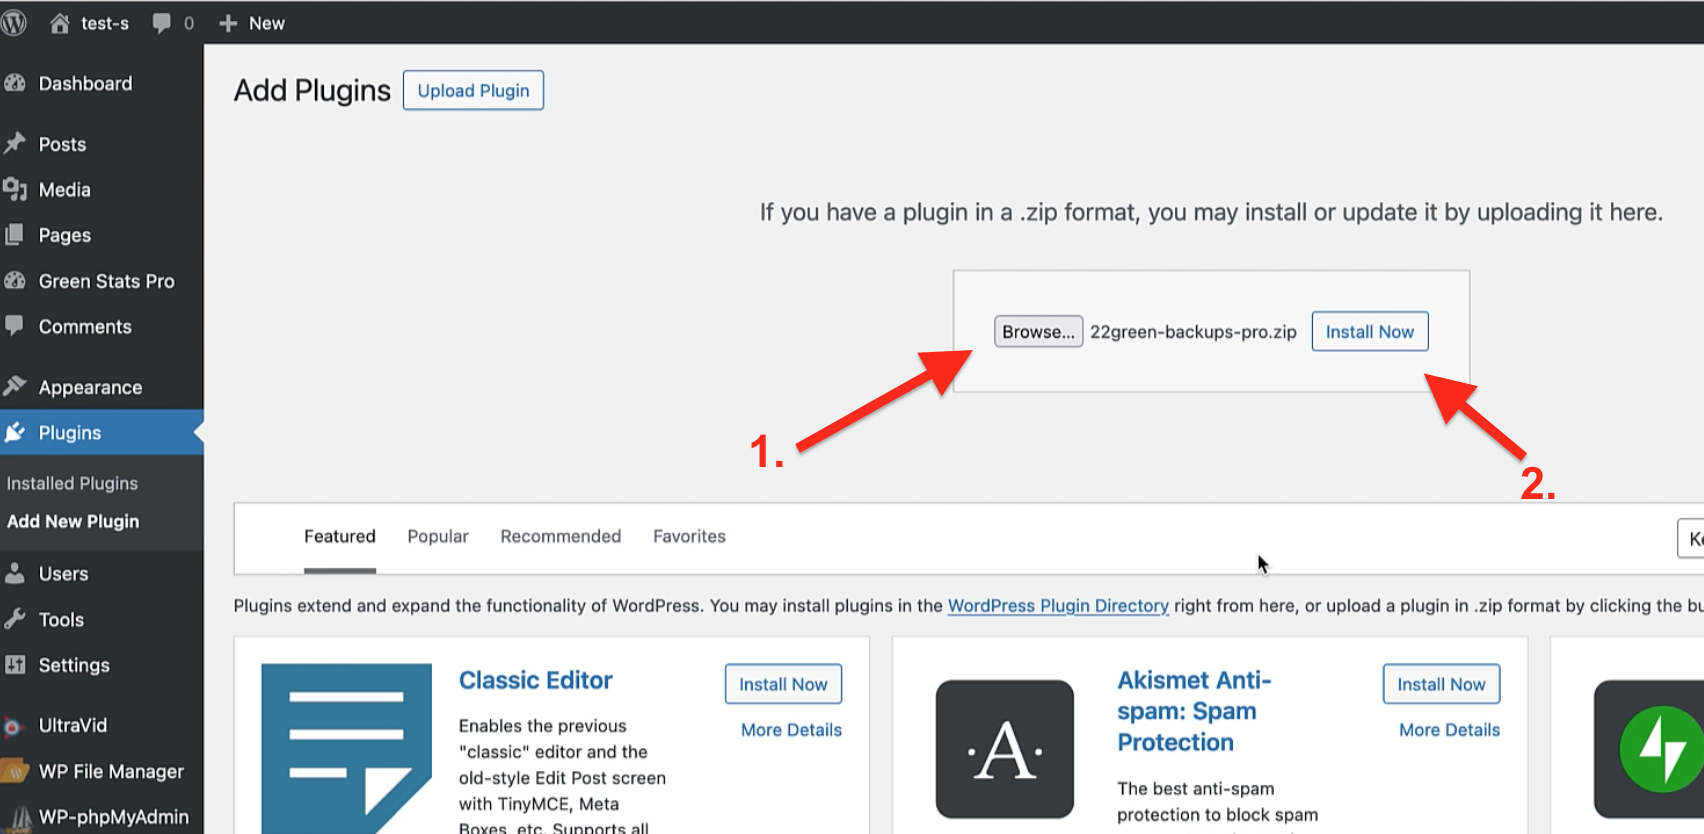
- Click to browse your desktop and choose the zip file of the plugin that you downloaded from the member area.
- Click “Install Now”
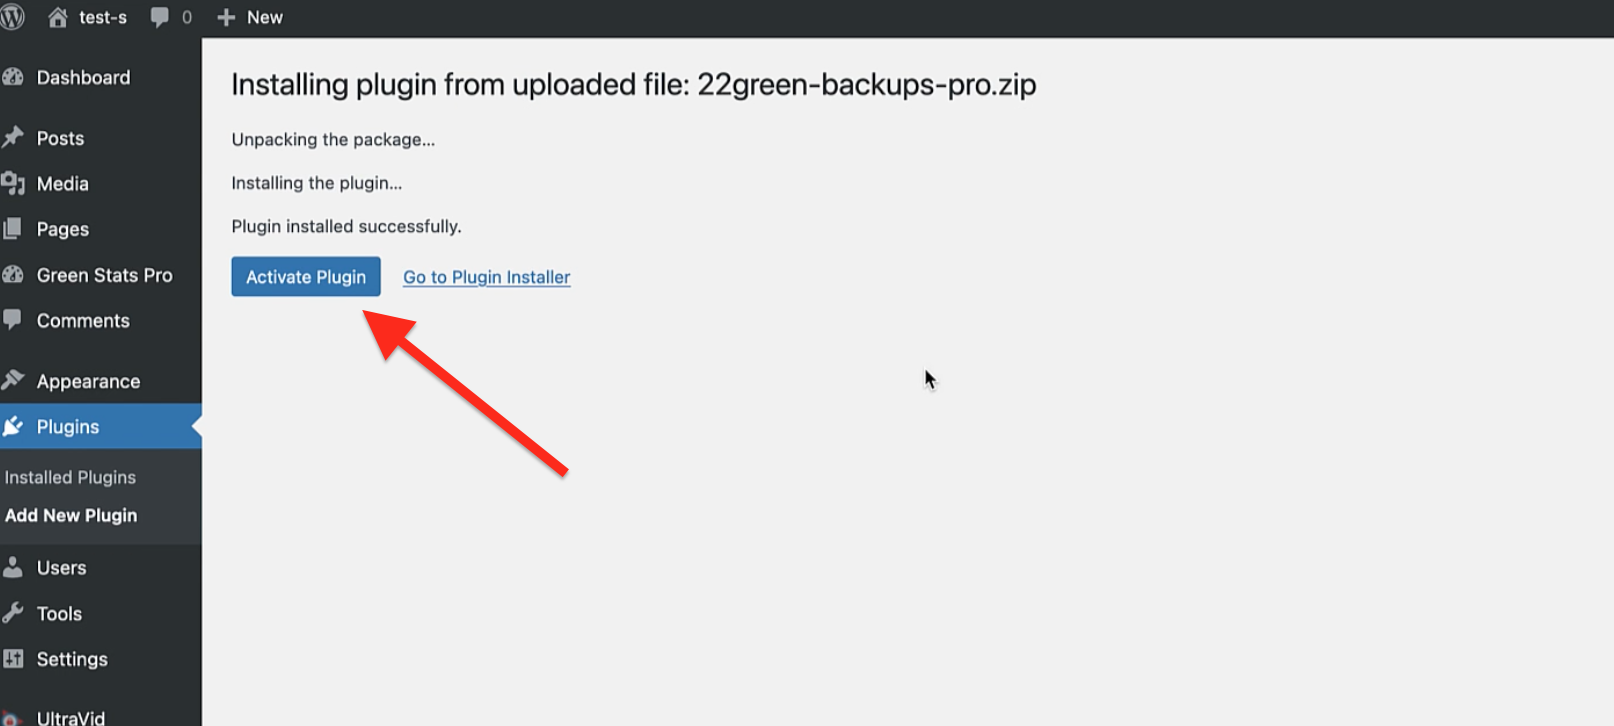
Then you will be redirected to this page, and click the “Activate Plugin” button.
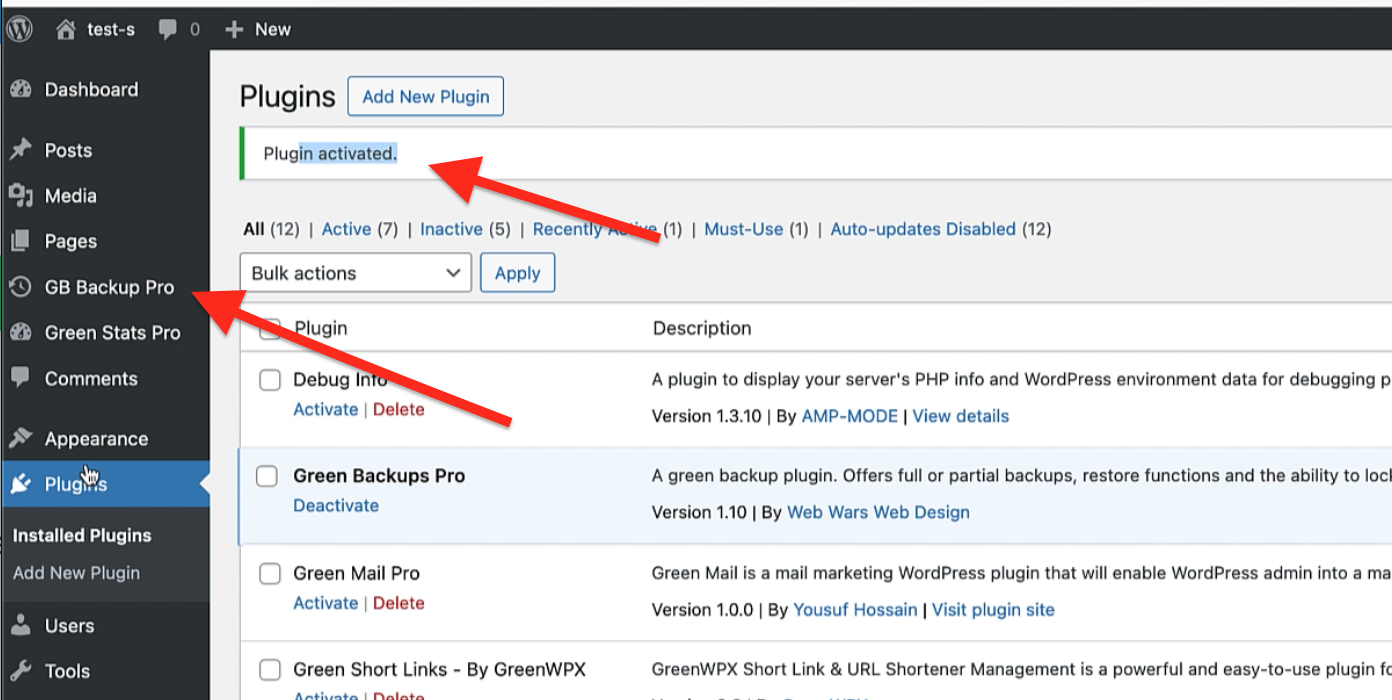
And the Plugin it will be Activated:
Step 3: Active The Pro Version:
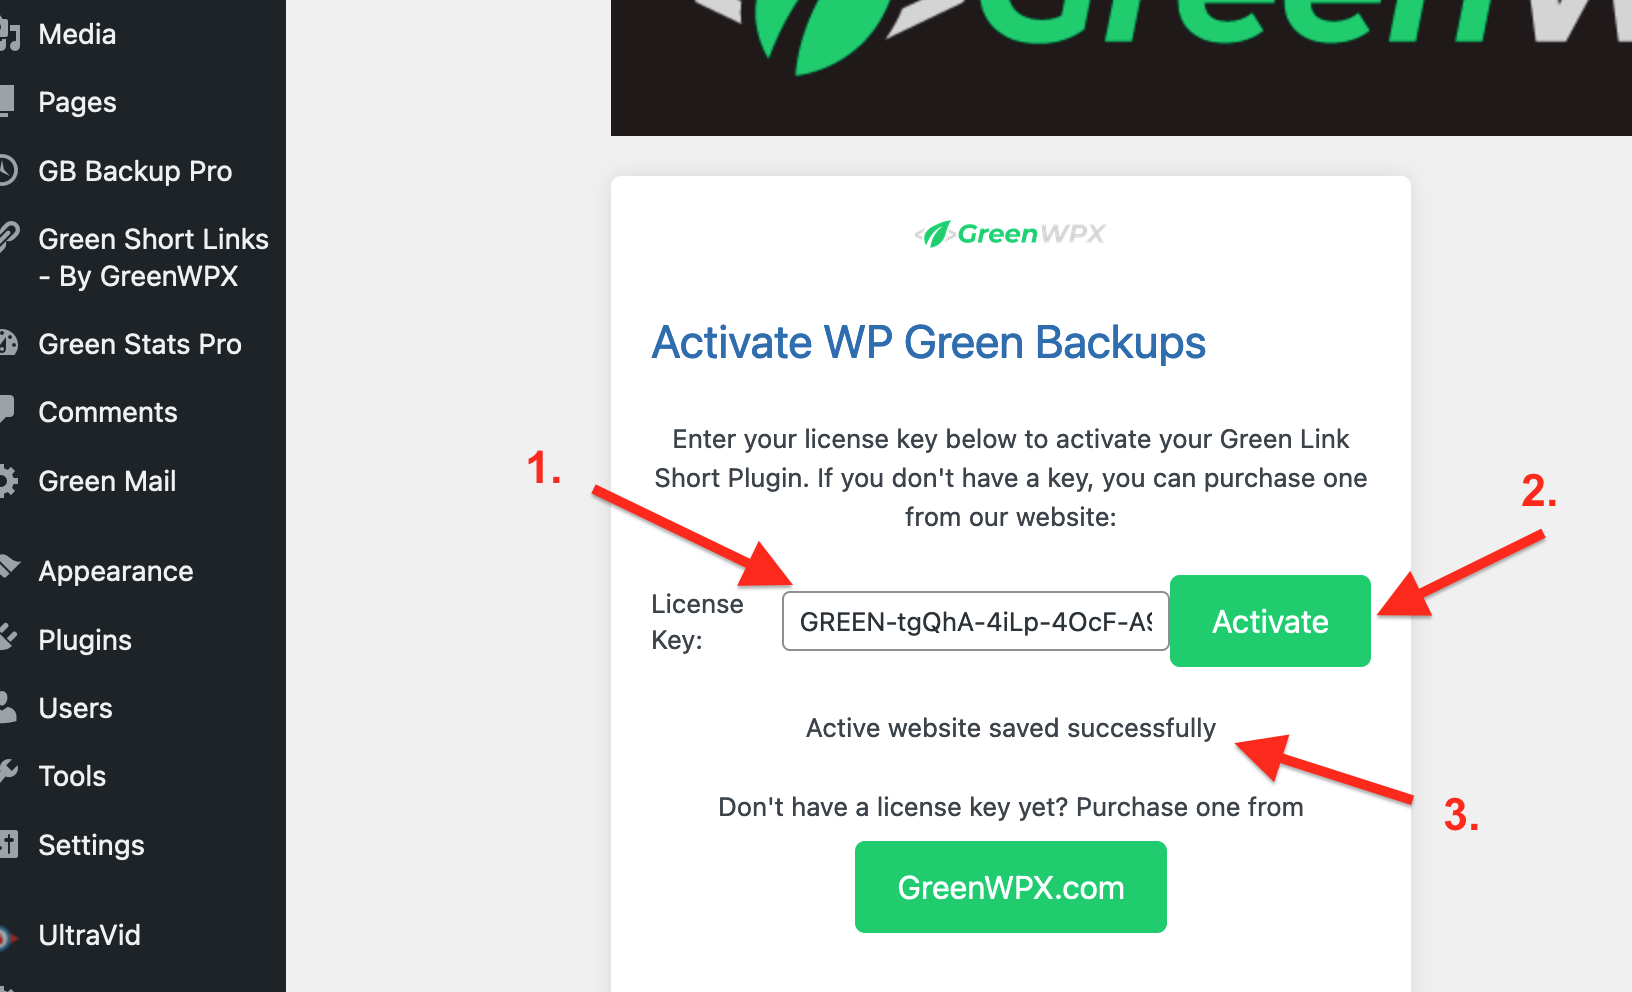
- Paste the license key that you obtained from the GreenWPX member area.
- Click the “Activate” button.
- Congratulations! Once you receive that message, you are good to go. Let’s move on to the next step.
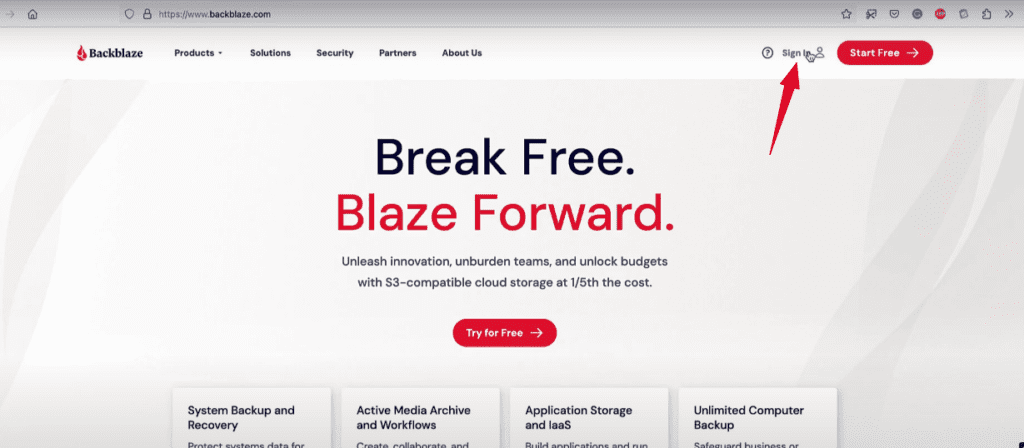
Step 2: Set Up Backblaze B2 Account
If you don’t have a Backblaze B2 account, create one. Once logged in, create a new bucket, a container for your backups, and obtain your B2 key ID and application key.
Step 3.1: Once you login yo your account, click “Create a Bucket”:
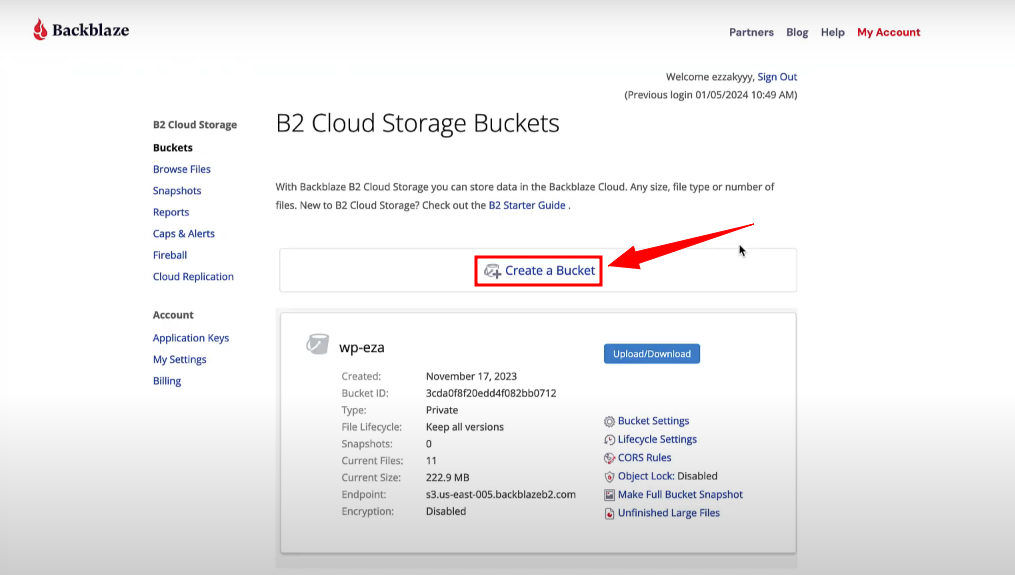
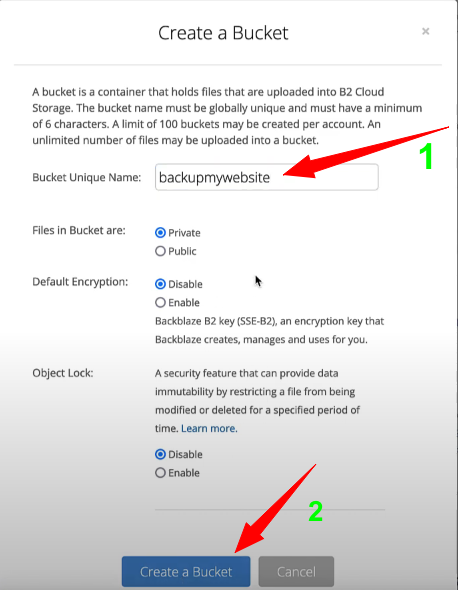
- Give your bucket a name
- Click “Create a Bucket”.
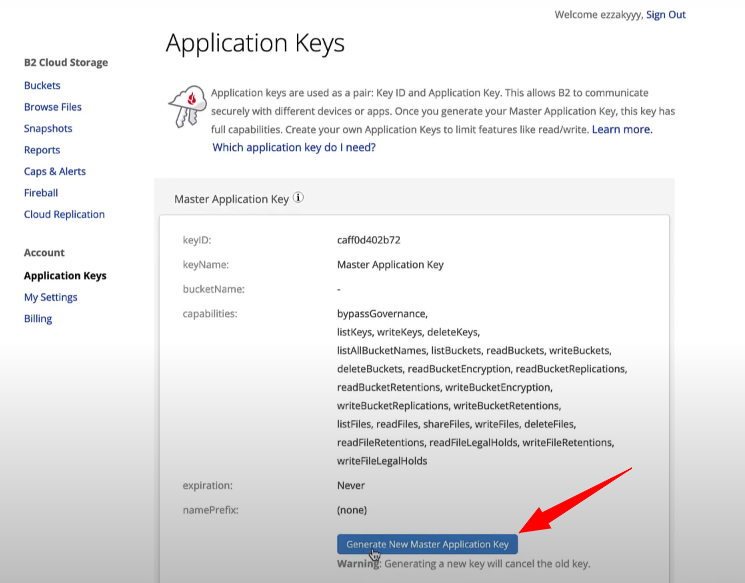
Step 3.2: Get Your Keys:
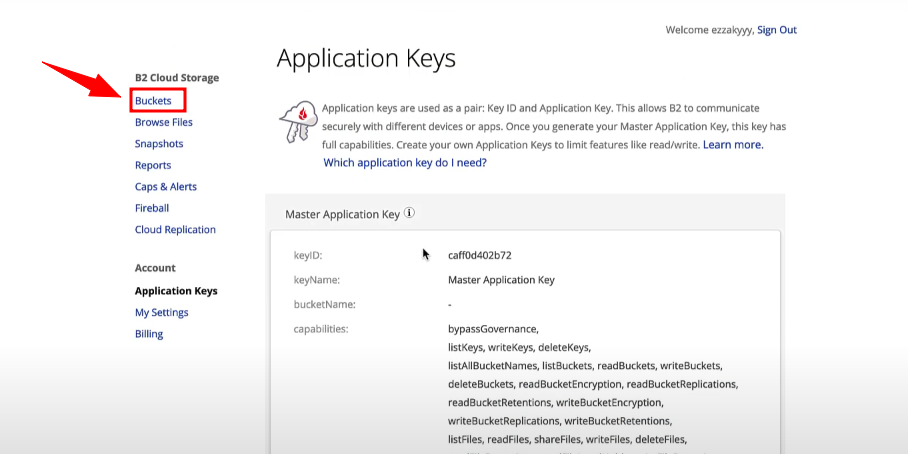
- Click on “Application Keys” on the left menu.
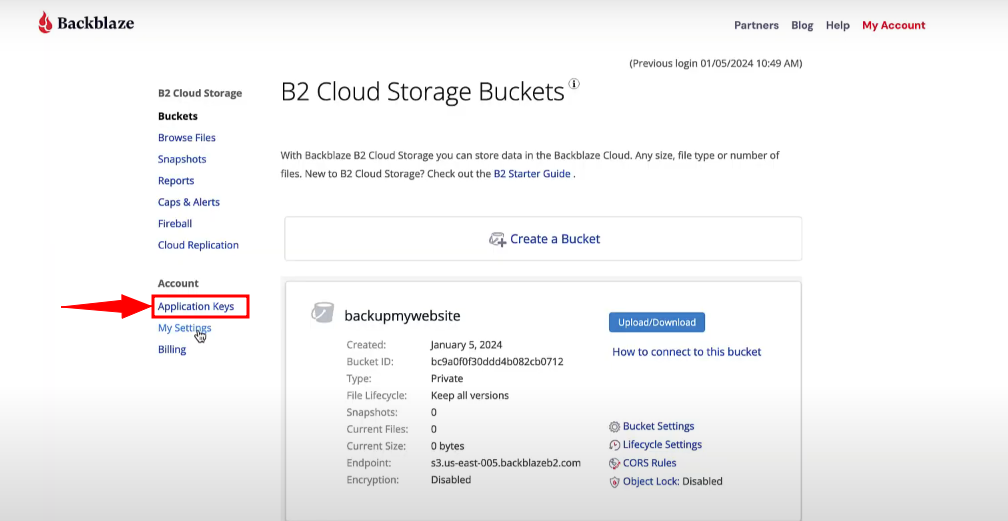
- And click “Generate New Master Application Key.”
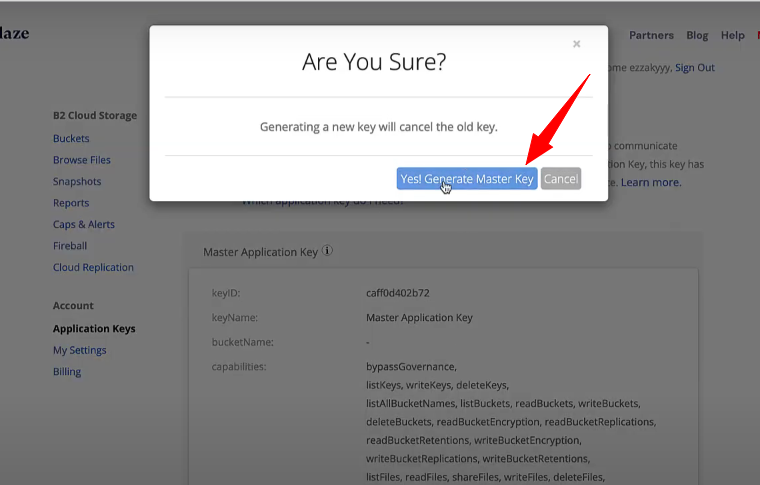
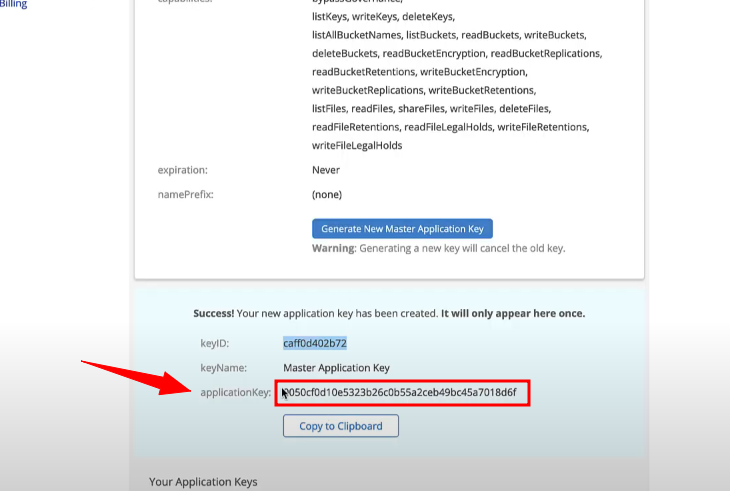
Click again on “Yes, Generate Master Key.”
You will get your keys like this:

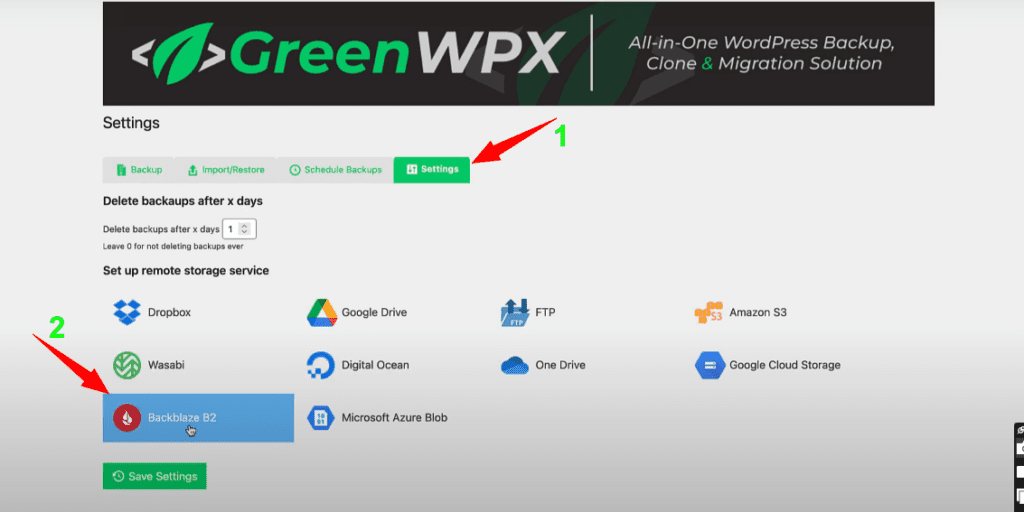
Step 3: Connect Backblaze B2 to Green Backup
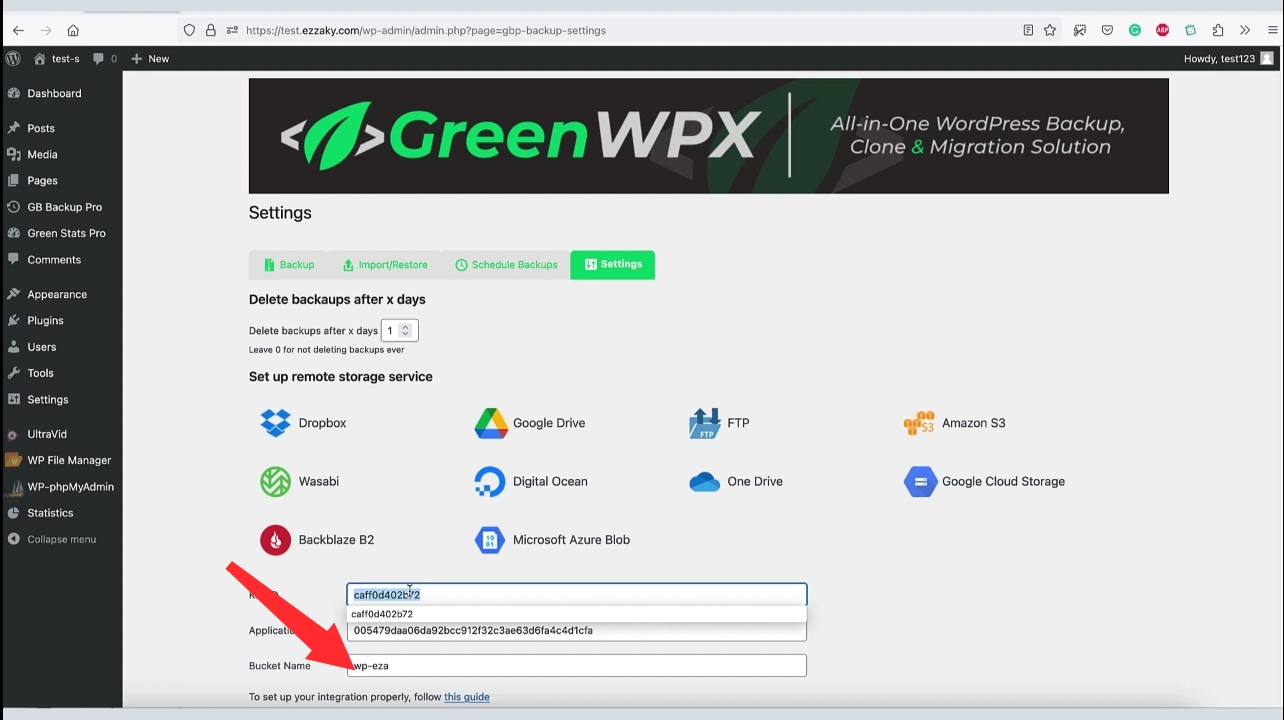
Back in your WordPress dashboard, go to Green WPX Pro, click on settings, then choose Backblaze B2.
Go back to your Backblaze B2 account and copy the Key ID.

Paste the Key ID in Green WPX settings.
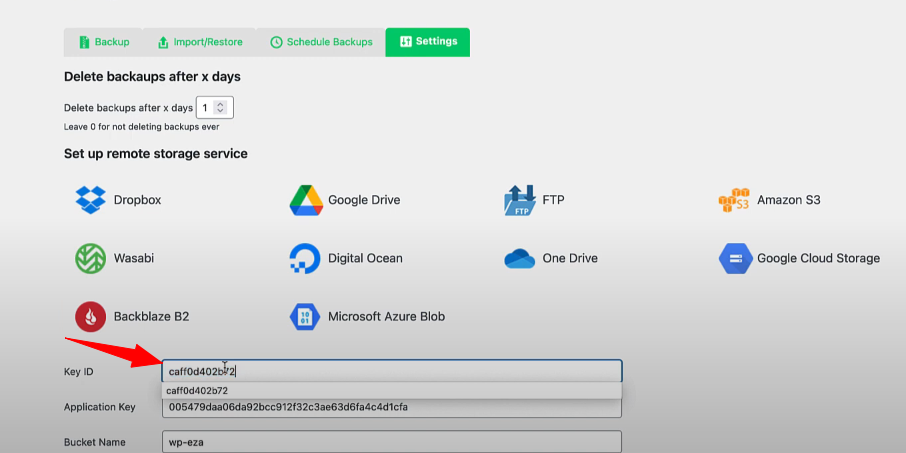
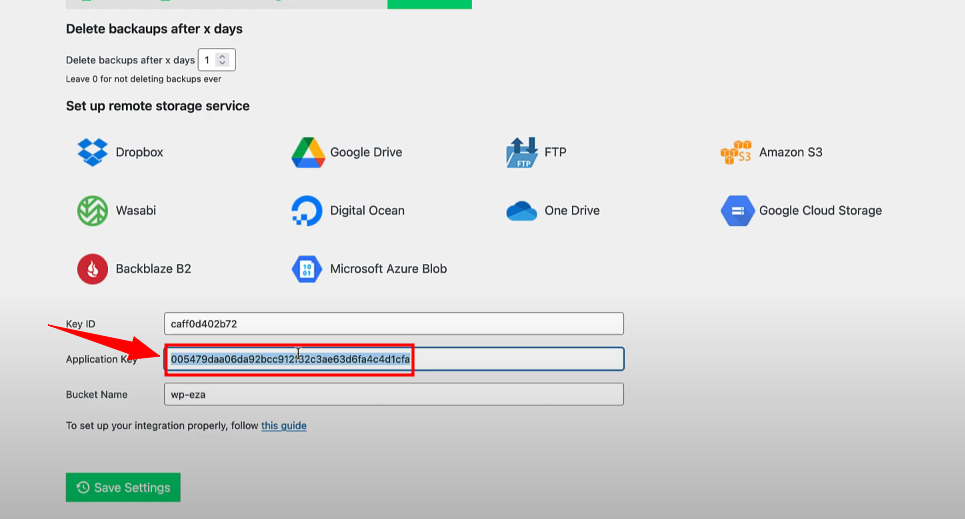
Copy the application key from your Backblaze B2 account.
Paste it into your Green WPX Pro settings.
Return to Backblaze, click on “Buckets.”
Copy the bucket name :
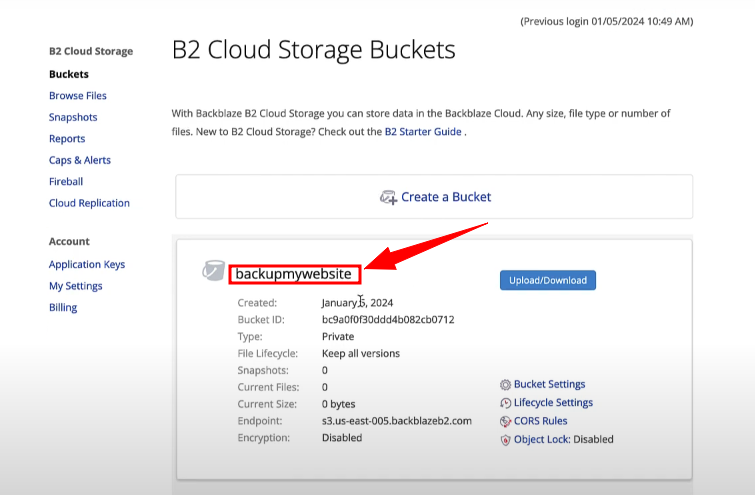
Paste the bucket name and click “Save Changes.”
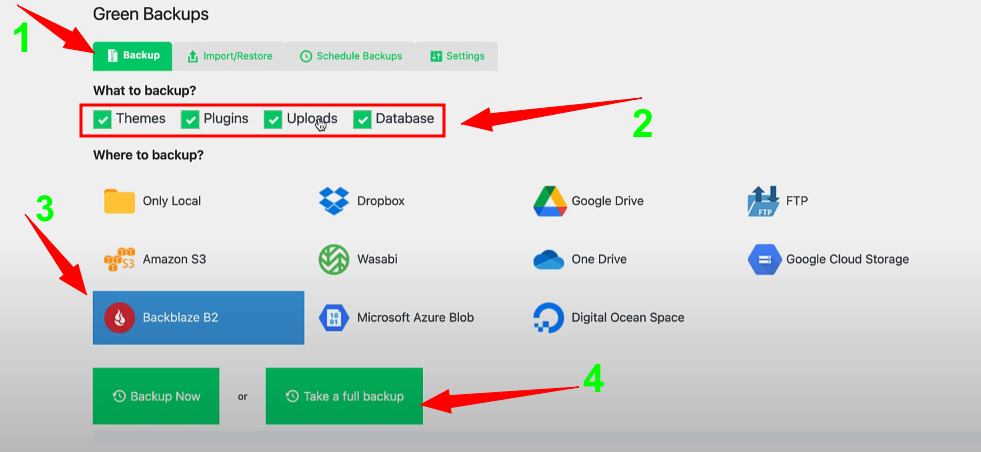
Step 4: Create a Backblaze B2 Backup
To create a Backblaze B2 backup with the connection established, go to the Backups tab in Green Backup. Select Backblaze B2 as the storage location and customize your backup preferences—whether to backup themes and plugins, uploads folder and database, or take a full backup. Then, watch the backup progress bar until it’s completed.
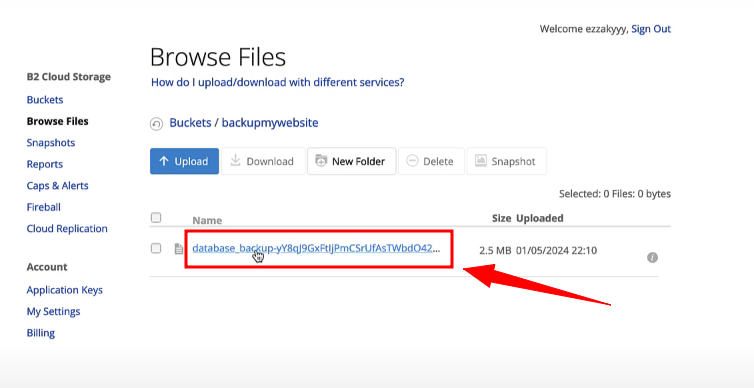
You can go back to your Backblaze bucket to check if the backup has been uploaded or not.
Step 5: Schedule Backups to Backblaze B2
To schedule backups to Backblaze B2 for automated peace of mind, go to the Schedule tab. Create a new schedule, choose Backblaze B2 as the storage location, set your preferred frequency, and enable the schedule.

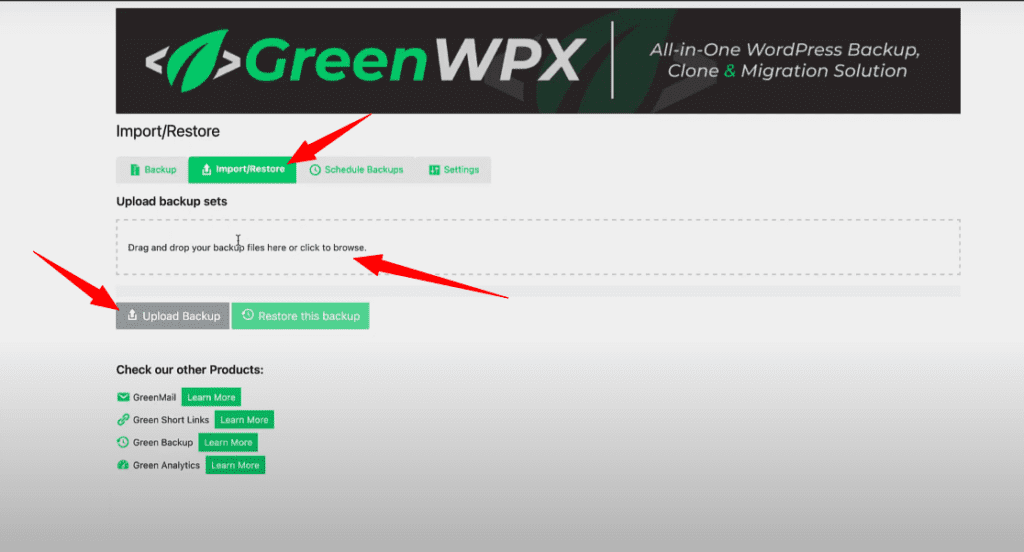
Step 6: Restore from Backblaze B2
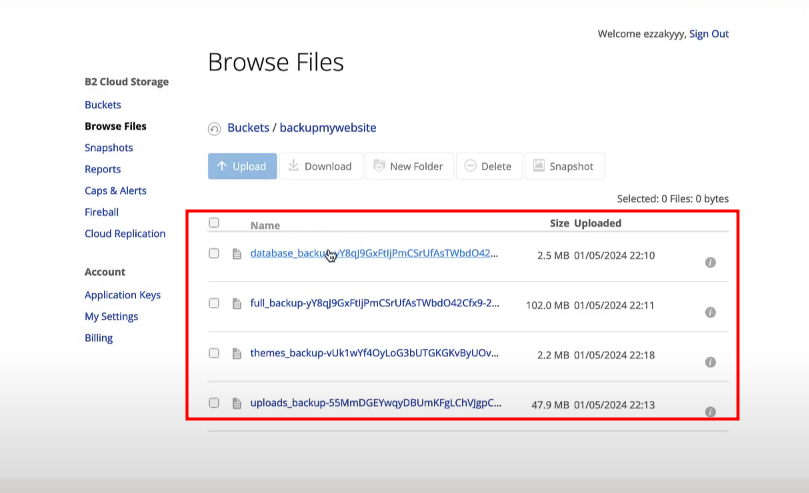
Accidents happen, and if you ever need to restore your site, it’s a breeze. Download the backup from Backblaze B2 based on the file name. As you know, the file contains the date and time when it was taken.
Download the backup file from your Backblaze B2. In Green Backup, click on “Browse Files” and choose the preferred file you want to back up.
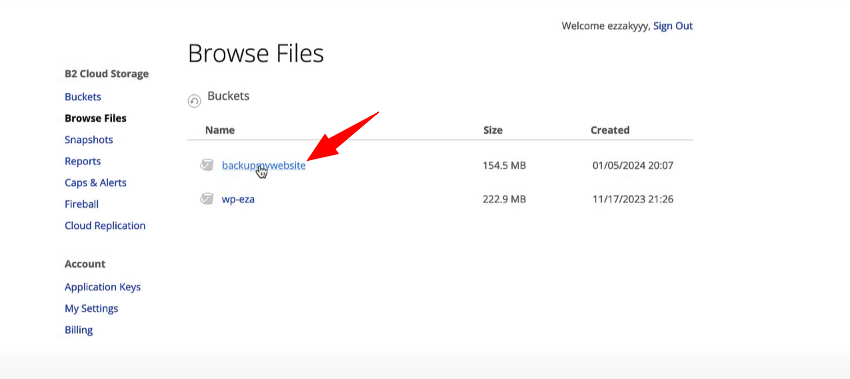
Click download .

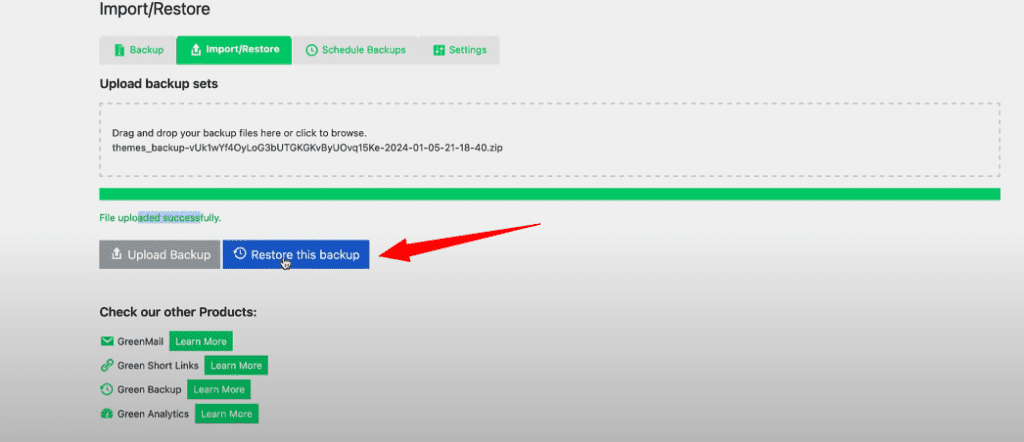
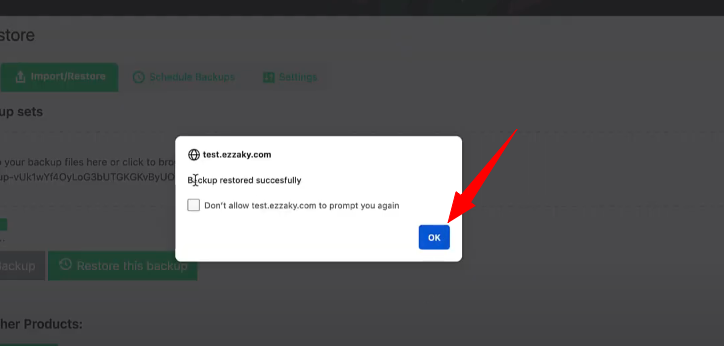
Utilize the import feature in Green Backup to restore it, and your WordPress site will be back to the date and time specified in the file name.
Finally click okay.
Conclusion
Congratulations! You’ve successfully configured Green Backup to seamlessly back up your WordPress site to Backblaze B2. Your website’s security is now in excellent hands. If you found this tutorial helpful, give it a thumbs up, and consider upgrading to Green Backup Pro for more advanced backup features.
Download Green Backup Pro Now!And please, if you have any questions or need help, contact our support team via: [email protected]
Happy backing up!