If you’re a WordPress site owner, securing your valuable content through regular backups is crucial. In this comprehensive guide, we’ll walk you through the process of effortlessly backing up your WordPress site to DigitalOcean Spaces using the powerful Green Backup plugin.
Prerequisites: Get Green Backup Pro
Before we get started, ensure you have the Green Backup Pro version to unleash the full potential of your backups. Head over to Green Backup Pro to upgrade your plugin.
Step 1: Install Green Backup Pro
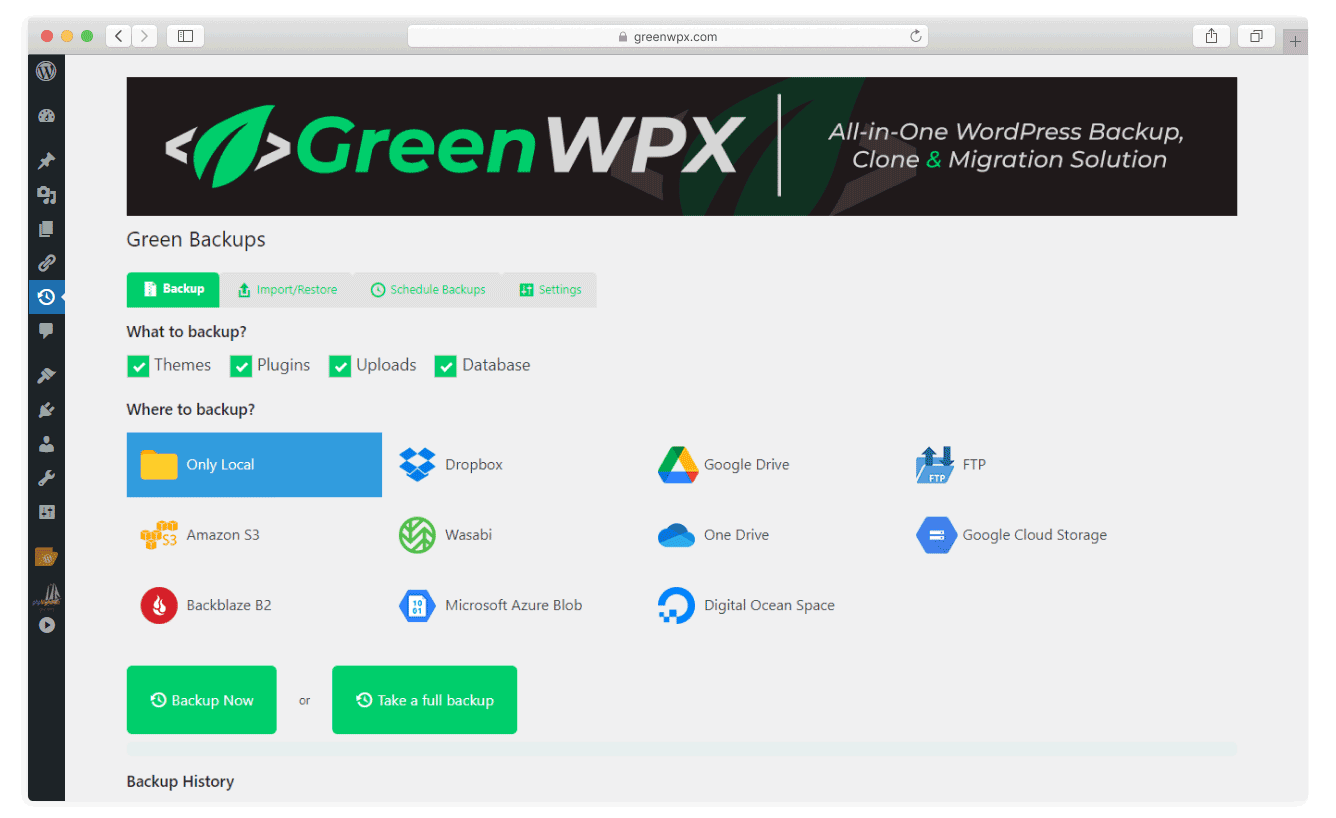
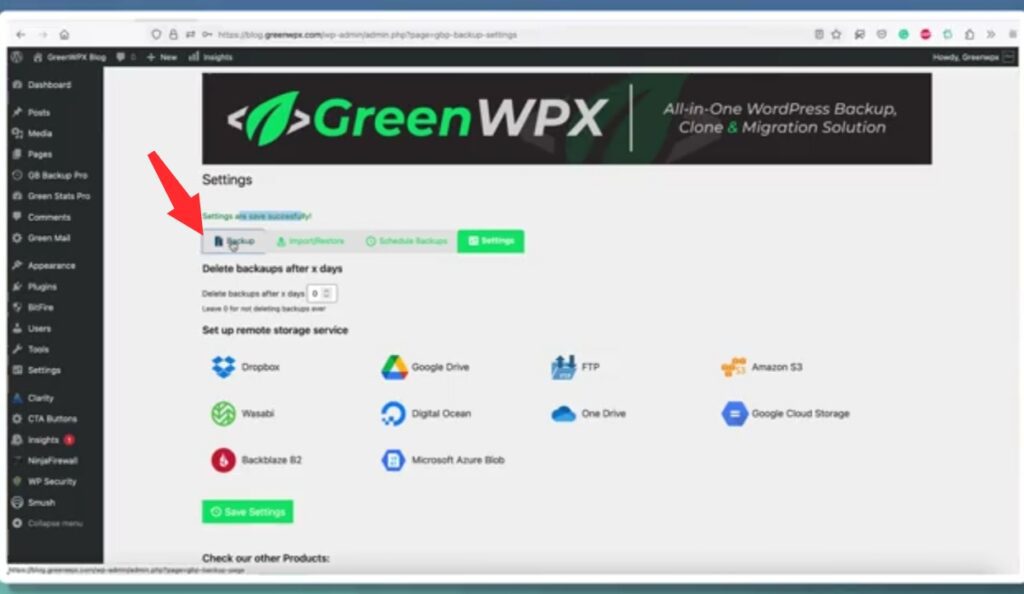
Begin by installing Green Backup Pro on your WordPress site. Activate the plugin and navigate to the Green Backup settings, paying special attention to the DigitalOcean Spaces tab.
Step 1: Once you have purchased the right plan for you, log in to your GreenWPX member area to download the plugin and copy the activation key.

- Download and save the plugin zip file to your desktop.
- Copy your Serial key.
Step 2: Install the plugin on your WordPress site.
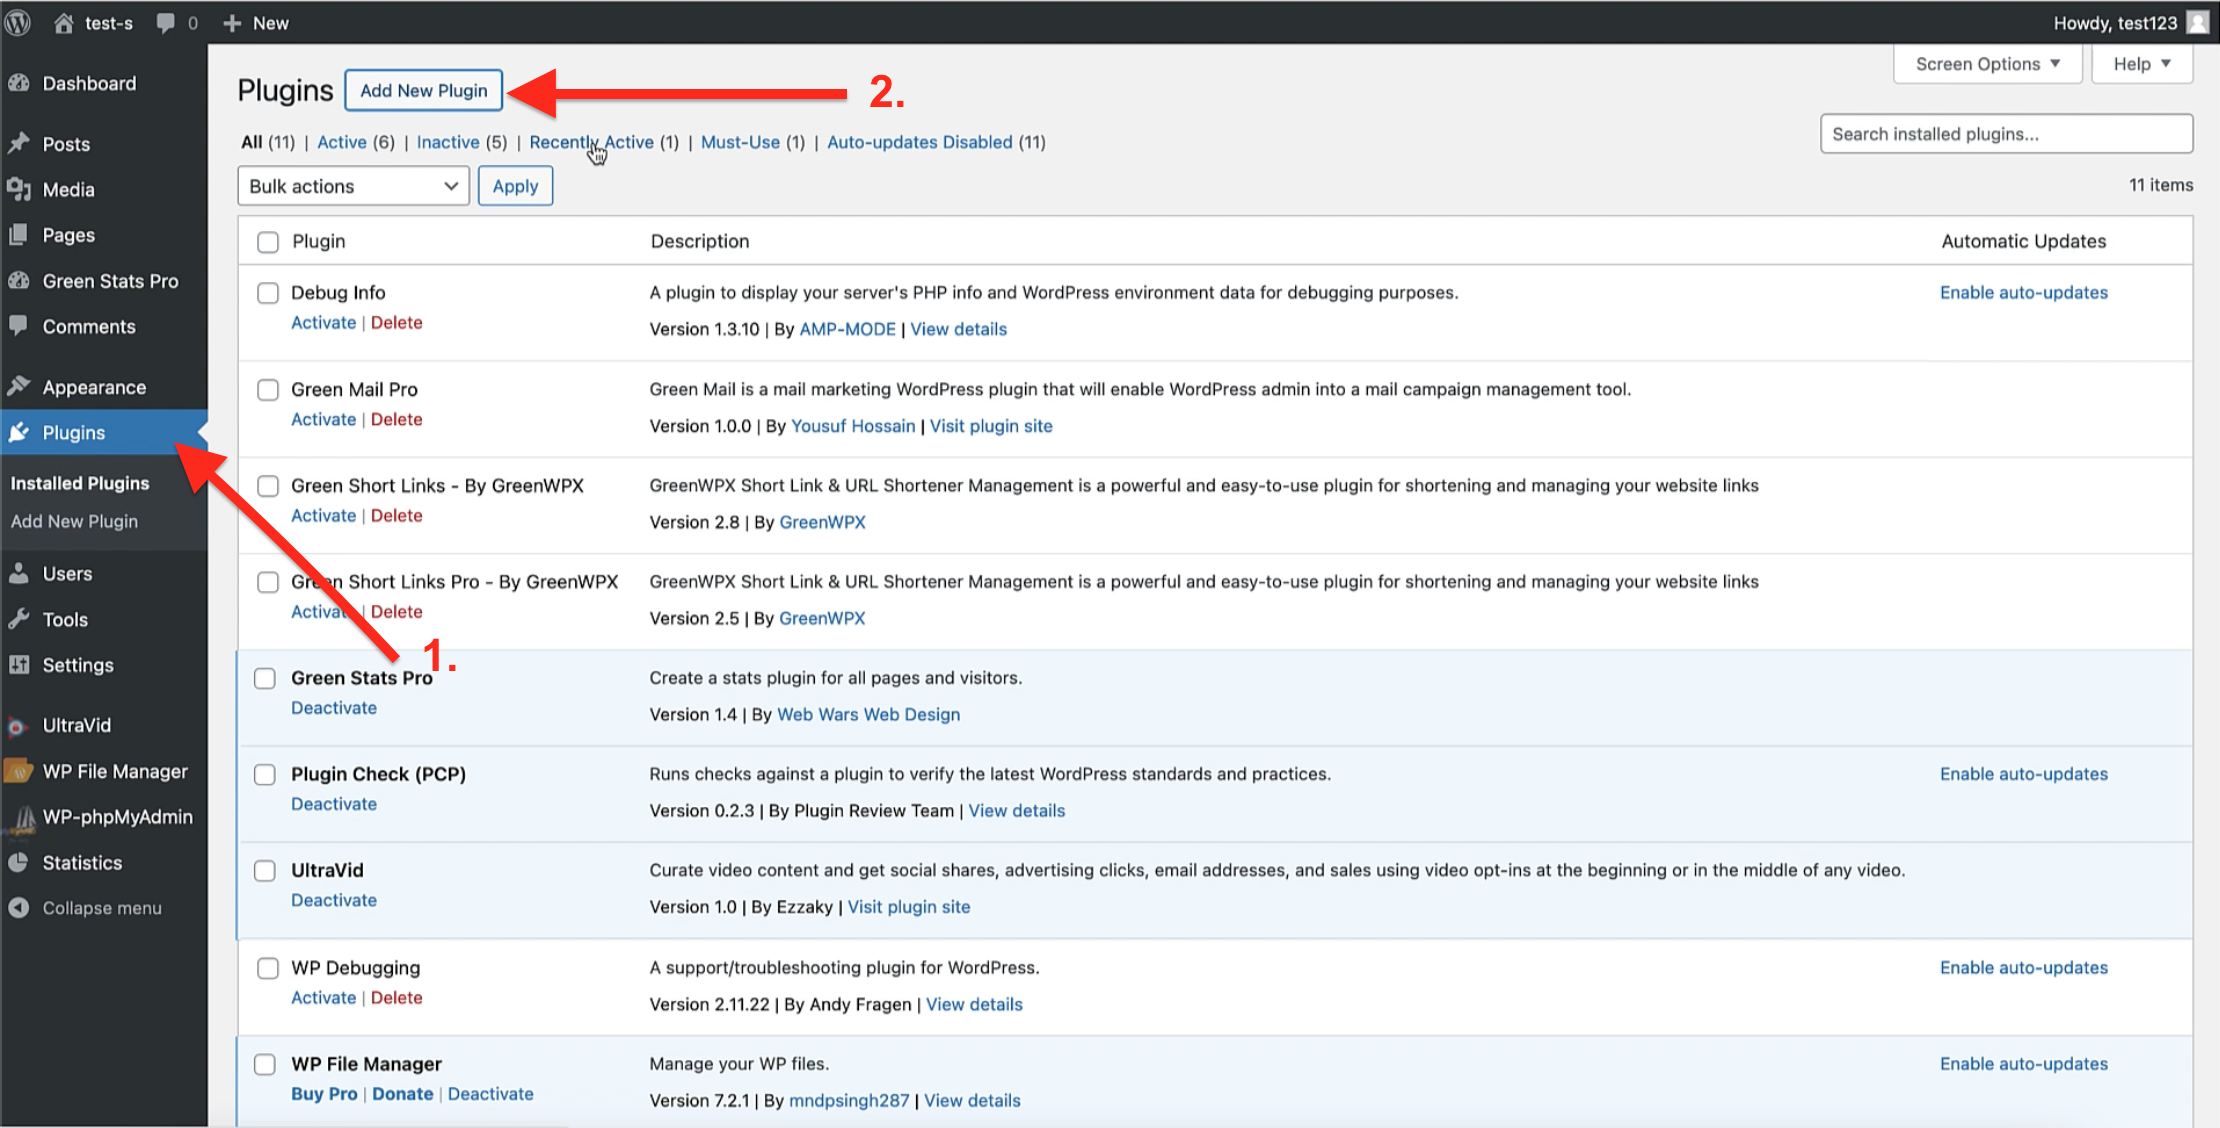
- On your WordPress Dashboard click on the Plugins on the left side menu.
- On The Plugins page click “Add New Plugin”.
Step 2.1 : Import the zip file of the downloaded plugin.
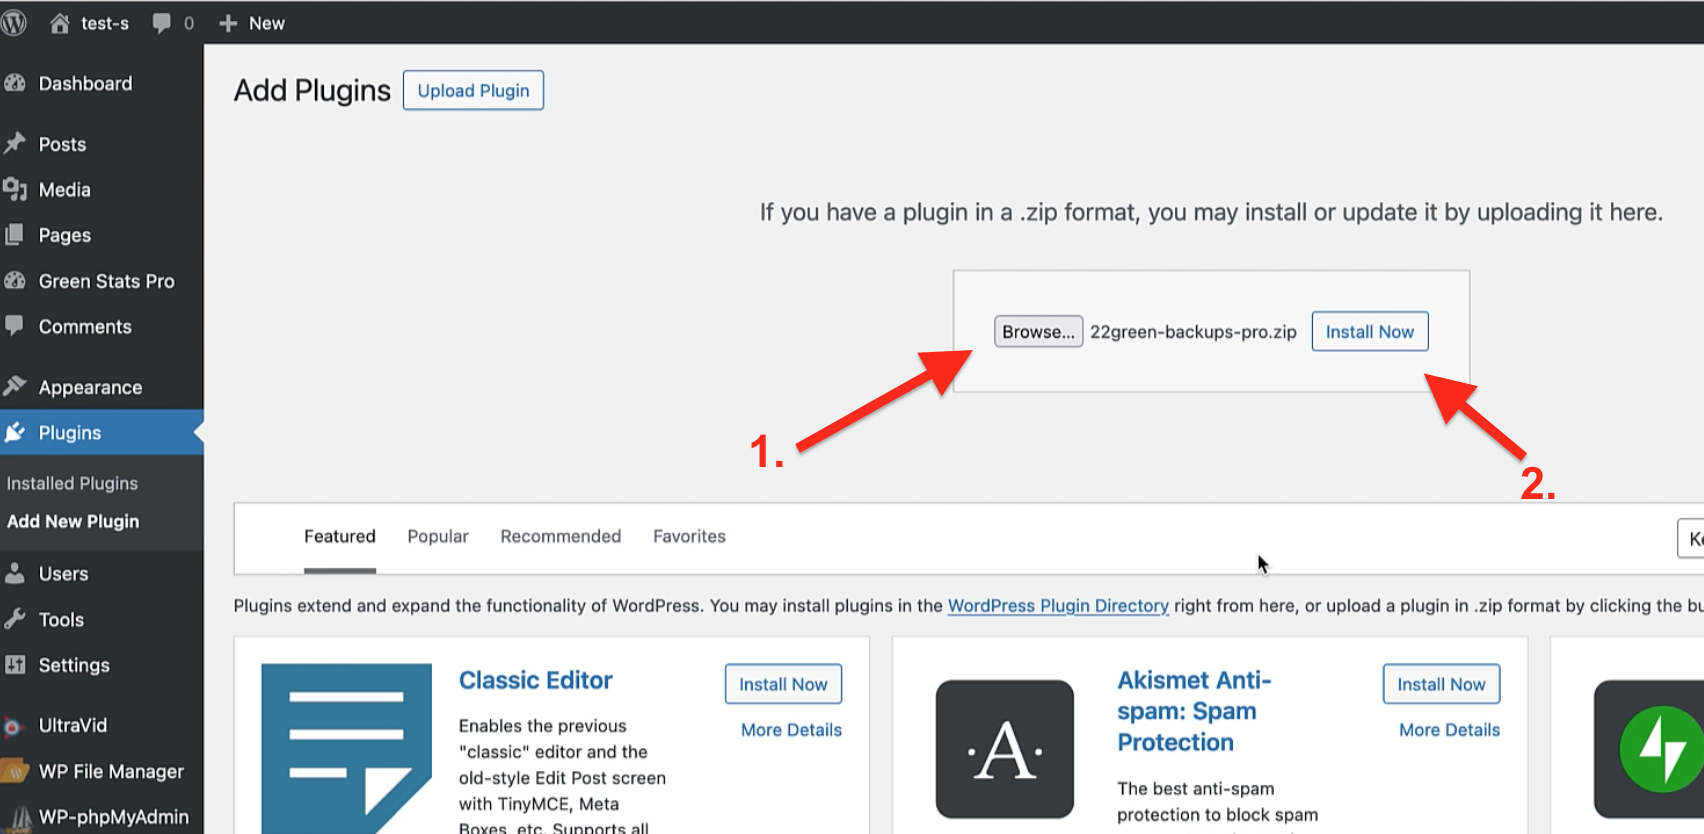
- Click to browse your desktop and choose the zip file of the plugin that you downloaded from the member area.
- Click “Install Now”
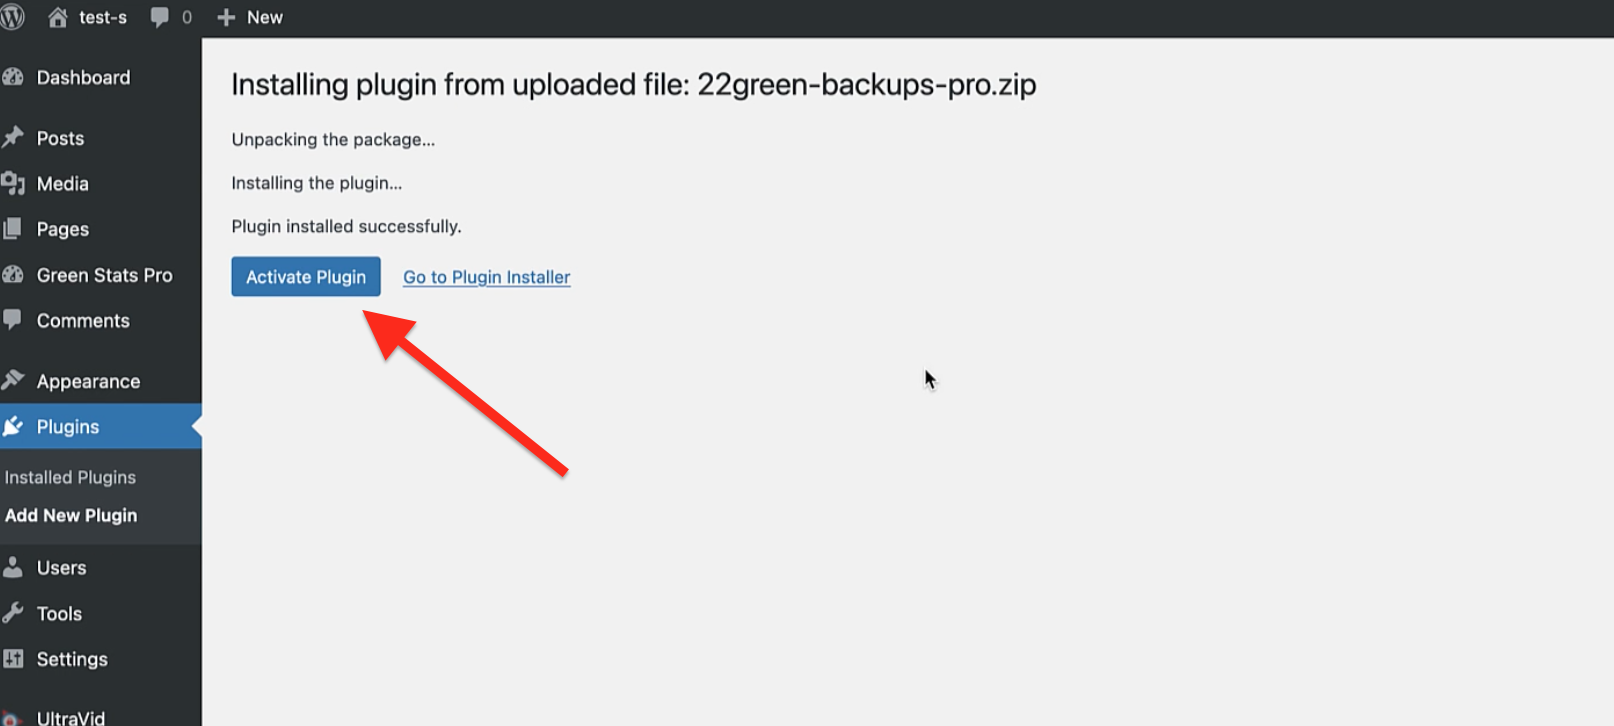
Then you will be redirected to this page, and click the “Activate Plugin” button.
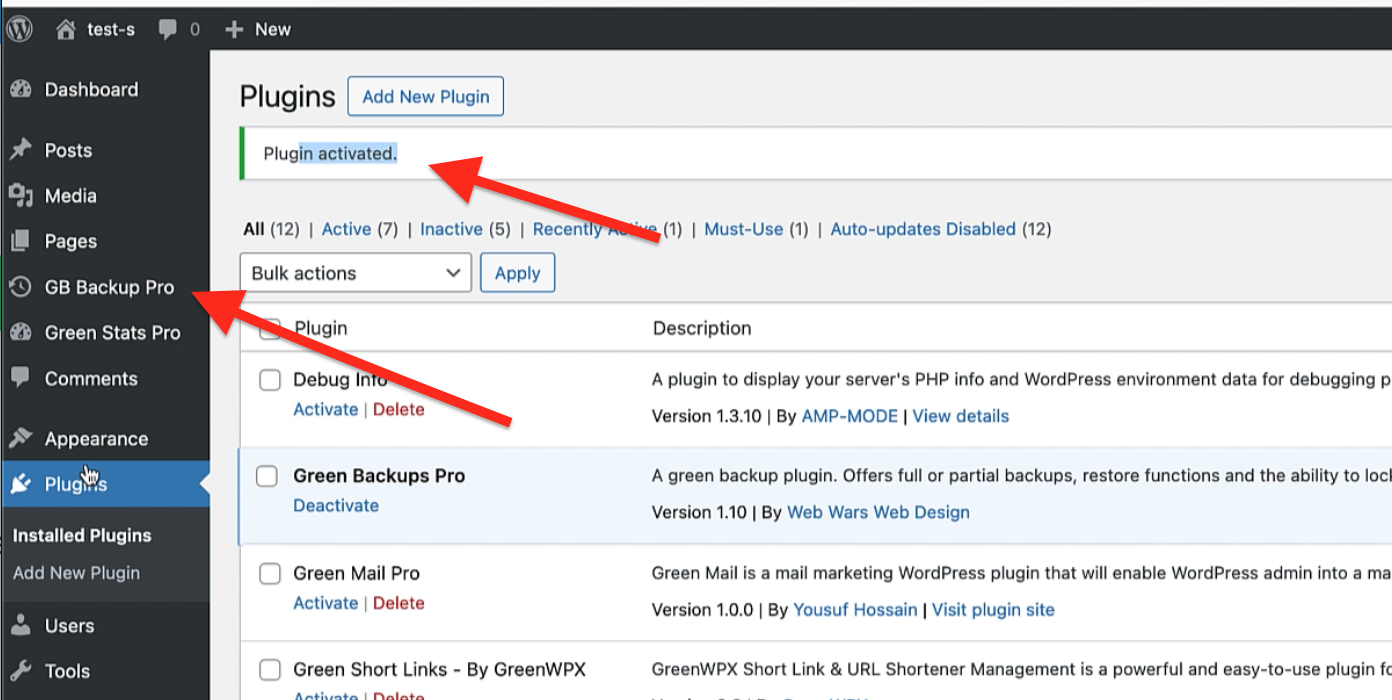
And the Plugin it will be Activated:
Step 3: Active The Pro Version:
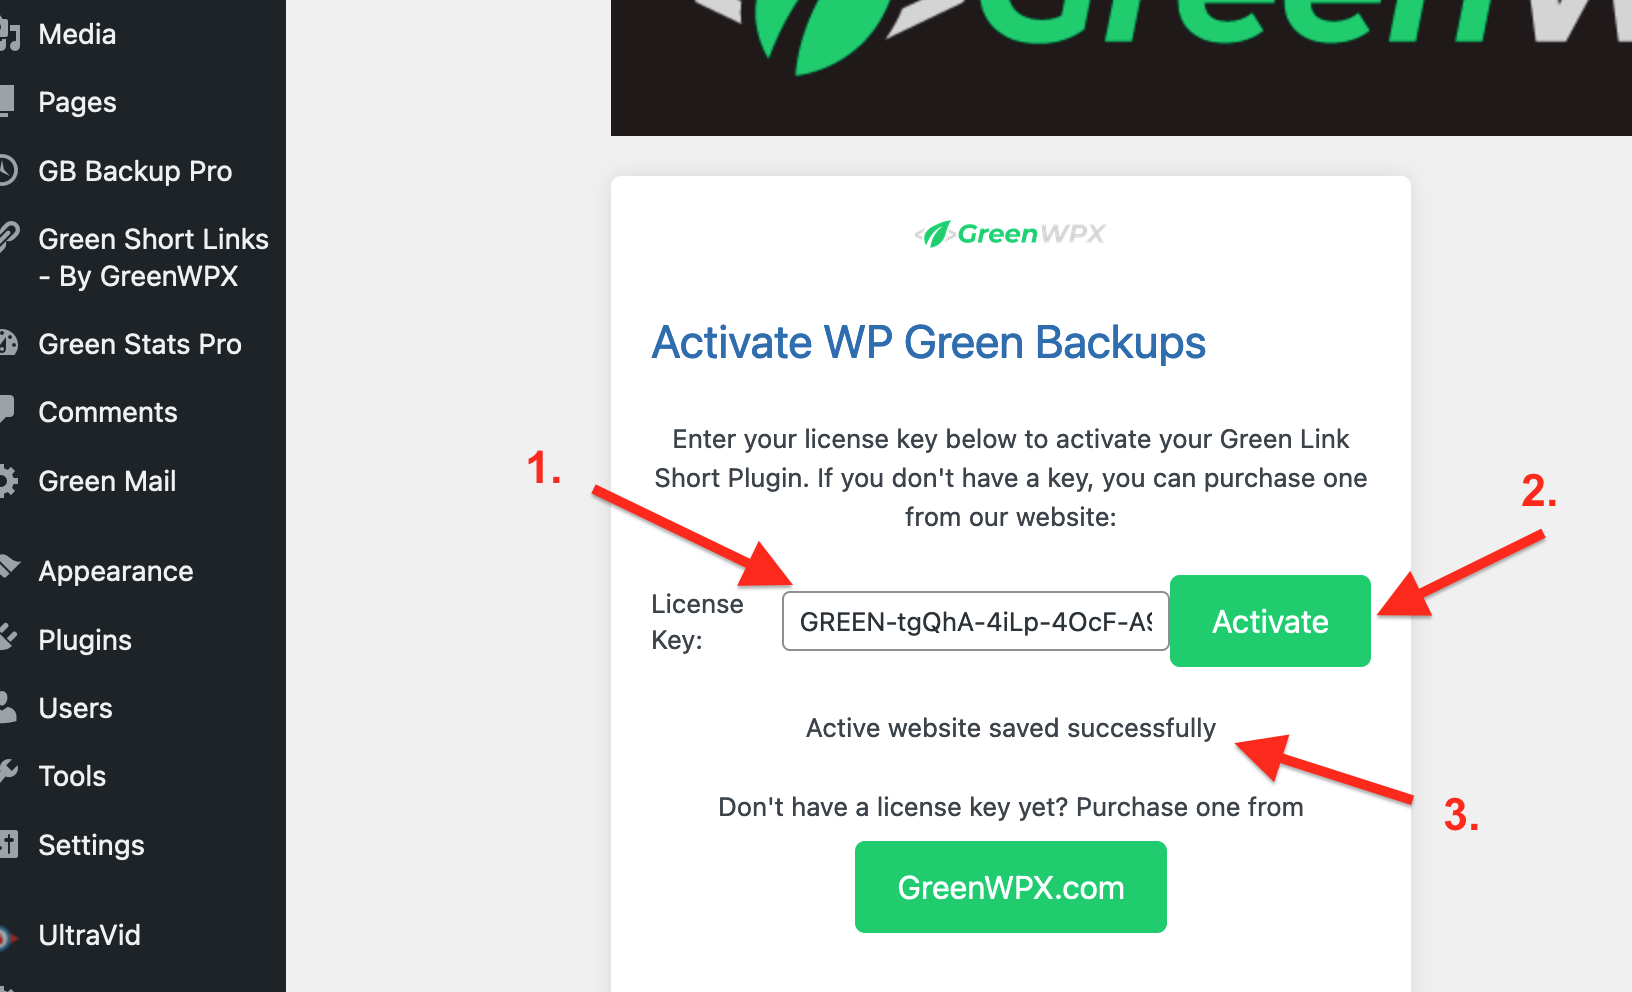
- Paste the license key that you obtained from the GreenWPX member area.
- Click the “Activate” button.
- Congratulations! Once you receive that message, you are good to go. Let’s move on to the next step.
Step 2: Set Up DigitalOcean Spaces
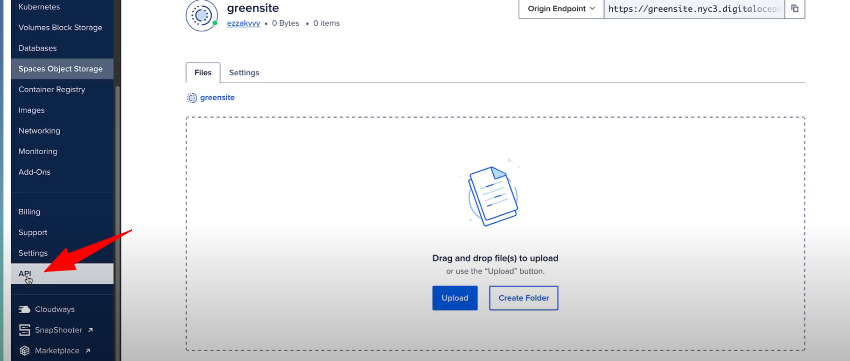
If you don’t have a DigitalOcean account, create one. Once logged in, navigate to the Spaces section .
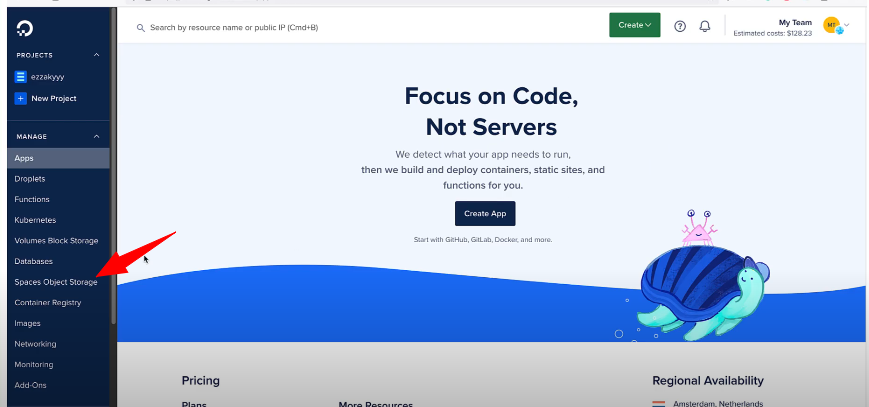
And create a new space to store your backups.
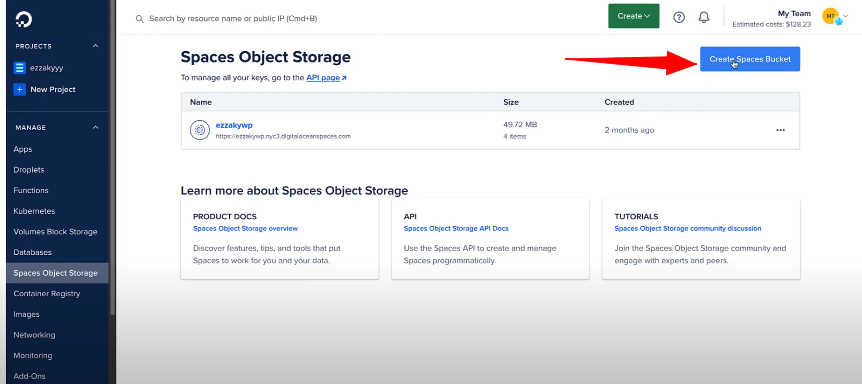
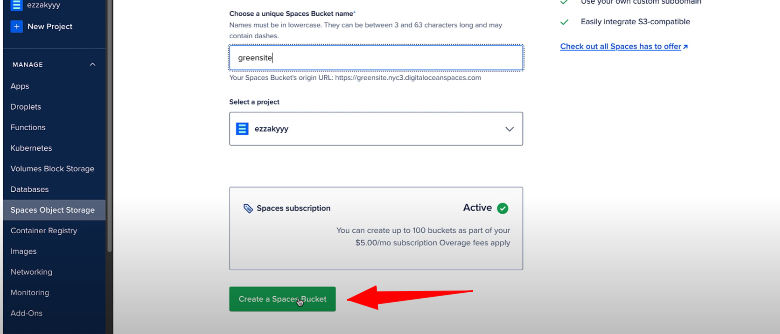
Specify a name for your bucket.
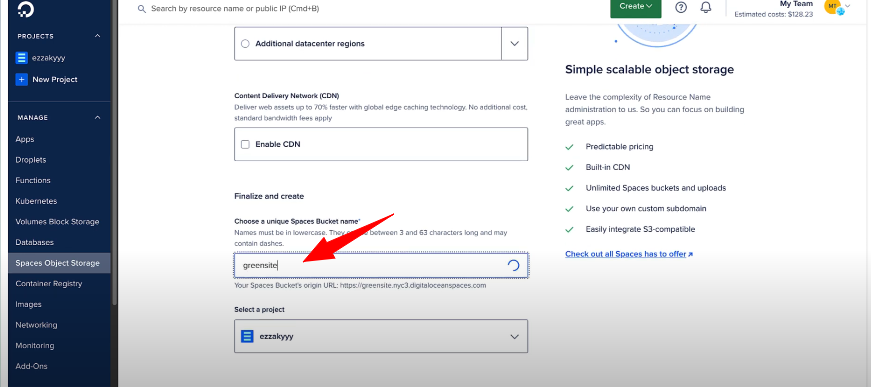
Click to create a bucket and provide a name for it.
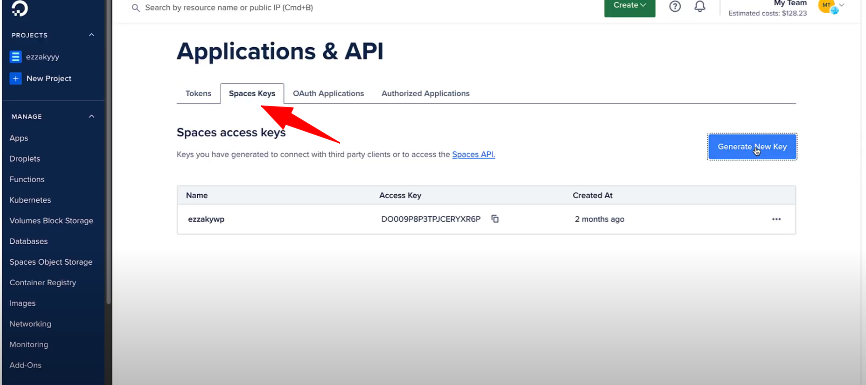
Step 3: Obtain DigitalOcean Spaces API Key
Access the API section in your DigitalOcean account.
Choose “Spaces Keys” in the API section of your DigitalOcean account.
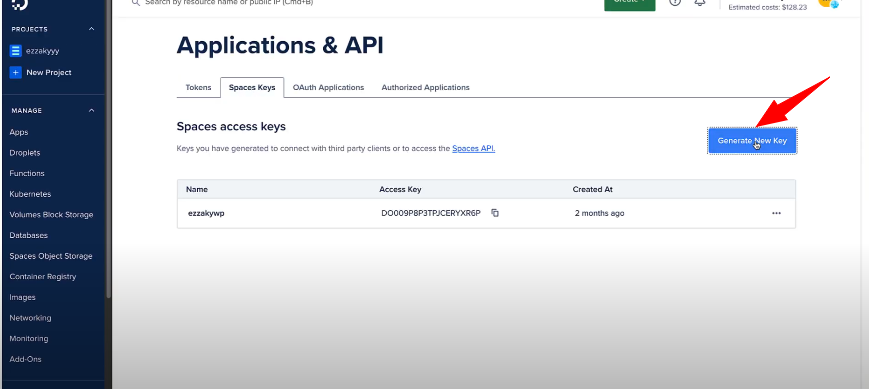
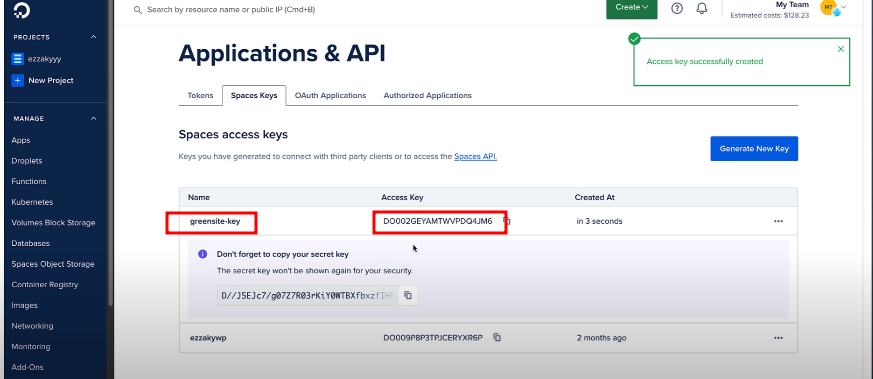
Click on “Create New Key” in the Spaces Keys section.
Provide a name for your access key and then click on “Create Access Key.”
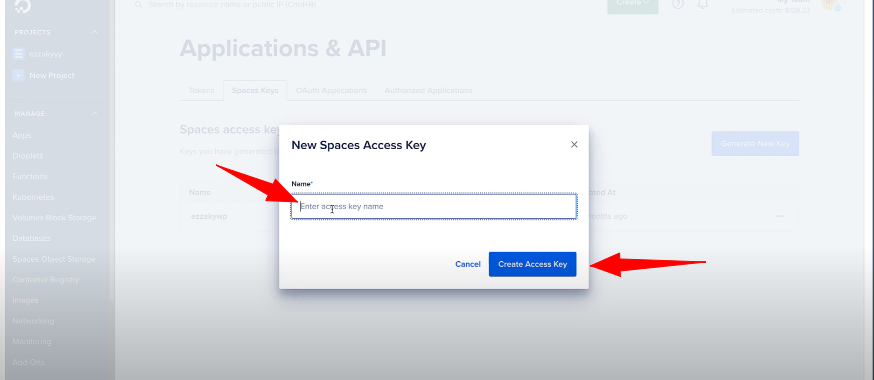
You now have both the access key and secret key with write permissions. Copy both keys for use in the next step.
Step 4: Connect DigitalOcean Spaces to Green Backup
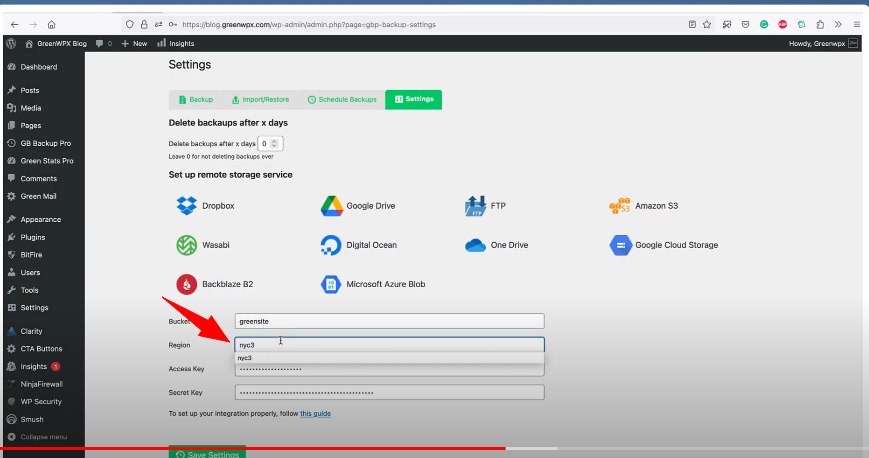
Return to your WordPress dashboard, navigate to Green Backup settings, and access the DigitalOcean Spaces tab. Enter the access key and secret key.

Now, to get the name of the DigitalOcean Space bucket, go back to the Spaces Objects Storage tab. Choose the bucket you want, and copy its name.
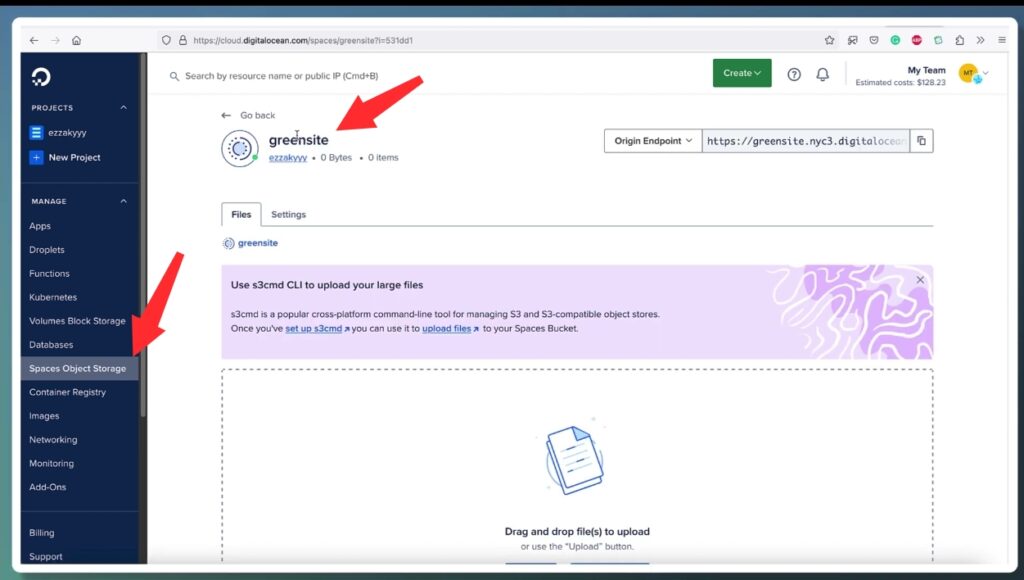
Paste the bucket name into the designated field.
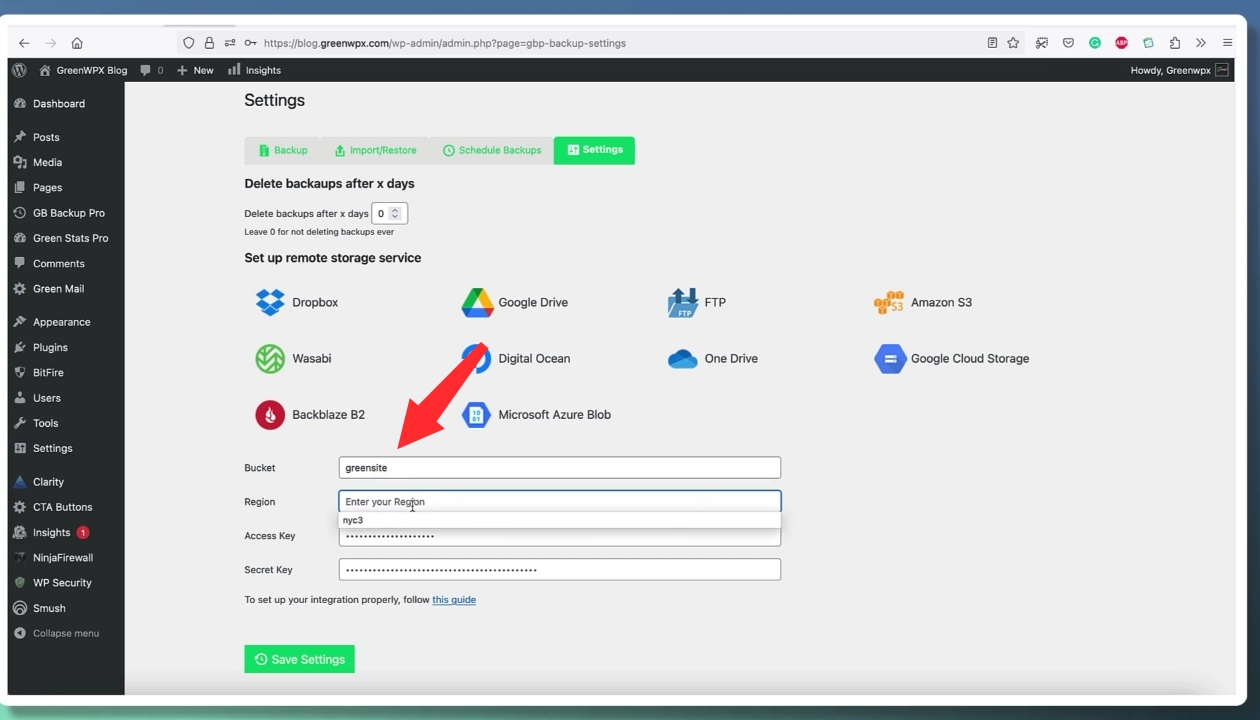
Go back to the Spaces Objects Storage tab, select the desired bucket, and copy the region in the endpoint link, copy only the four-digit name.
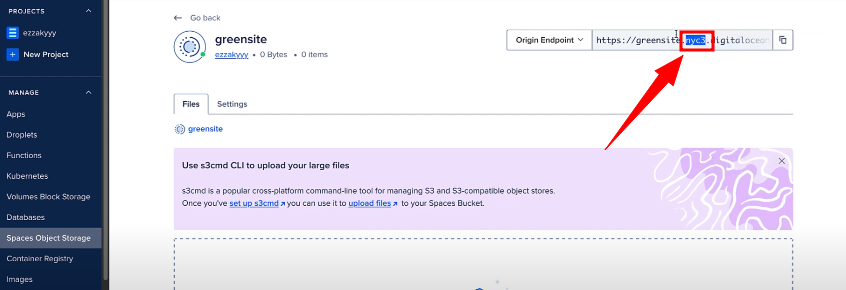
Paste the four-digit name and save the settings to establish the connection.
Step 5: Create a DigitalOcean Spaces Backup
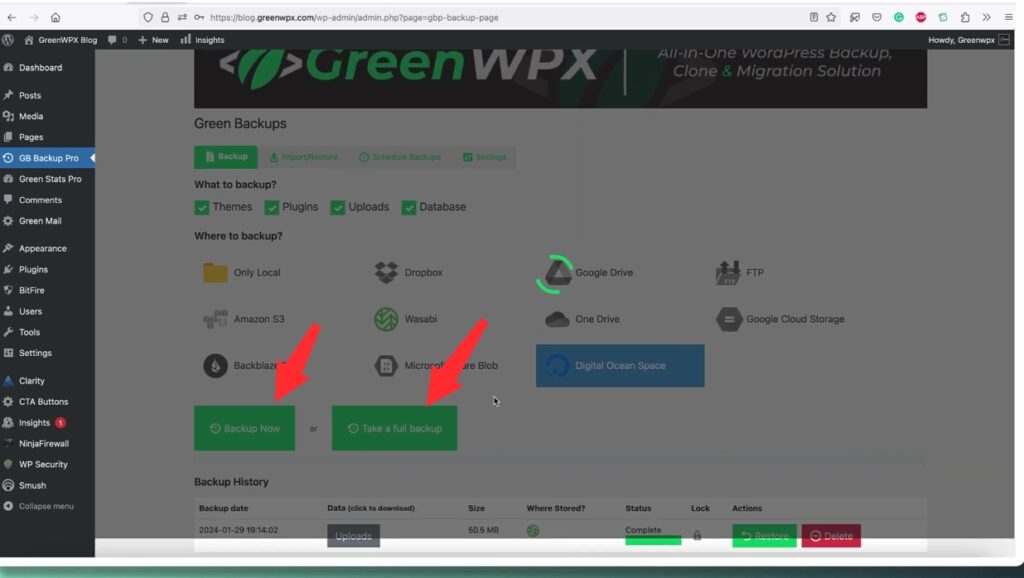
With Green Backup Pro configured, head to the Backups tab.
Create a new backup, choose DigitalOcean Spaces as the storage location, and select your desired backup components.
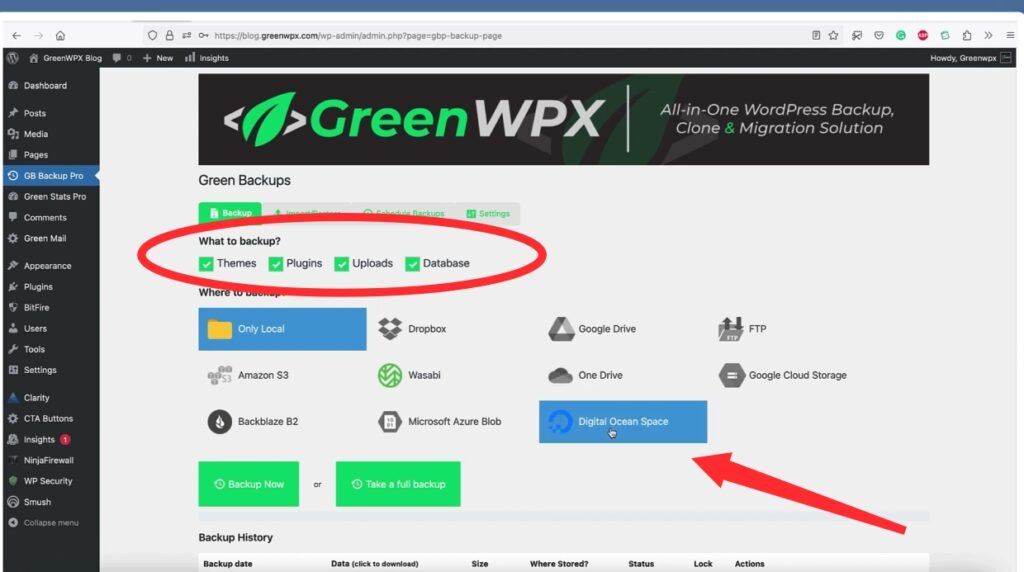
Click ‘Create Backup.’ Your WordPress site is now securely stored on DigitalOcean Spaces.
Step 6: Schedule Backups to DigitalOcean Spaces
No more manual backups! In Green Backup settings, navigate to Schedule.
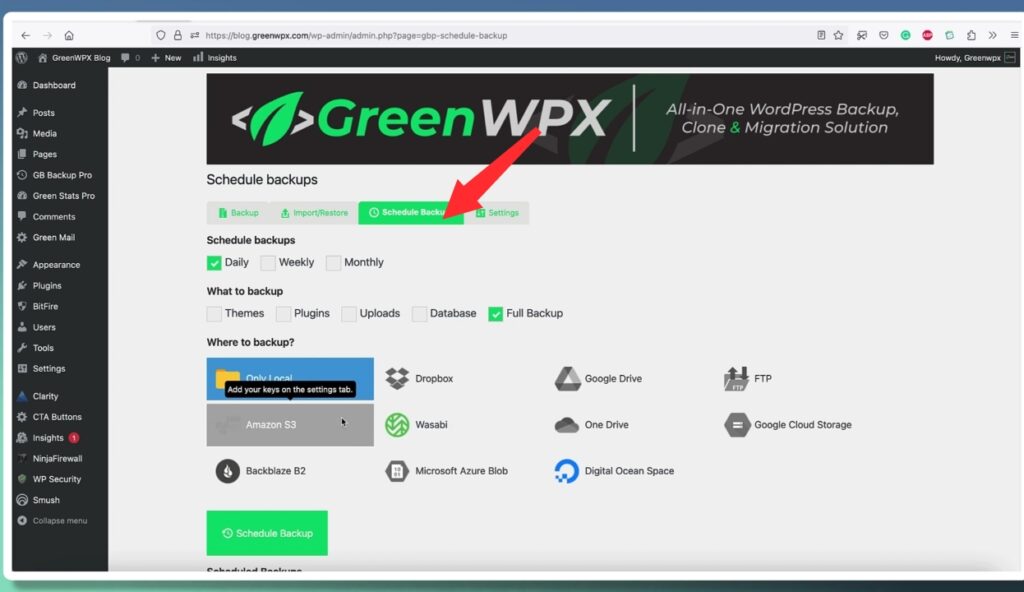
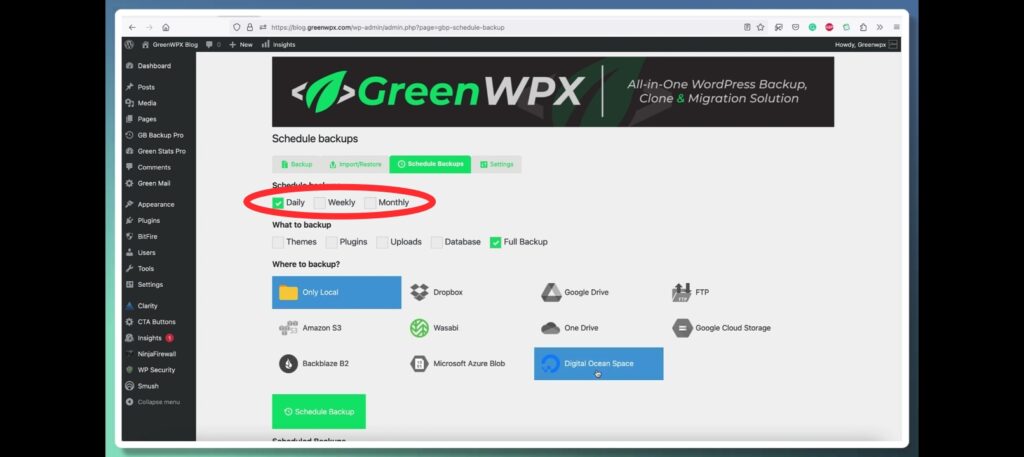
Customize the backup frequency (hourly, daily, weekly, or monthly) in the Green Backup settings.
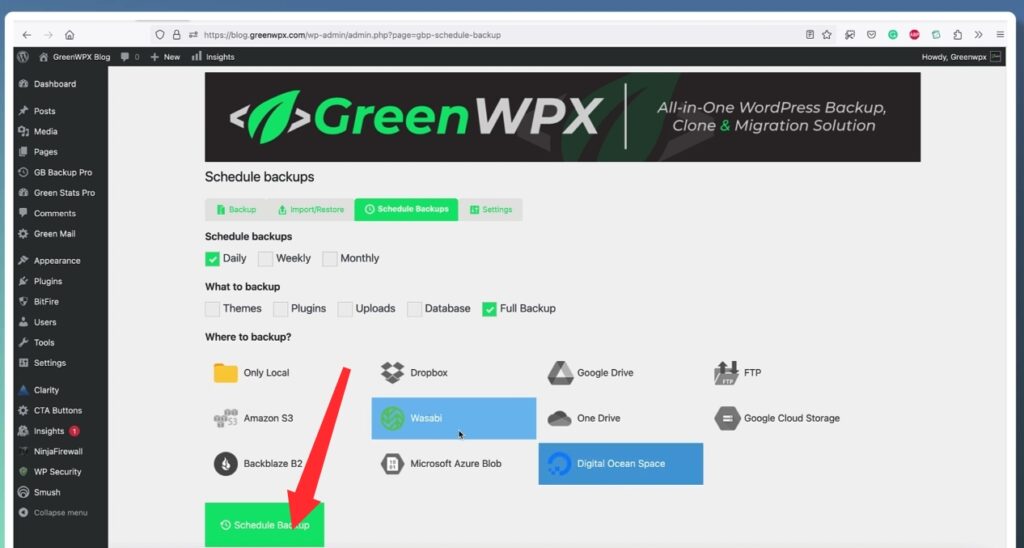
Select DigitalOcean Spaces as the storage location.
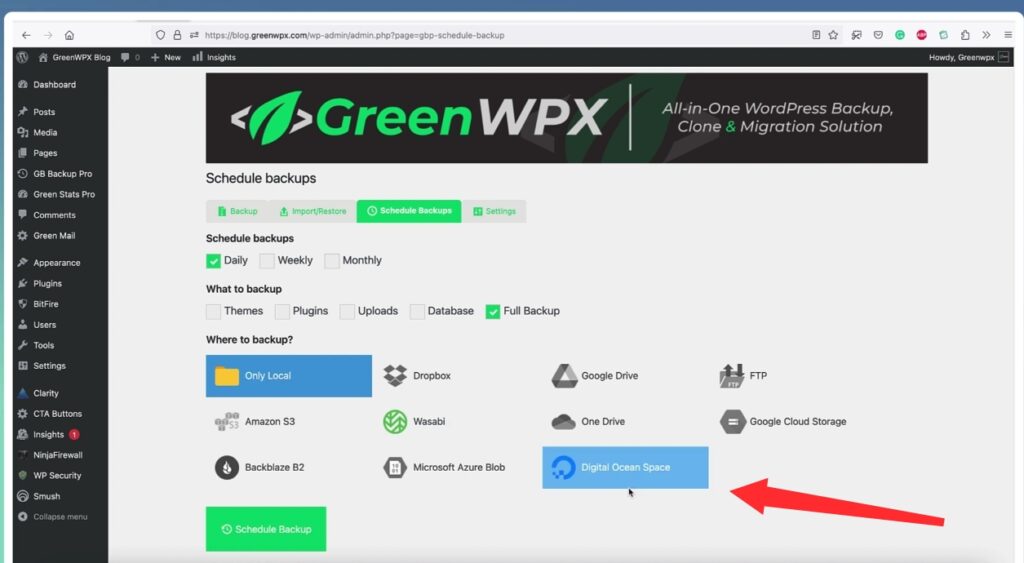
Enable the schedule, and you’re all set.
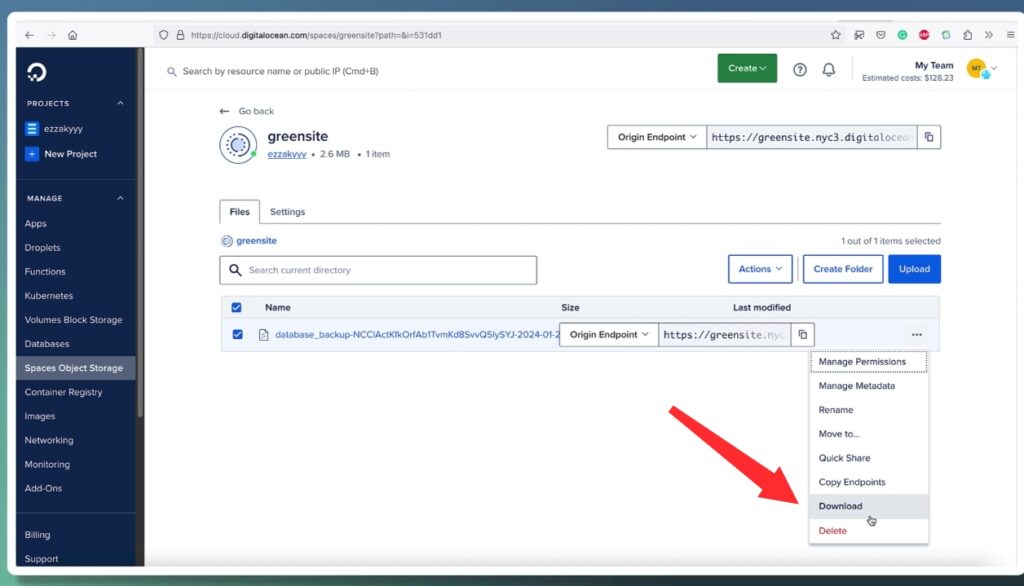
Step 8: Restore from DigitalOcean Spaces
To restore your site, download the backup file from your DigitalOcean Spaces.
In Green Backup, navigate to Import.
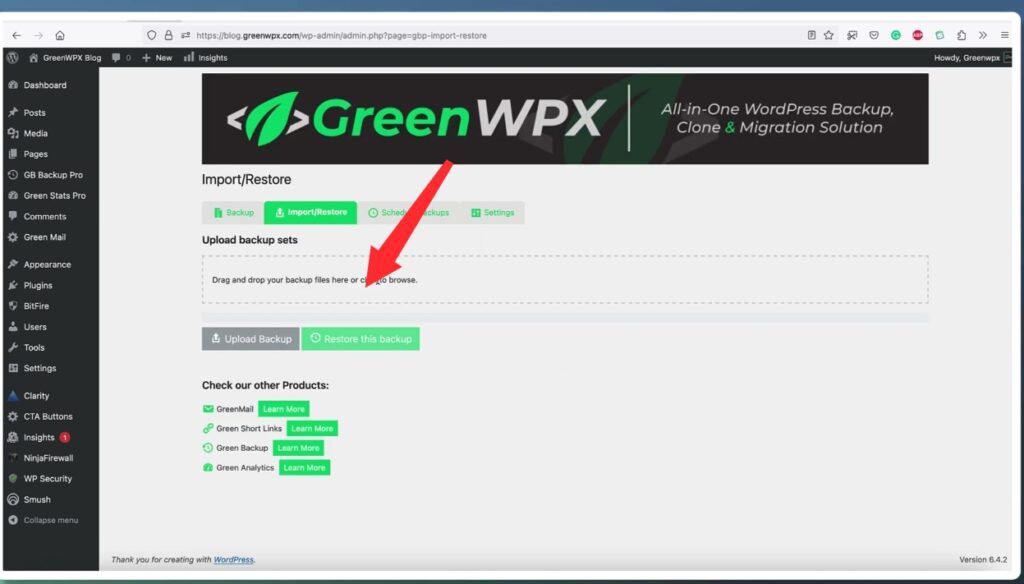
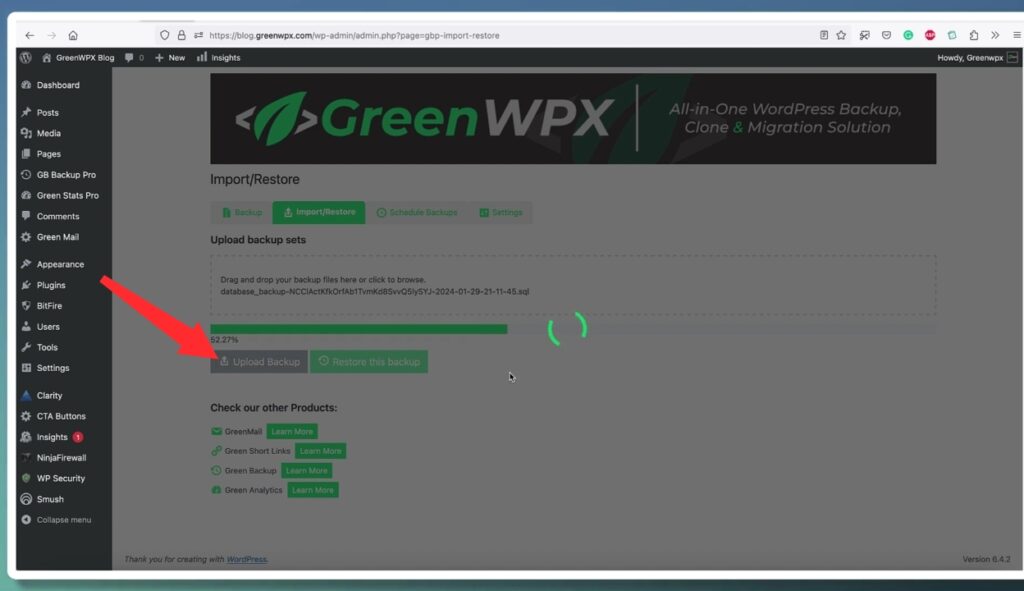
Upload the backup file in the Import section of Green Backup.
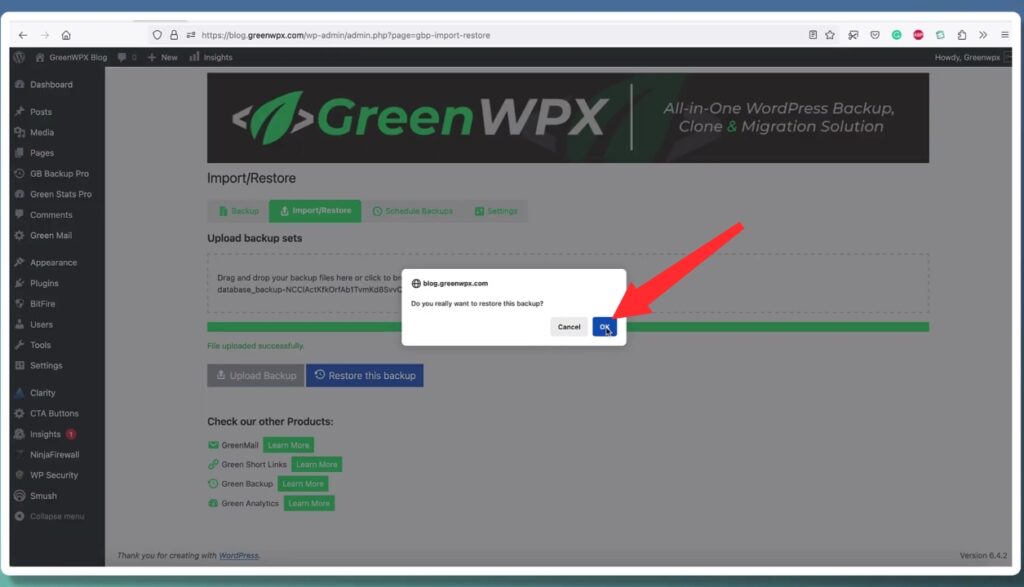
Click on “Restore This Backup.”
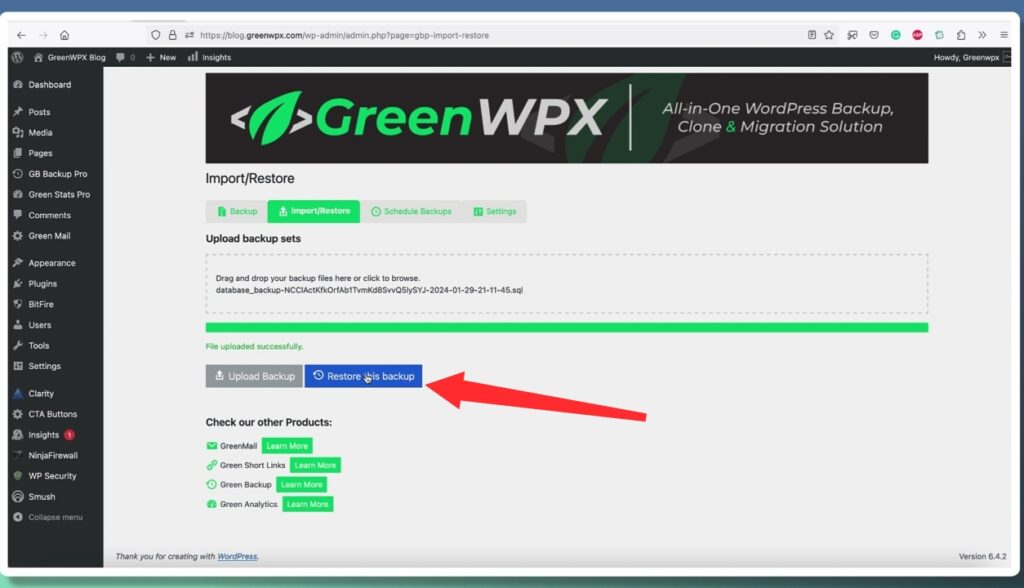
Finally, click on the “OK” button, and your site will be restored to the specified time with precision.
Conclusion
Download Green Backup Pro Now!Congratulations! You’ve successfully configured Green Backup to seamlessly back up your WordPress site to DigitalOcean Spaces. Your website’s security is now in excellent hands. If you found this tutorial helpful, give it a thumbs up, and consider upgrading to Green Backup Pro for more advanced backup features.
Happy backing up!