Greetings, WordPress enthusiasts! In today’s guide, we’ll explore a crucial aspect for every website owner – backing up your WordPress site to Amazon S3 using the robust Green Backup Pro plugin. This step-by-step walkthrough ensures a seamless process, providing you with peace of mind regarding your website’s data integrity. Before we dive in, make sure you have the Green Backup Pro version. If not, obtain it from Green Backup Pro for an enhanced backup experience.
Stay tuned as we guide you through the installation and activation of Green Backup Pro, followed by the essential steps to seamlessly connect it with your Amazon S3 account. This comprehensive guide not only covers the setup but also delves into creating automated backups, ensuring your WordPress site is well-protected. If you’re ready to safeguard your website data effectively, let’s embark on this insightful journey! And don’t forget to check the link in the description for the Green Backup Pro version.
Prerequisites: Get Green Backup Pro
Before we begin, ensure you have the Green Backup Pro version to unlock the full potential of backups. Head over to Green Backup Pro to upgrade your plugin.
P.S.: The free version of Green Backup doesn’t support saving backups to Amazon S3.
You need to choose a PRO plan from the three available options, depending on how many websites you can install the plugin on.
Step 1: Install Green Backup Pro
Start by installing Green Backup Pro on your WordPress site. Activate the plugin,
and navigate to the Green Backup settings, specifically the Amazon S3
Download Green Backup Pro Now!
Begin by installing Green Backup Pro on your WordPress site. Activate the plugin and navigate to the Green Backup settings, paying special attention to the DigitalOcean Spaces tab.
Step 1: Once you have purchased the right plan for you, log in to your GreenWPX member area to download the plugin and copy the activation key.

- Download and save the plugin zip file to your desktop.
- Copy your Serial key.
Step 2: Install the plugin on your WordPress site.
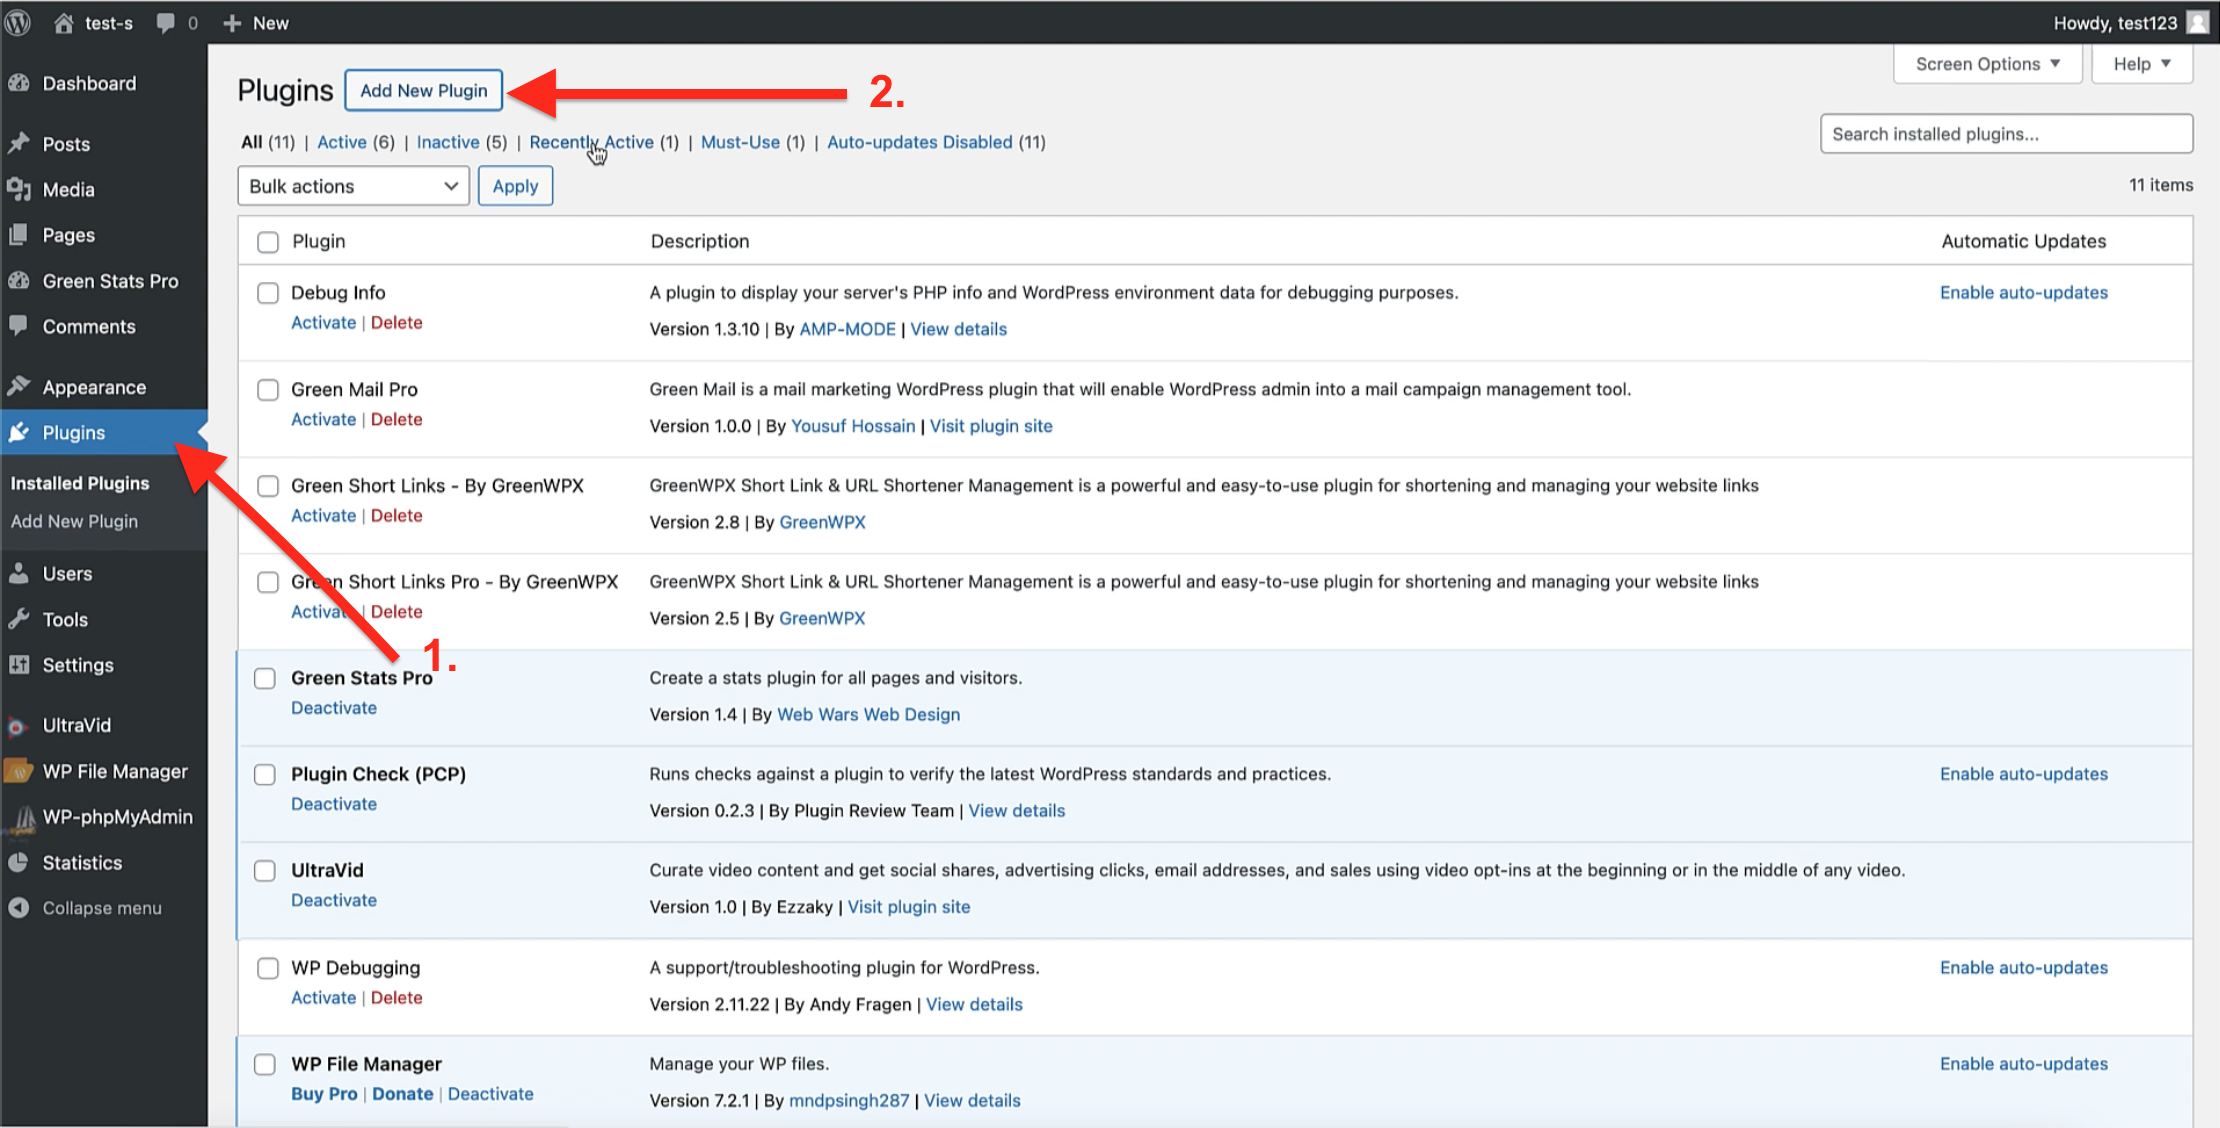
- On your WordPress Dashboard click on the Plugins on the left side menu.
- On The Plugins page click “Add New Plugin”.
Step 2.1 : Import the zip file of the downloaded plugin.
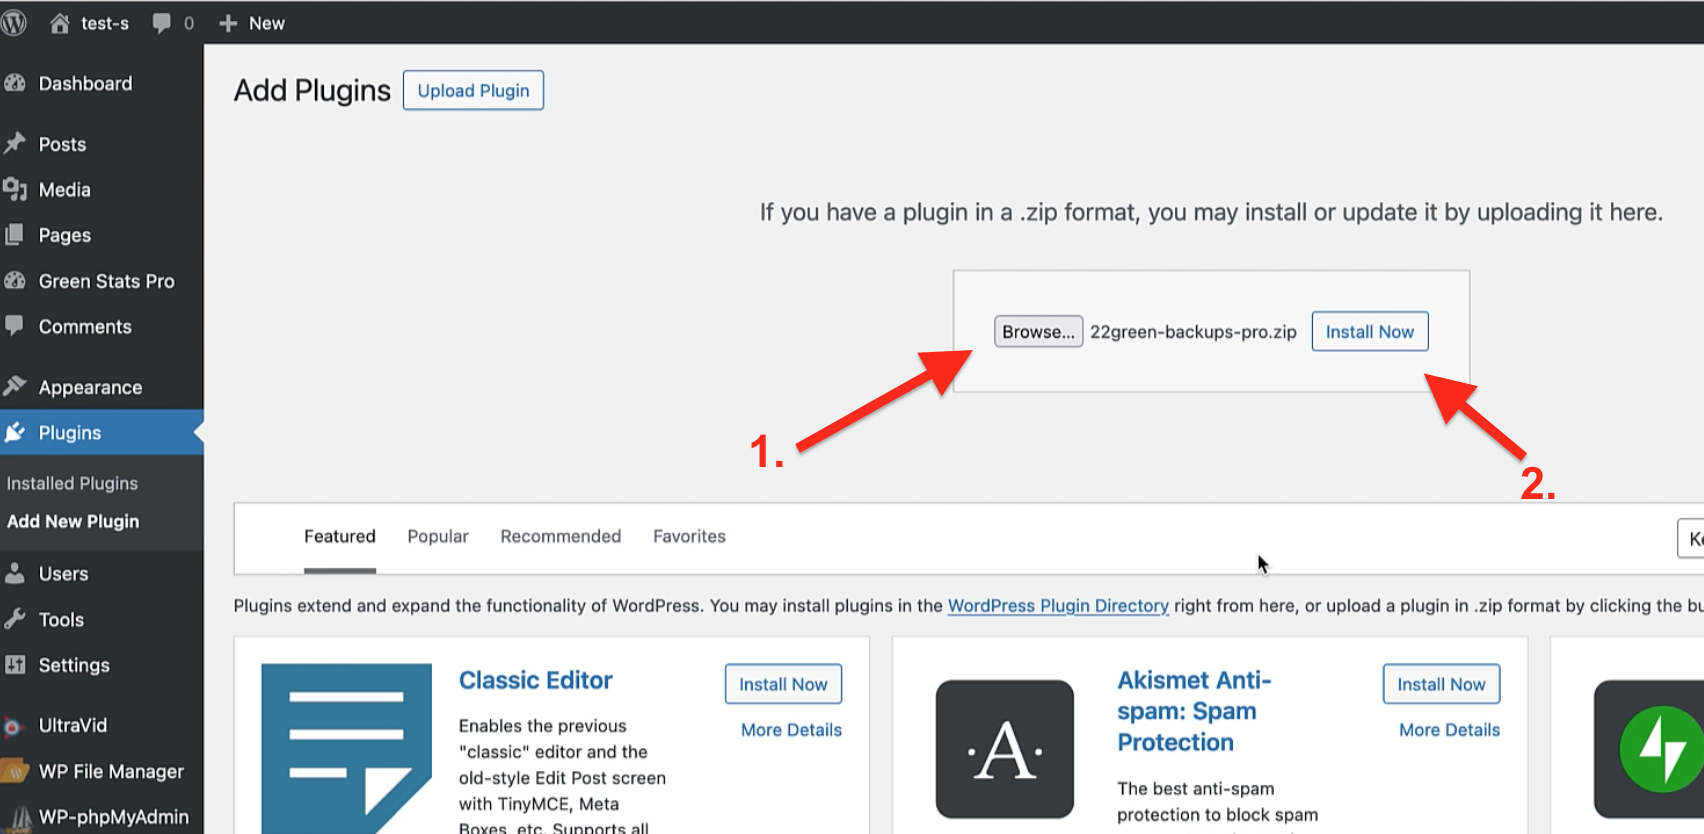
- Click to browse your desktop and choose the zip file of the plugin that you downloaded from the member area.
- Click “Install Now”
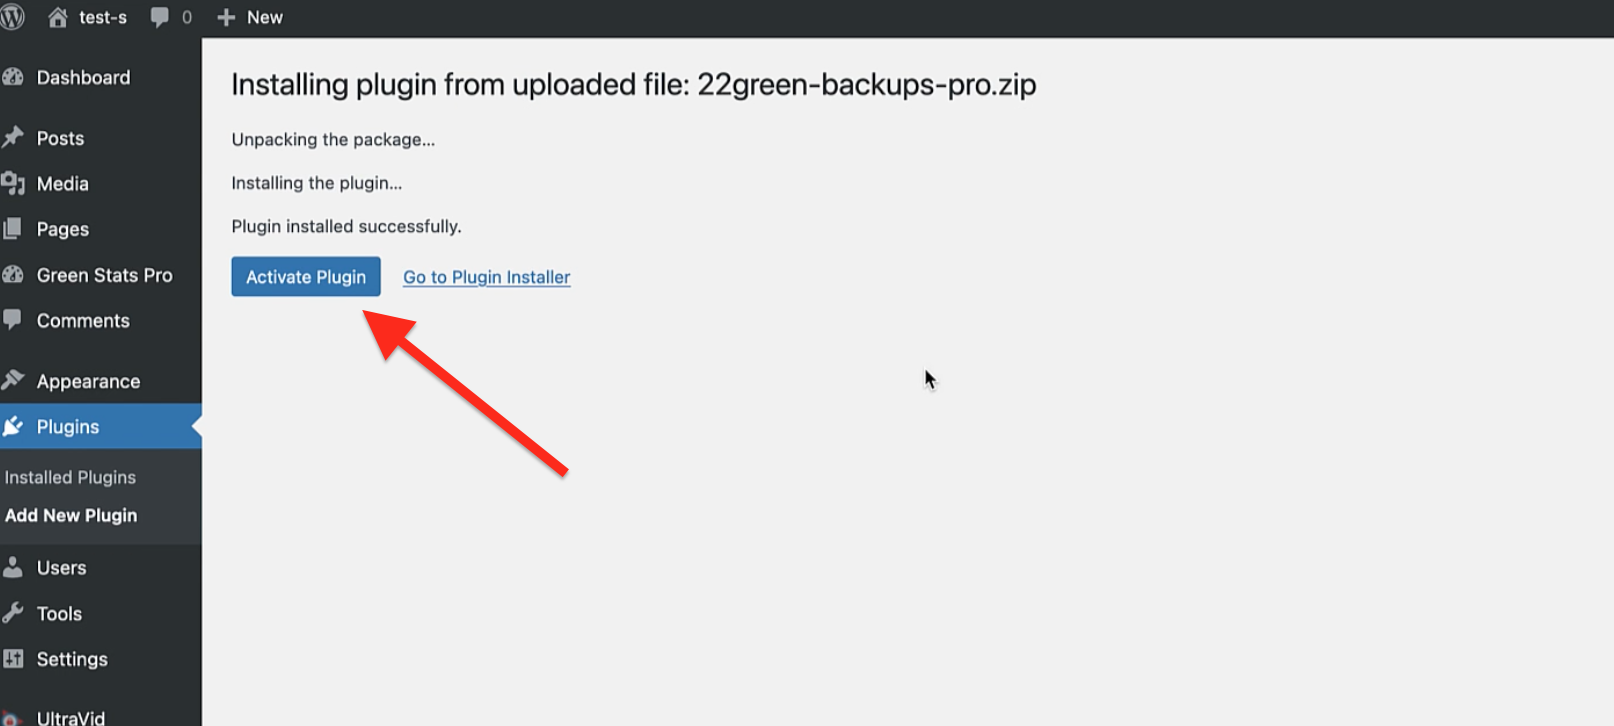
Then you will be redirected to this page, and click the “Activate Plugin” button.
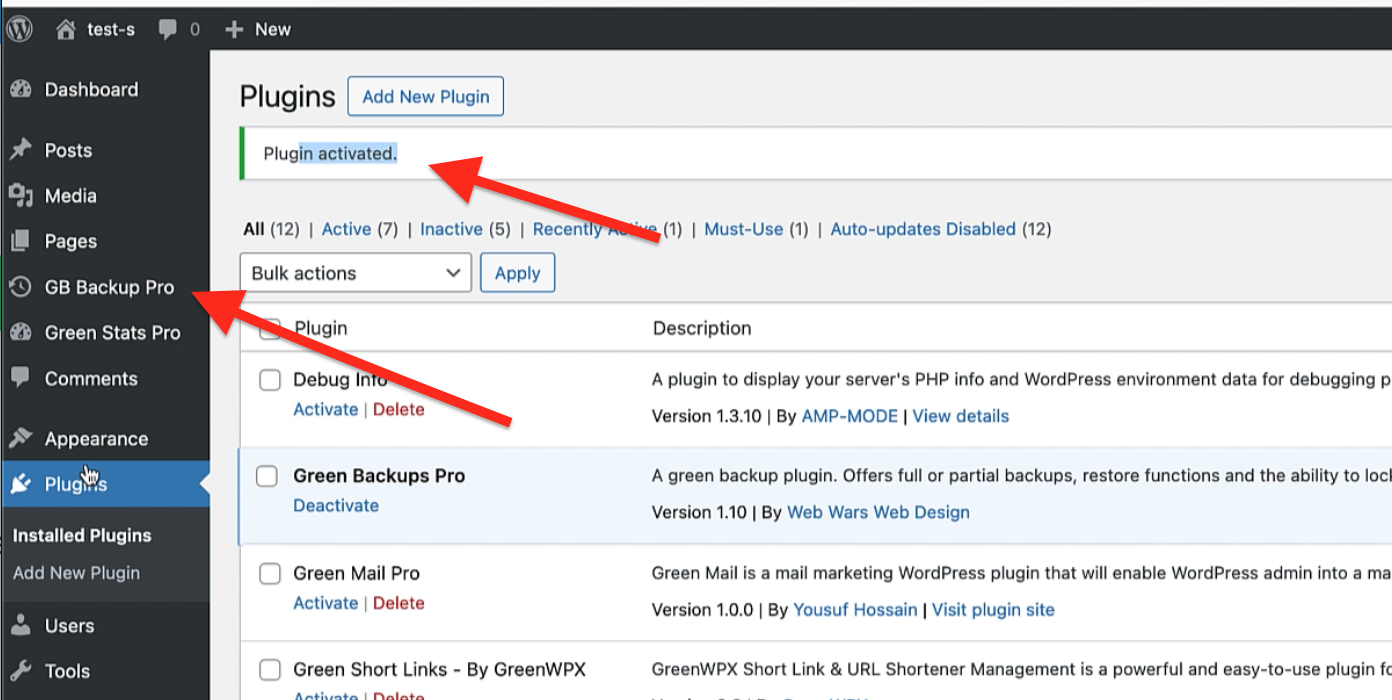
And the Plugin it will be Activated:
Step 3: Active The Pro Version:
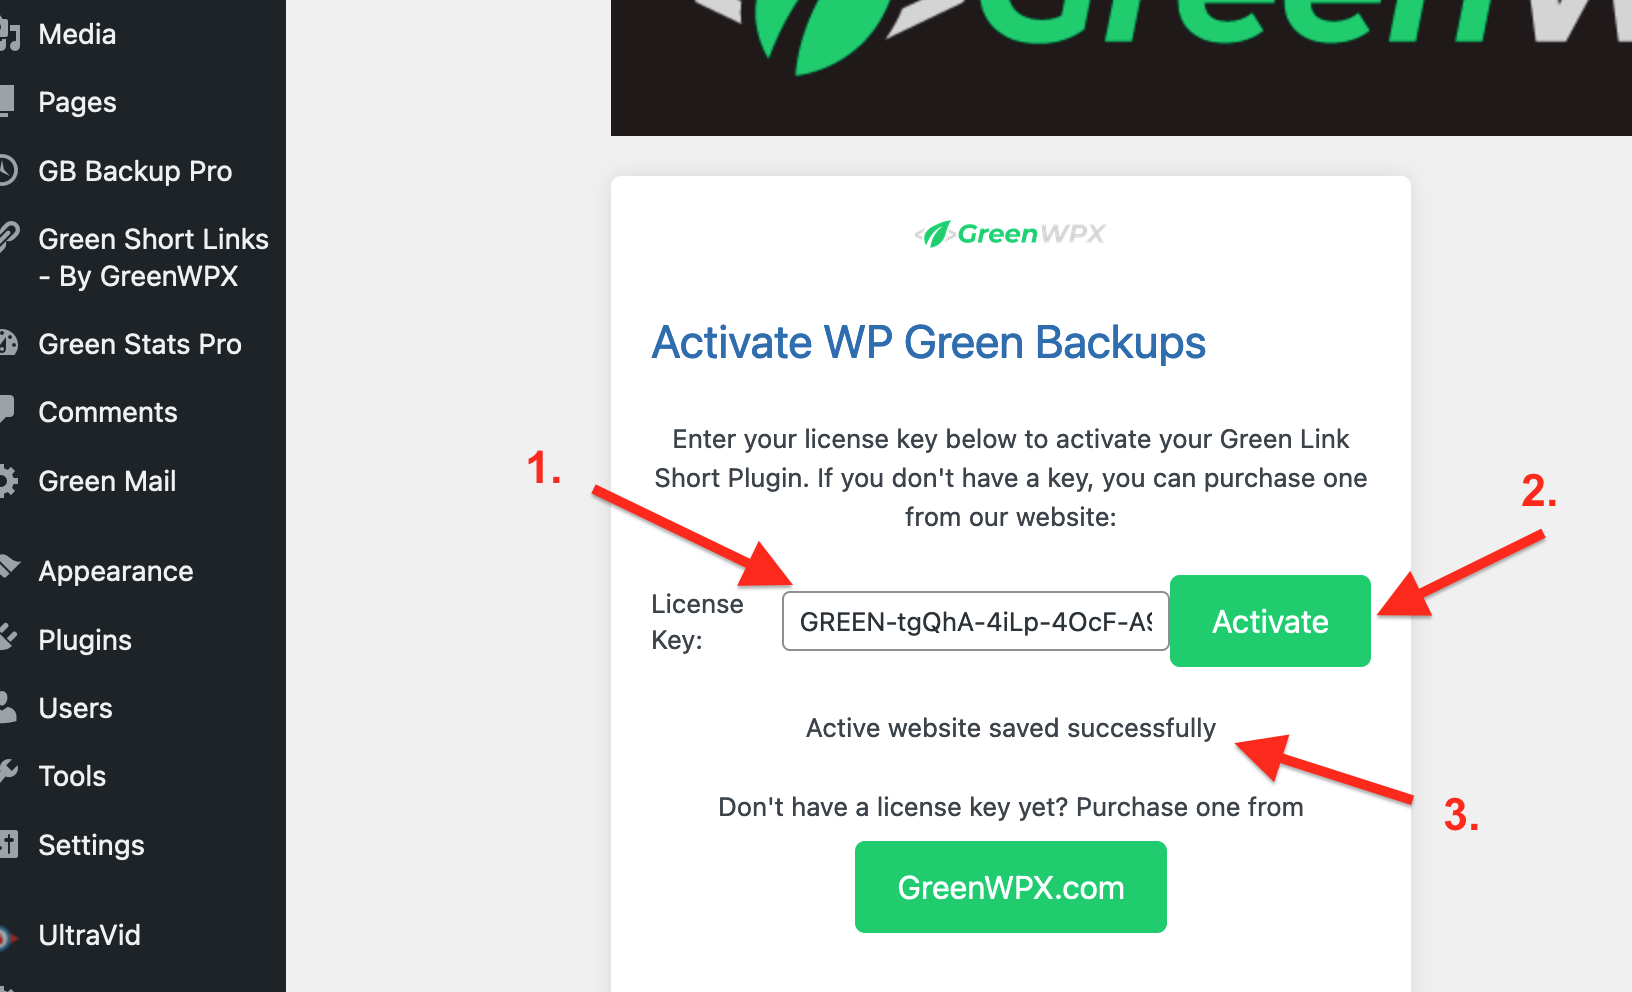
- Paste the license key that you obtained from the GreenWPX member area.
- Click the “Activate” button.
- Congratulations! Once you receive that message, you are good to go. Let’s move on to the next step.
Step 2: Configure Amazon S3 Settings
If you don’t have an Amazon S3 account, create one. Once logged in, head to Services and find S3. Create a new bucket, a storage space for your backups. Name your bucket and choose the region closest to your web server.
Once you log in to your AWS account.
Go to the search bar and search for “S3“
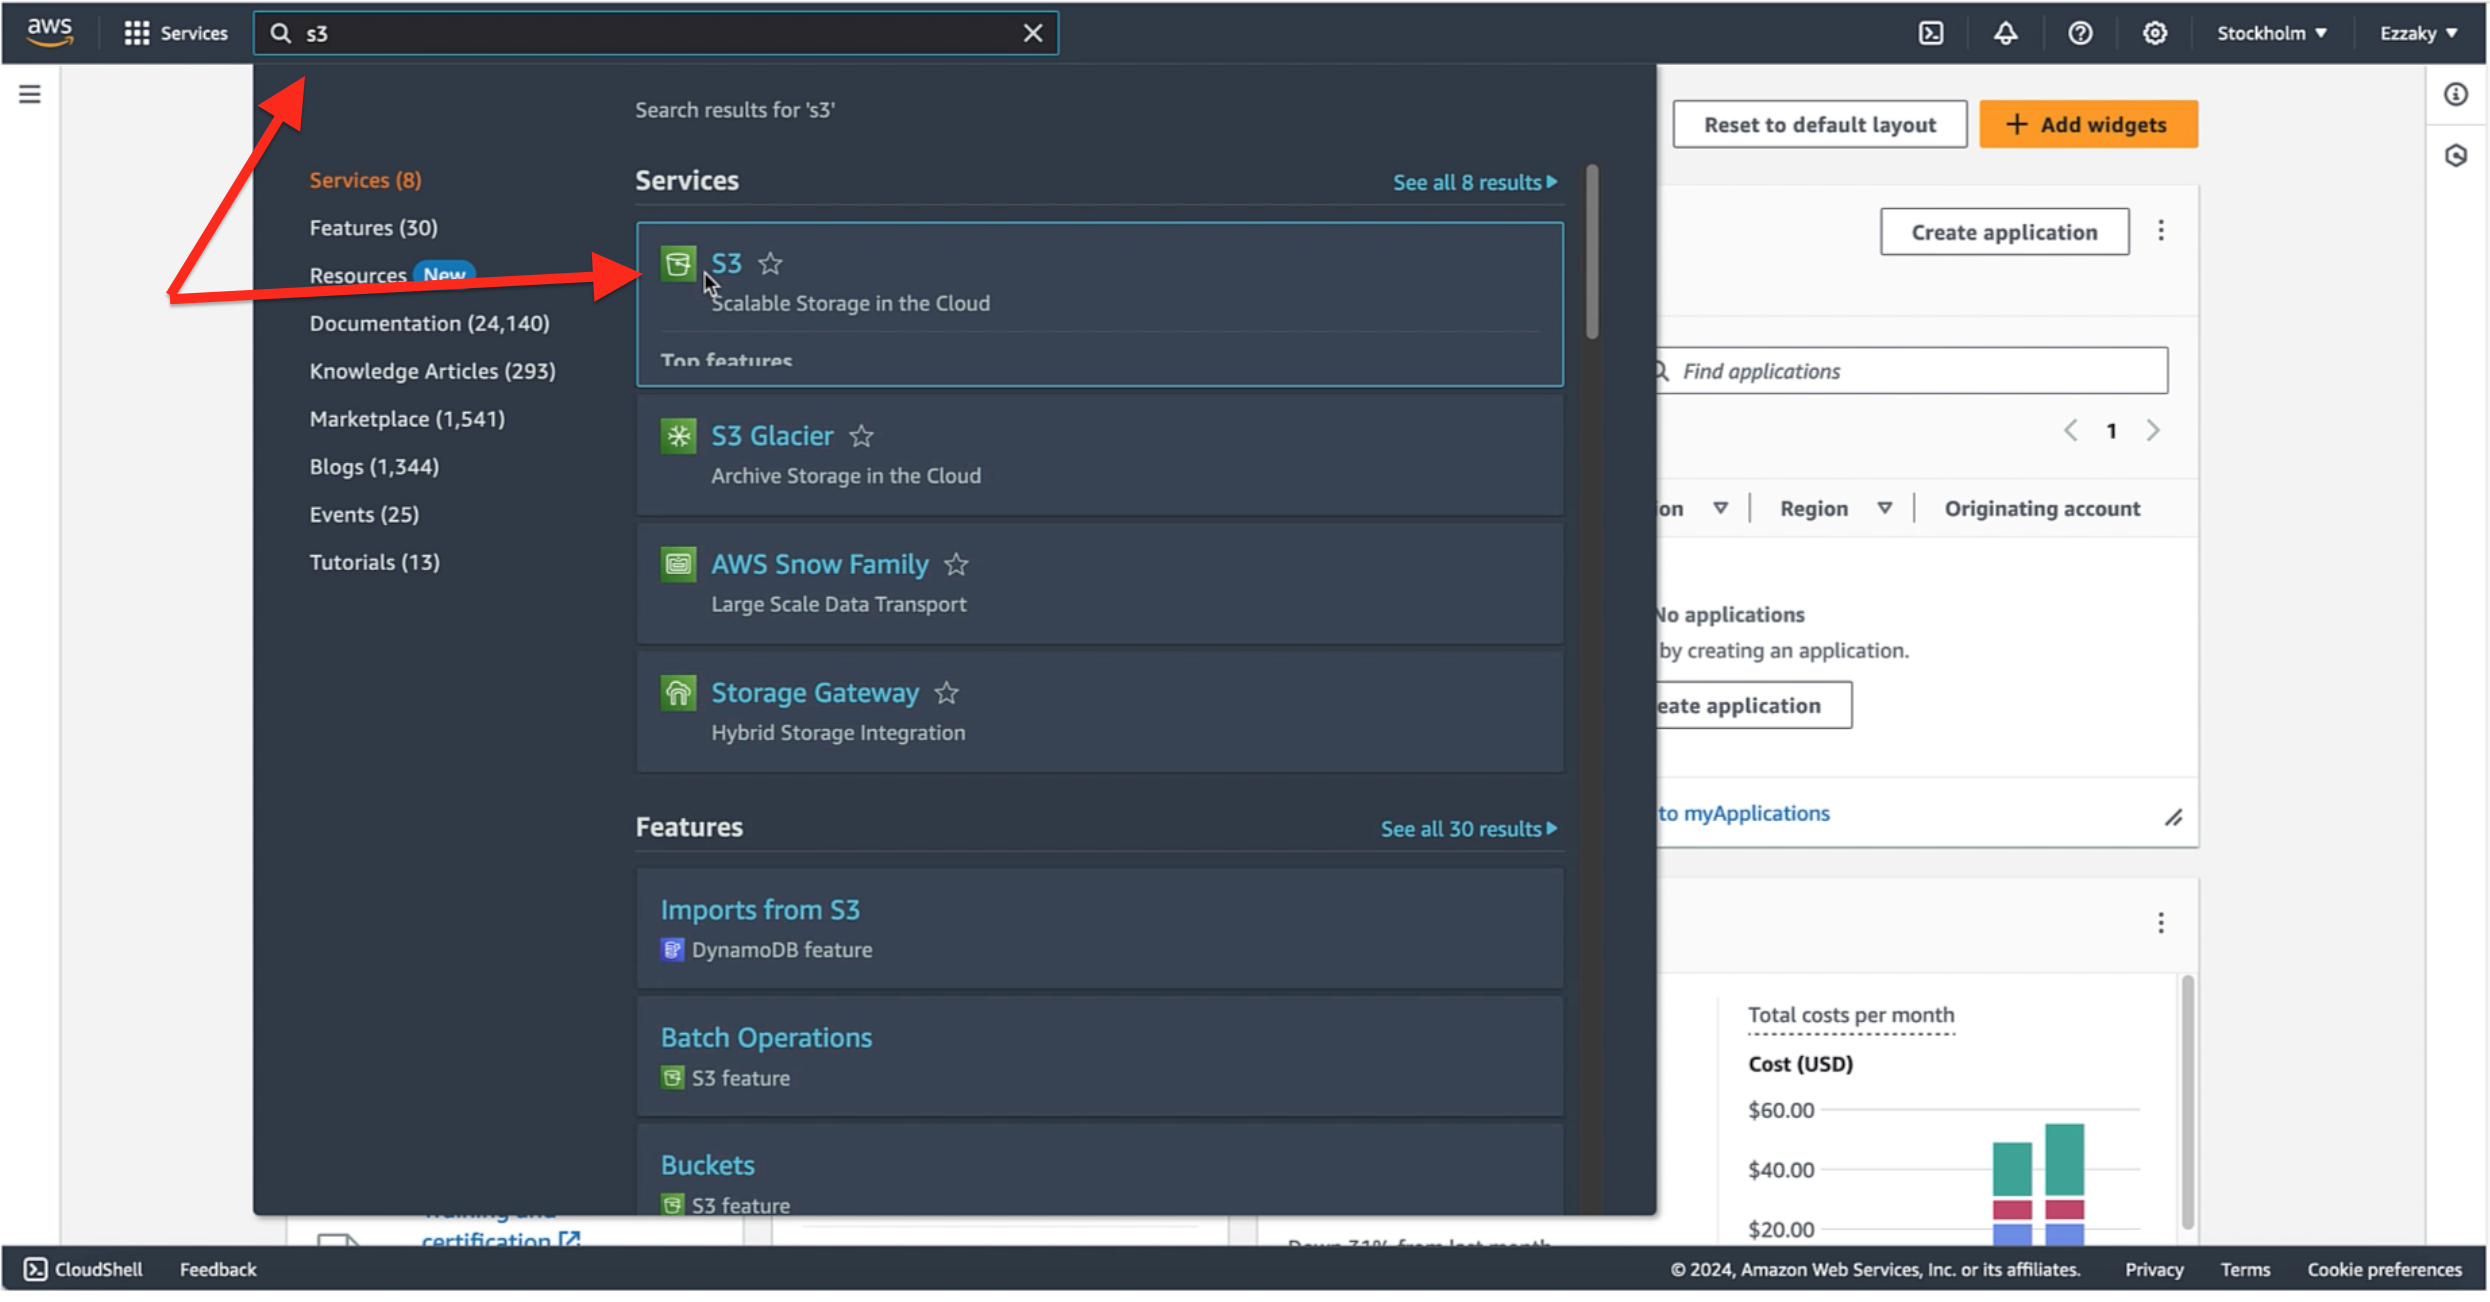
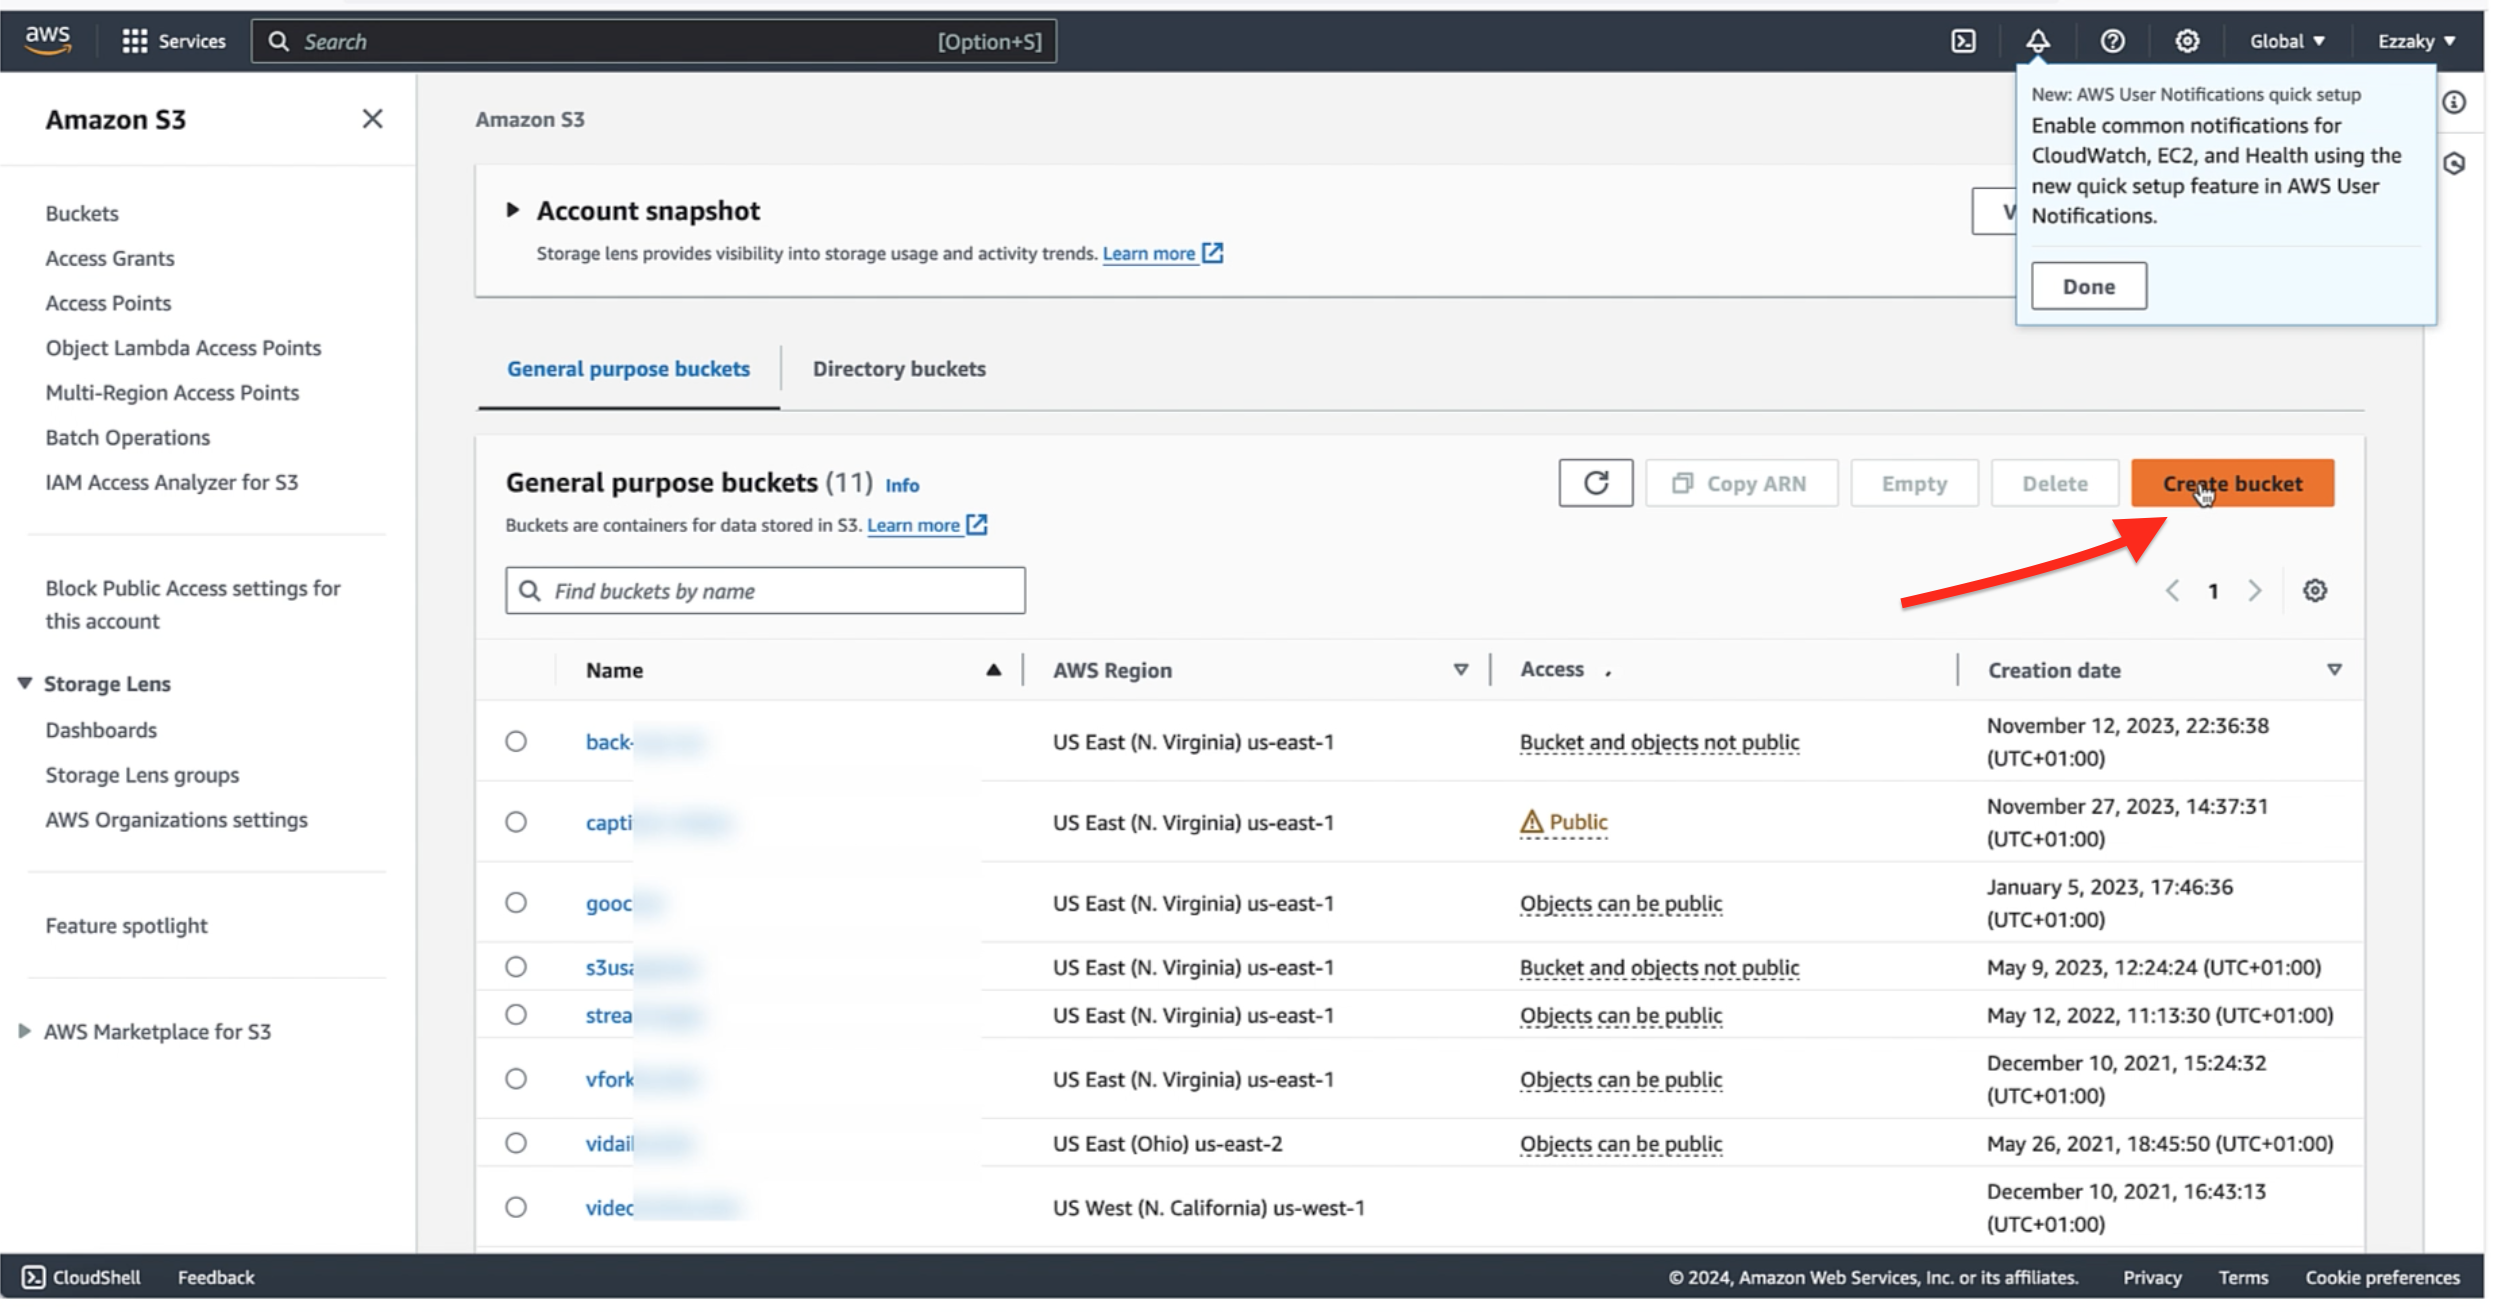
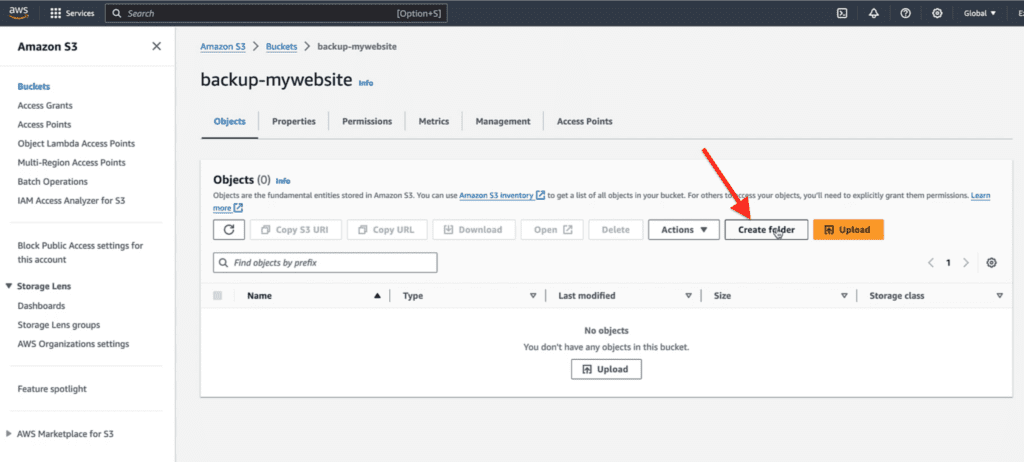
After clicking on it, you’ll be directed to the list of buckets:
Click “Create Bucket.”
Select the AWS region closest to your server; for example, I’ll choose “us-east-1.”
Next, provide a name for your bucket.
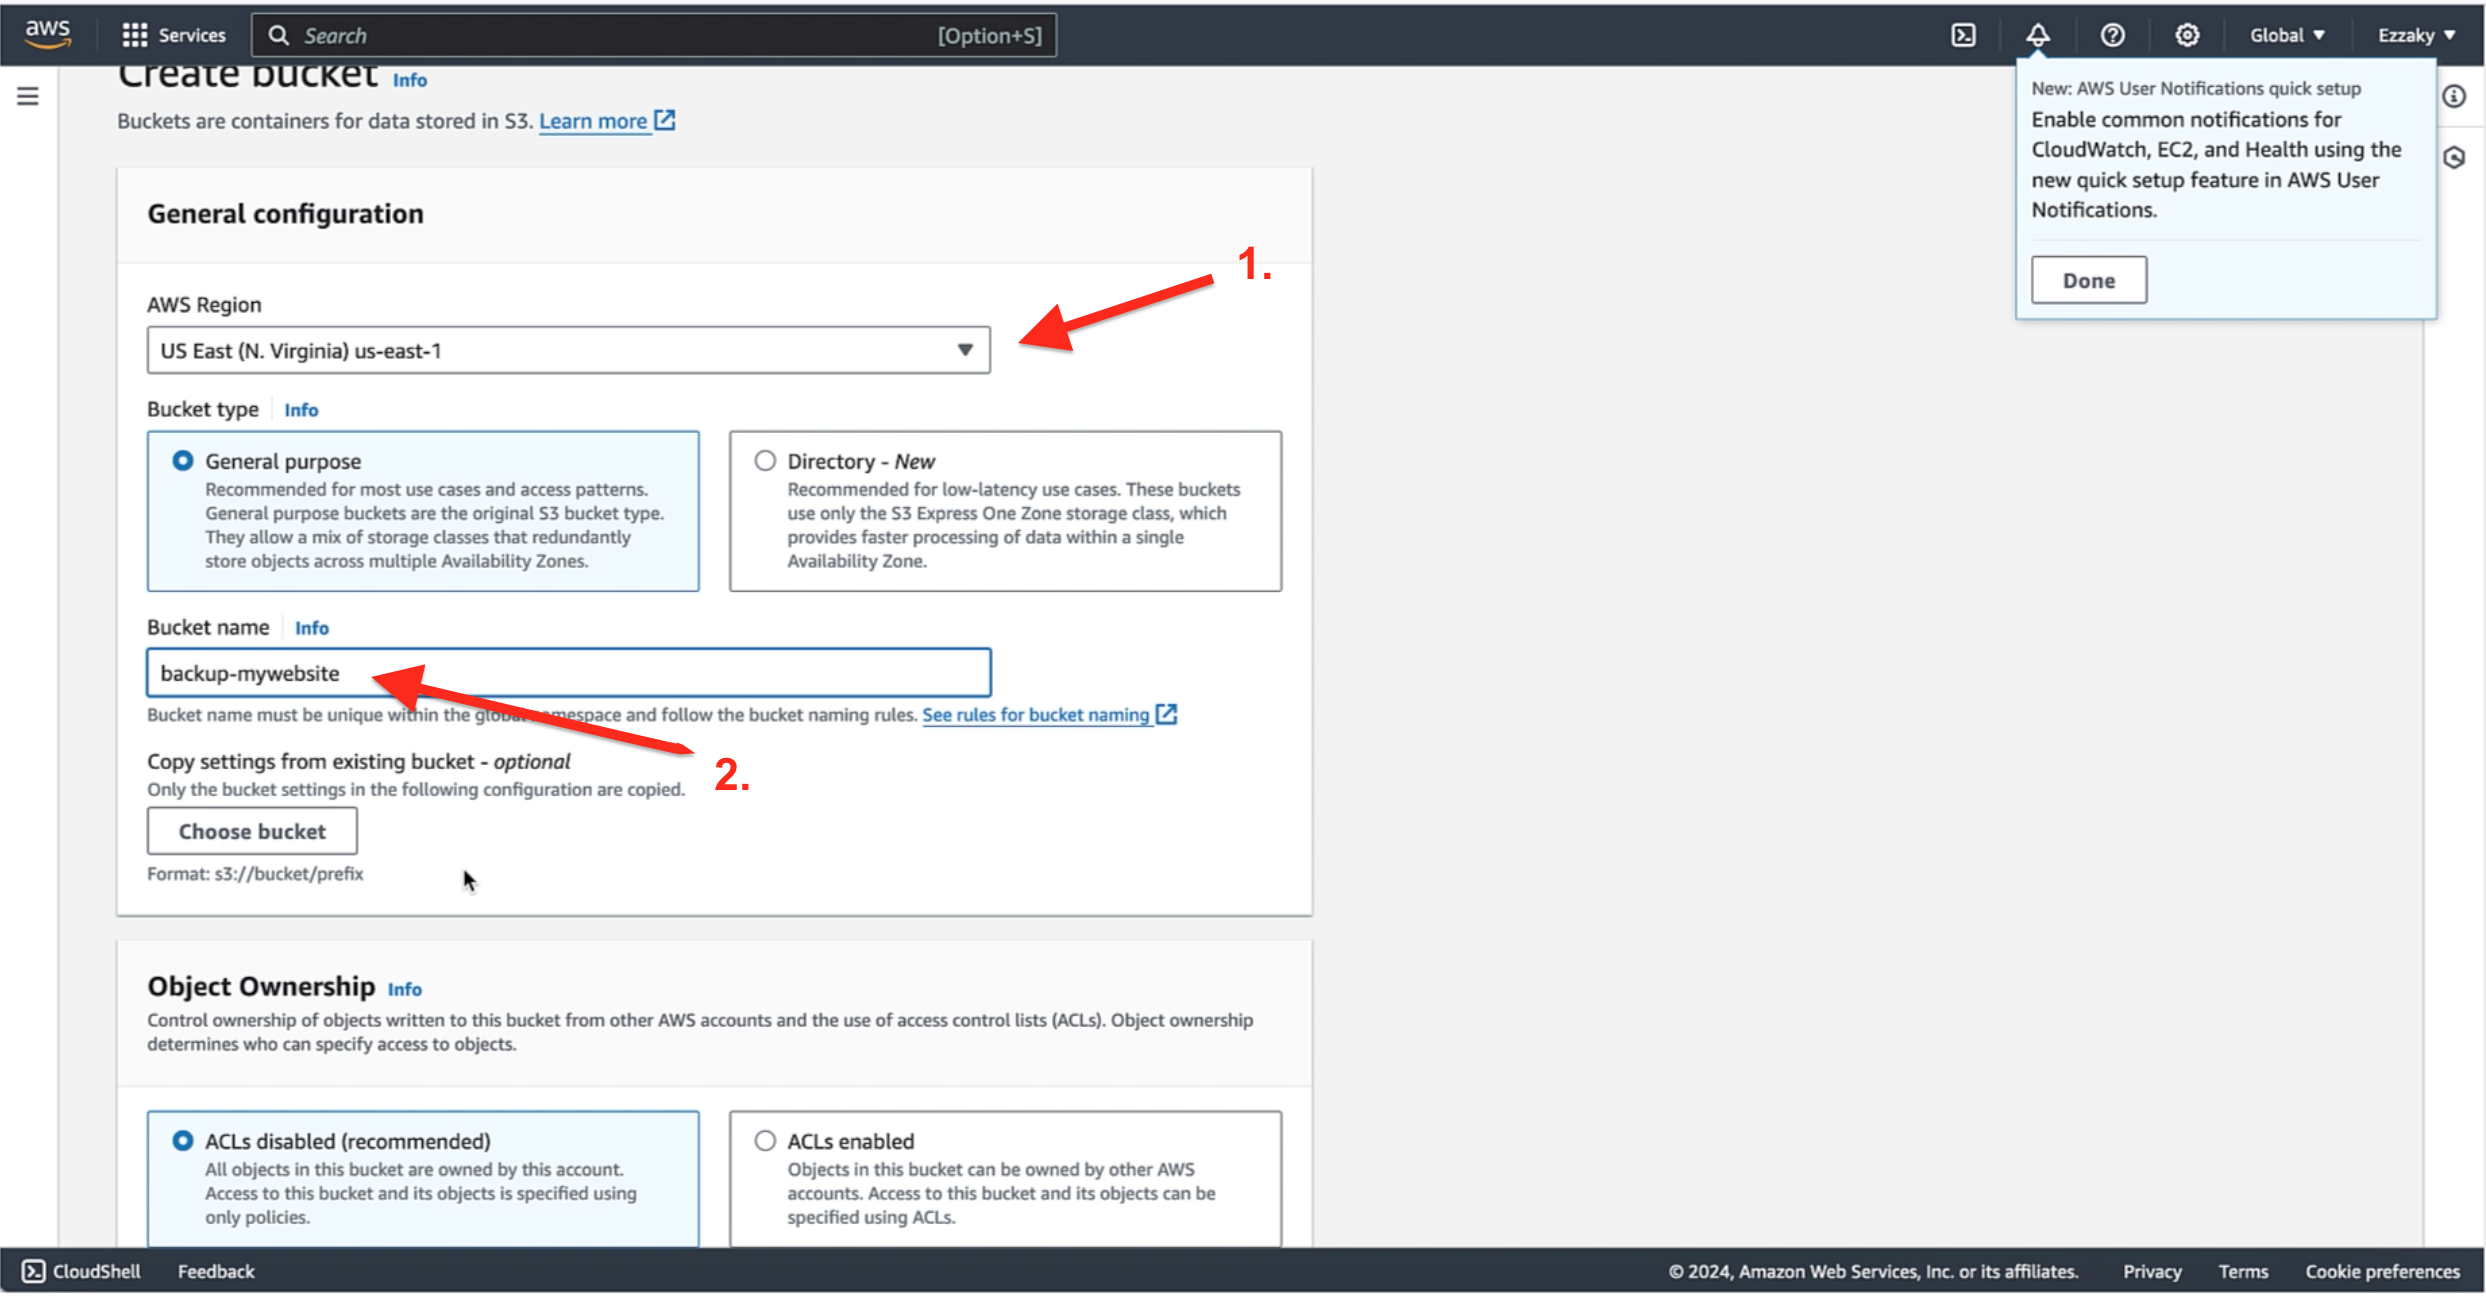
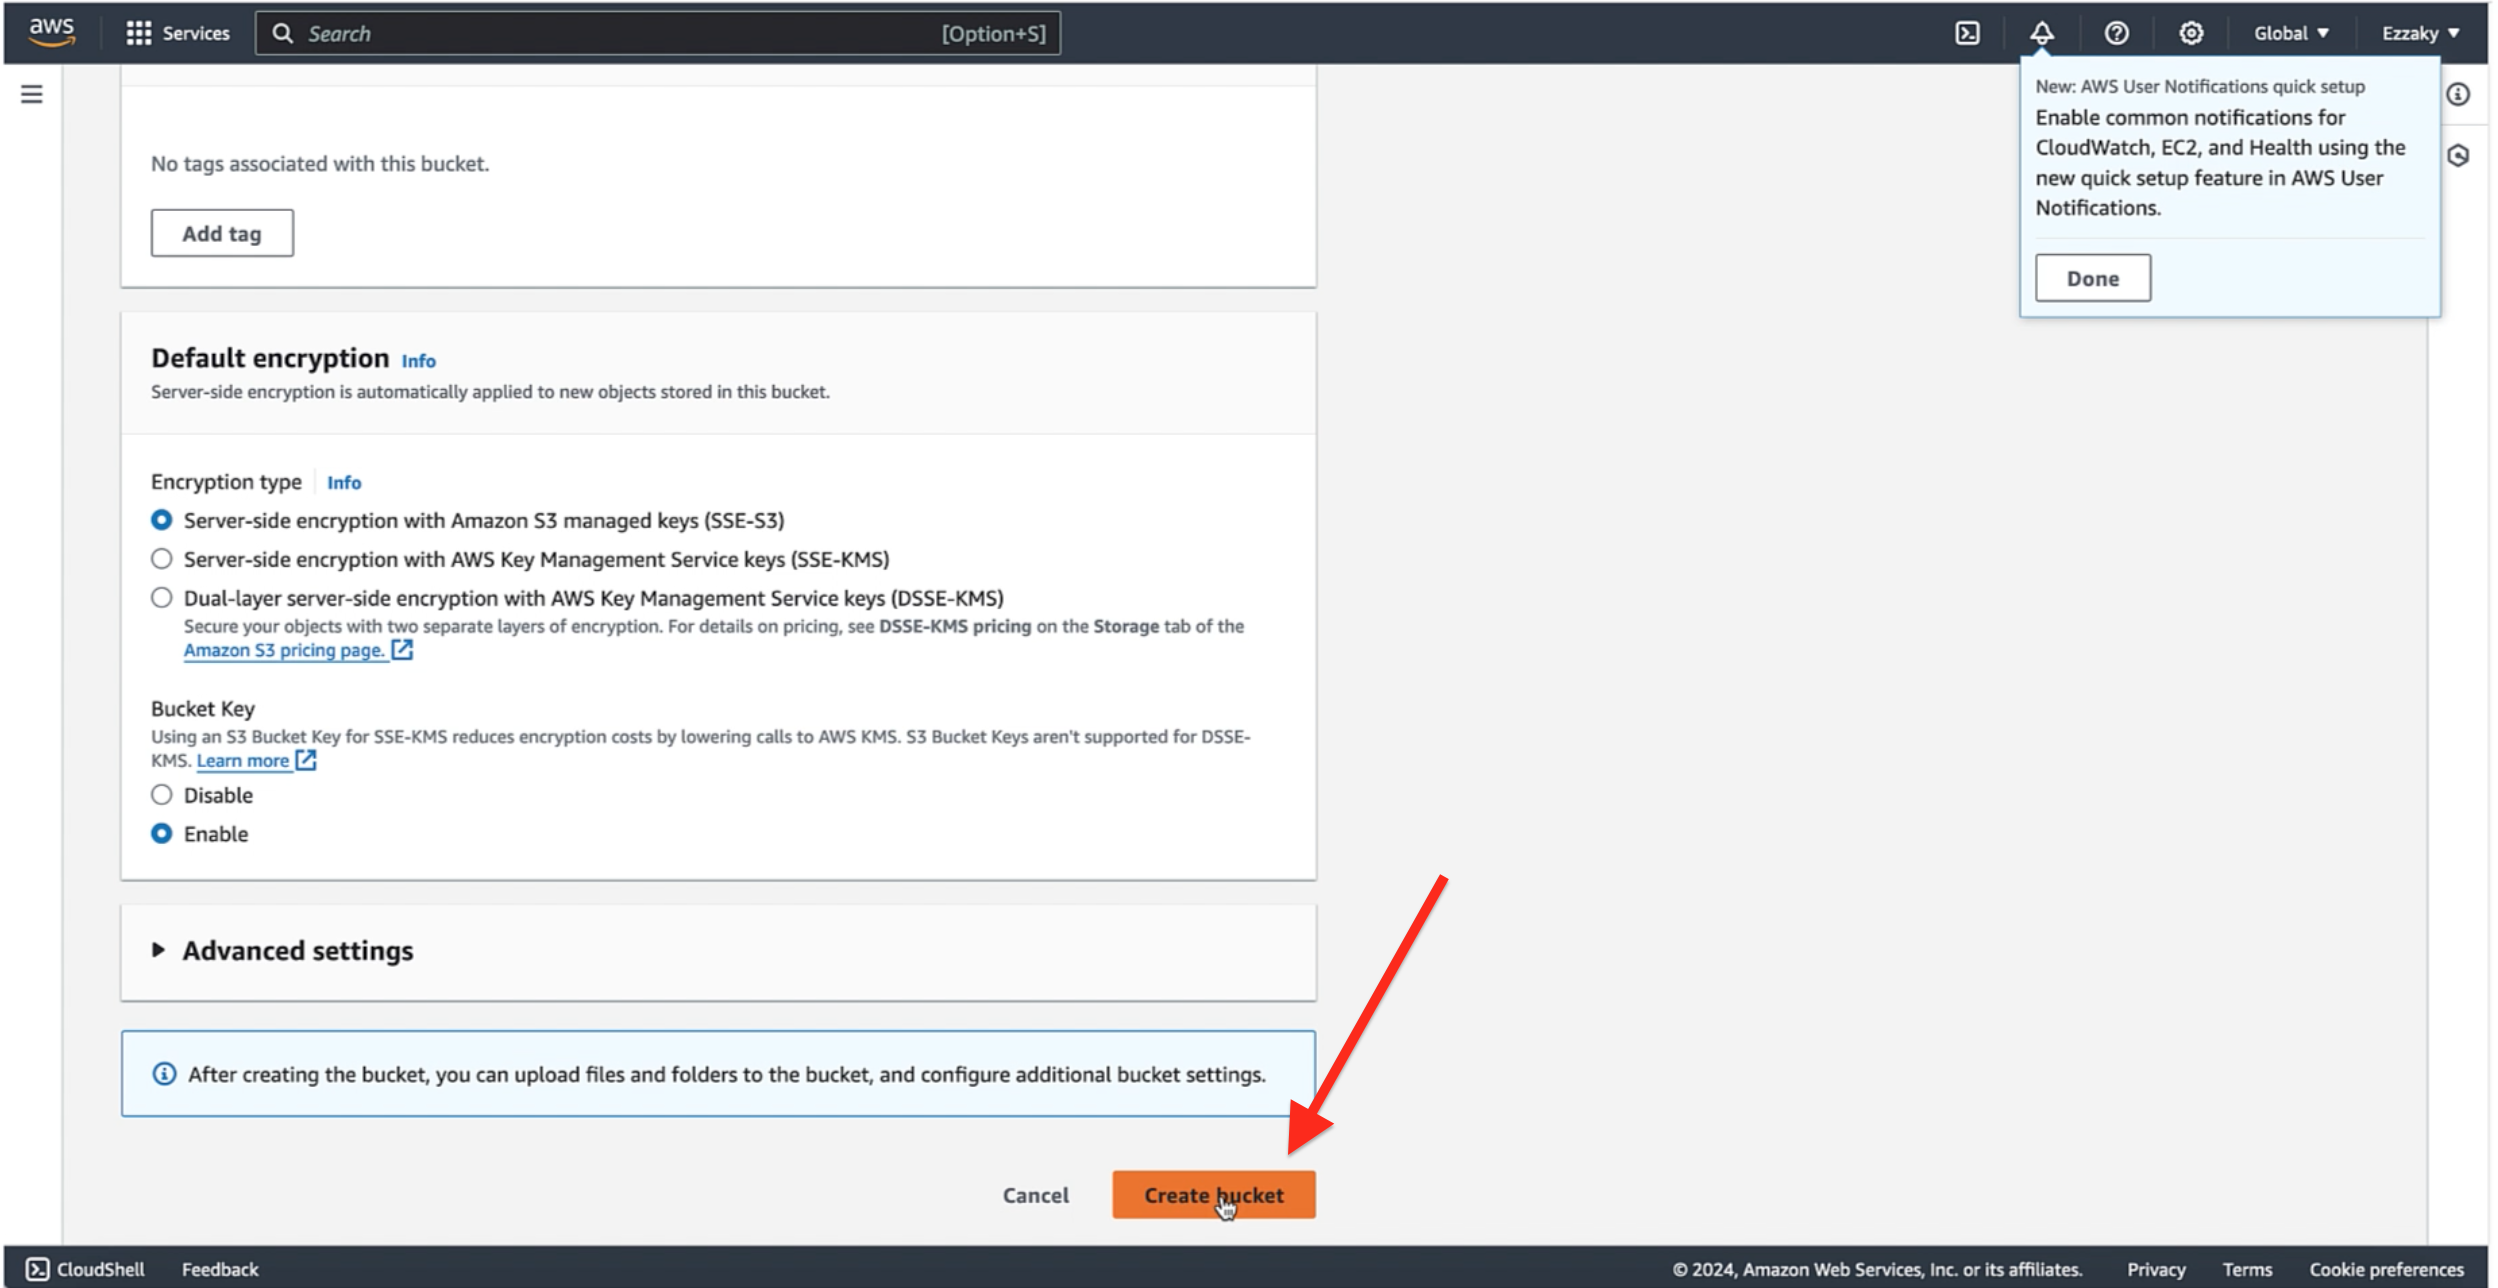
Scroll down and select “Create Bucket.”
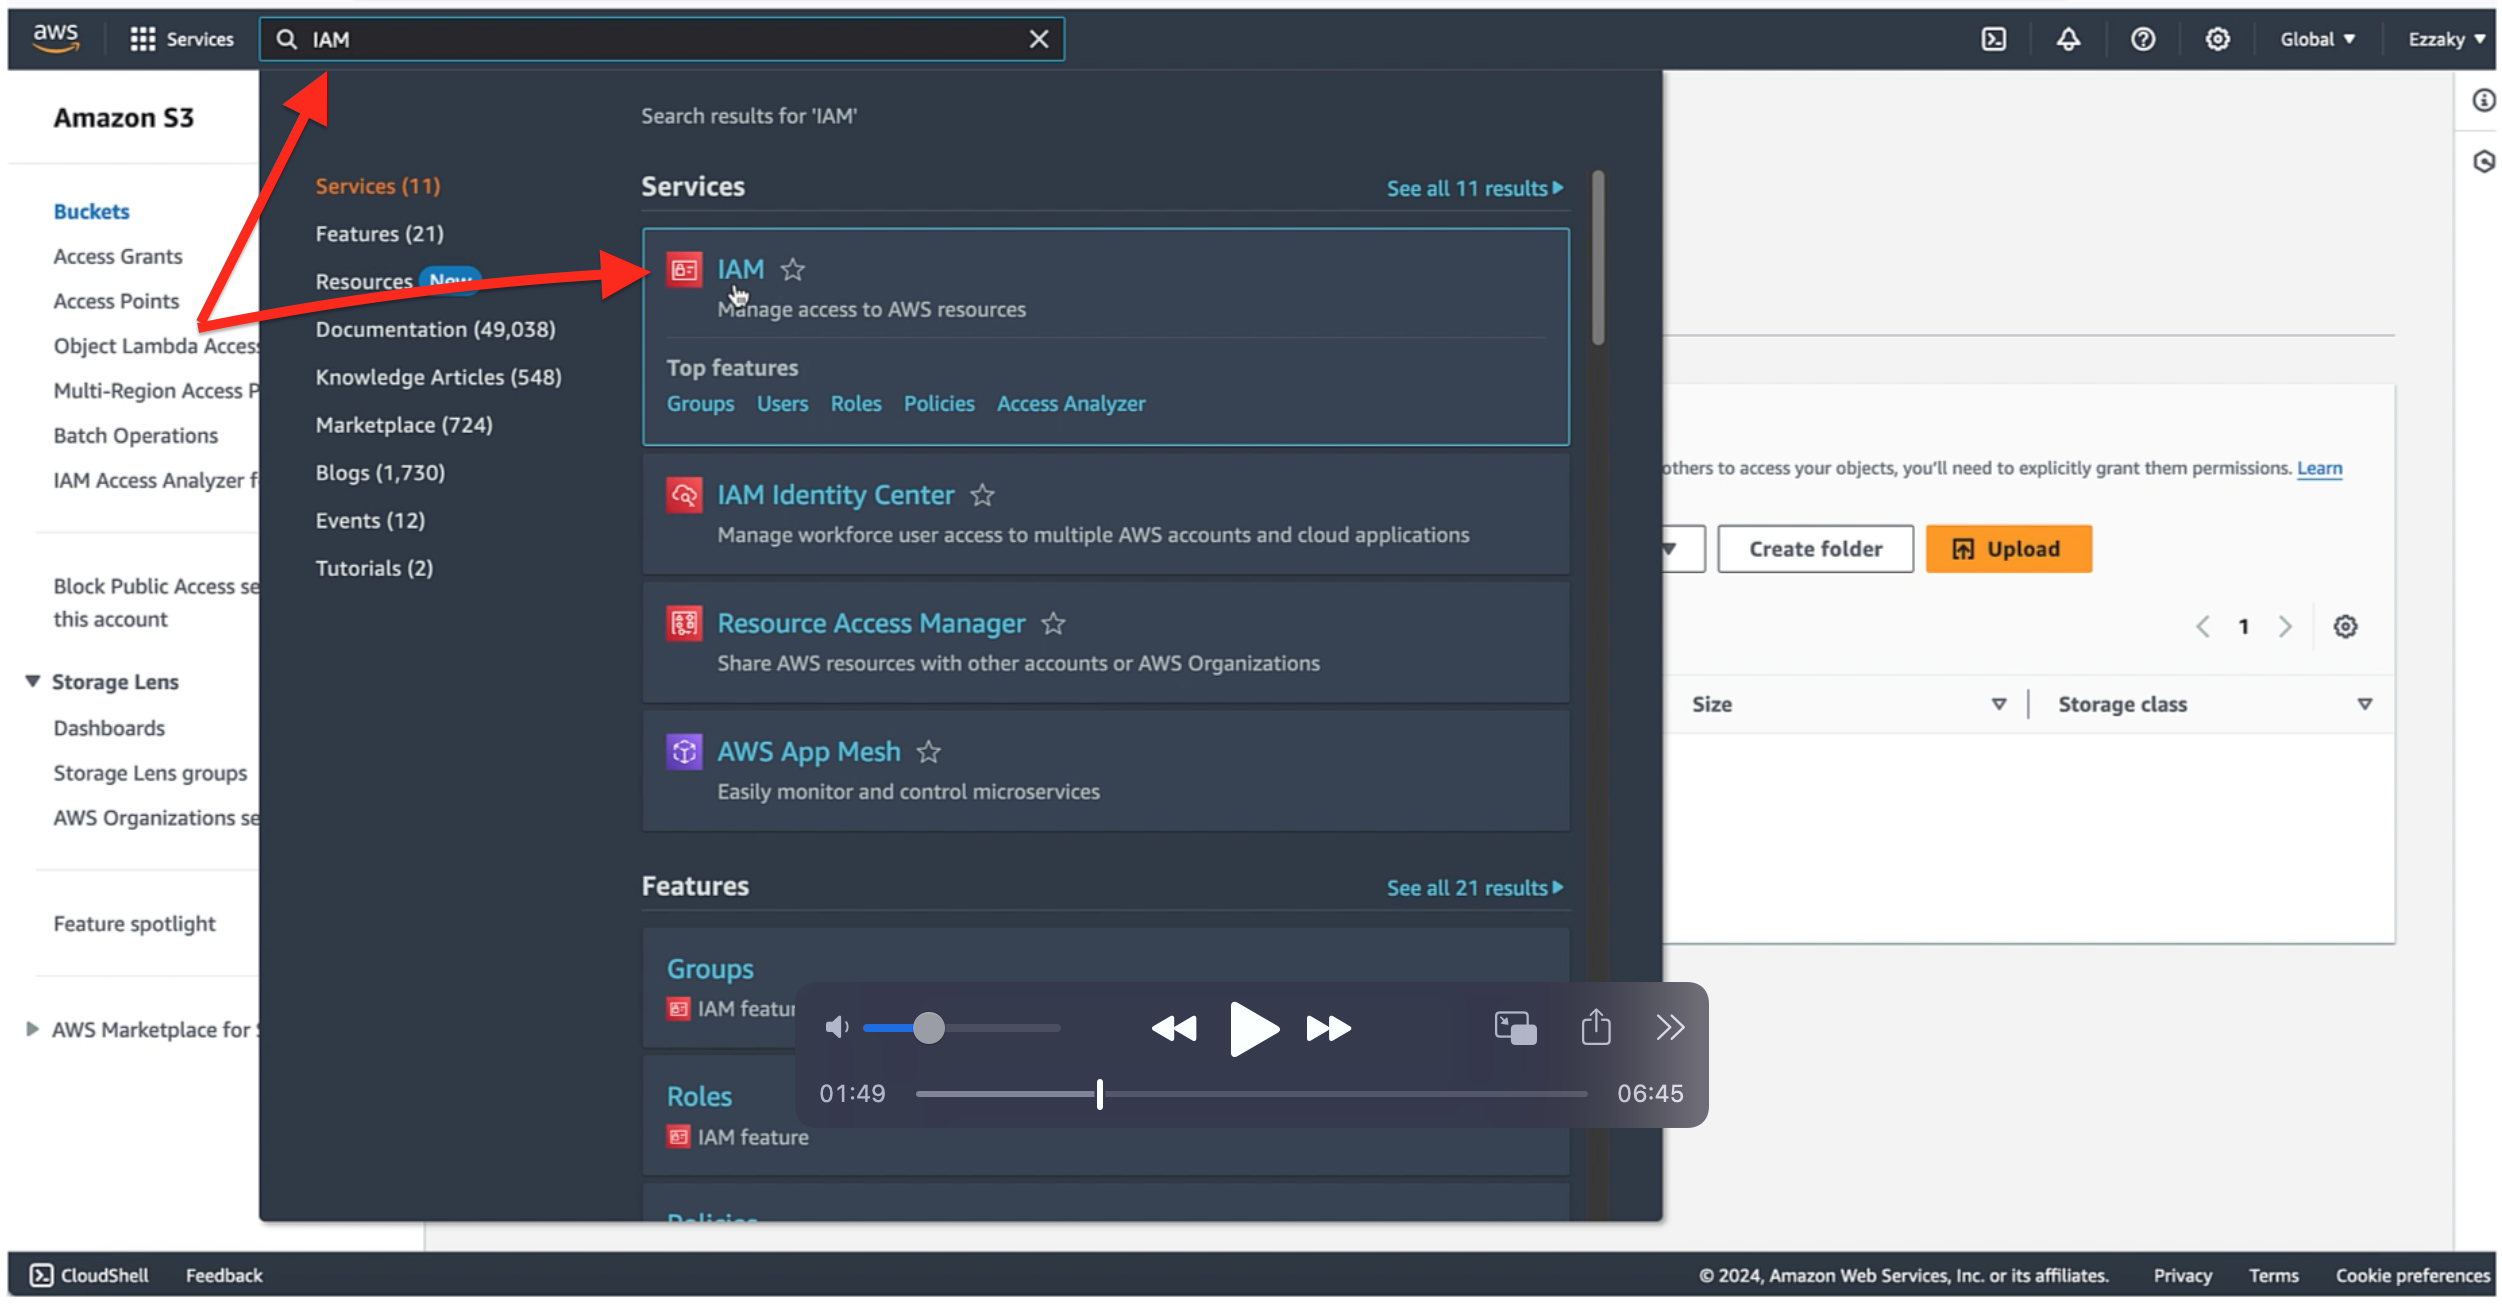
Now, let’s configure IAM for Green Backup. In the search bar, type “IAM” and choose it.
Step 3: Add a Security Policy
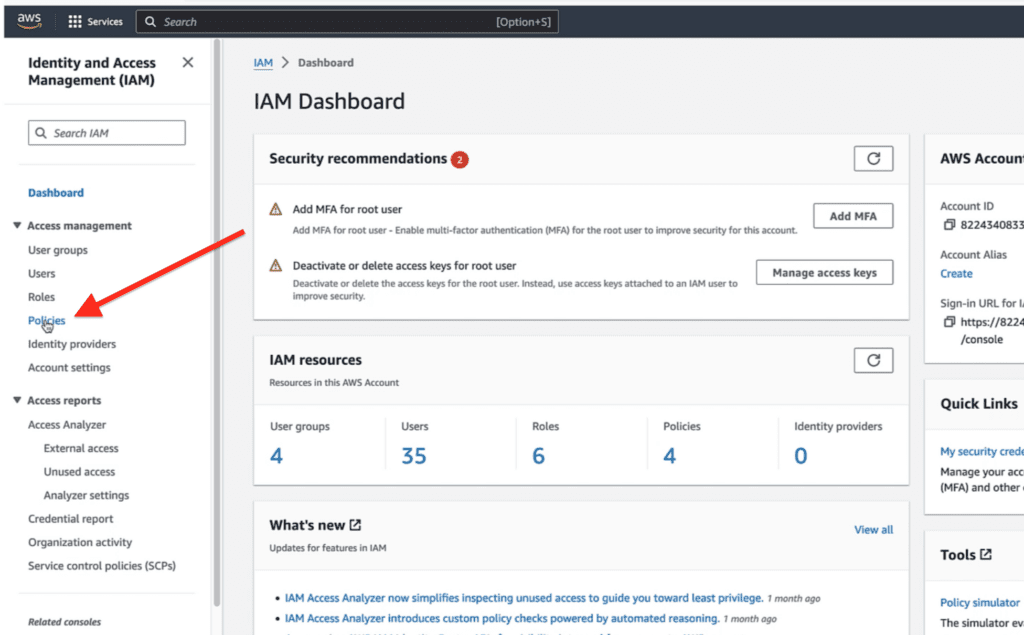
Navigate to “Policies” under the IAM dashboard.
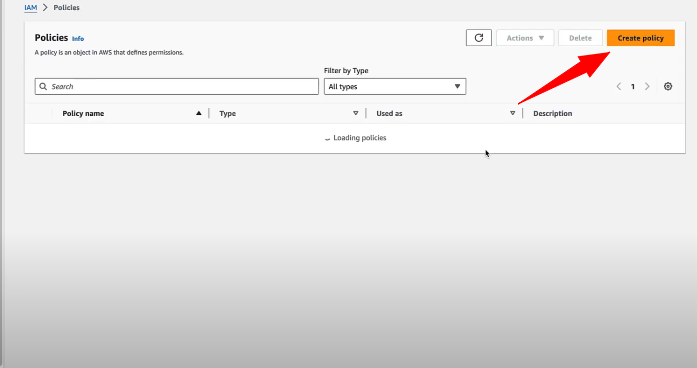
Proceed by selecting “Create Policy.”
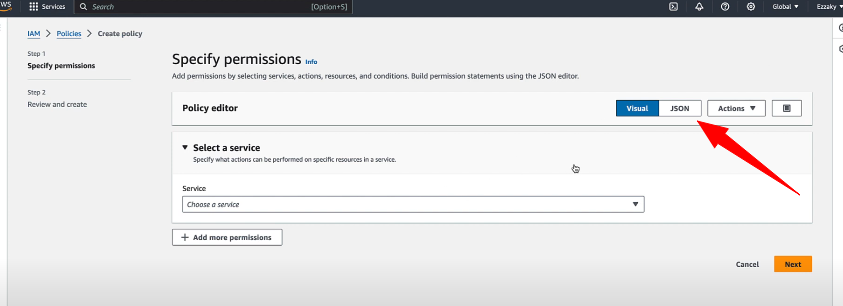
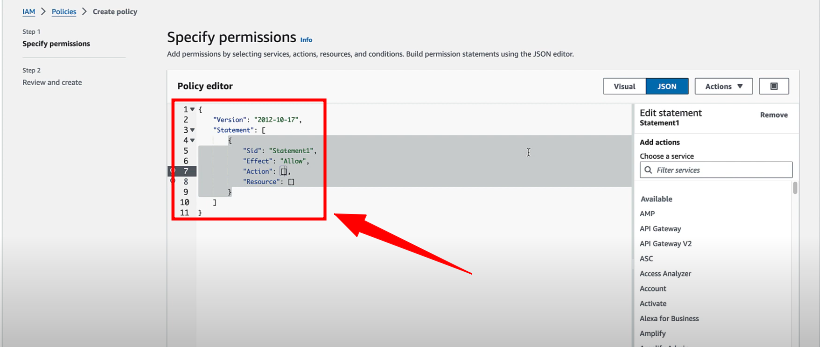
Choose the “JSON” option.
Copy this JSON code.
{
    "Version": "2012-10-17",
    "Statement": [
        {
            "Effect": "Allow",
            "Action": [
                "s3:ListBucket",
                "s3:GetBucketLocation",
                "s3:ListBucketMultipartUploads"
            ],
            "Resource": "arn:aws:s3:::BUCKETNAME",
            "Condition": {}
        },
        {
            "Effect": "Allow",
            "Action": [
                "s3:AbortMultipartUpload",
                "s3:DeleteObject",
                "s3:DeleteObjectVersion",
                "s3:GetObject",
                "s3:GetObjectAcl",
                "s3:GetObjectVersion",
                "s3:GetObjectVersionAcl",
                "s3:PutObject",
                "s3:PutObjectAcl"
            ],
            "Resource": "arn:aws:s3:::BUCKETNAME/*",
            "Condition": {}
        },
        {
            "Effect": "Allow",
            "Action": "s3:ListAllMyBuckets",
            "Resource": "*",
            "Condition": {}
        }
    ]
}
In the policy editor, replace the default code and paste the JSON code.
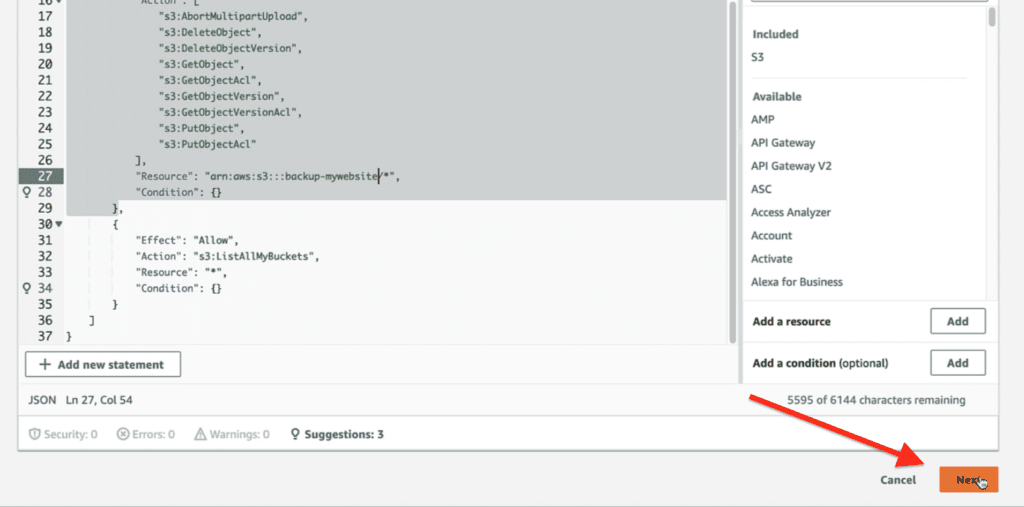
Replace the bucket name with the one you created, then click “Next.”
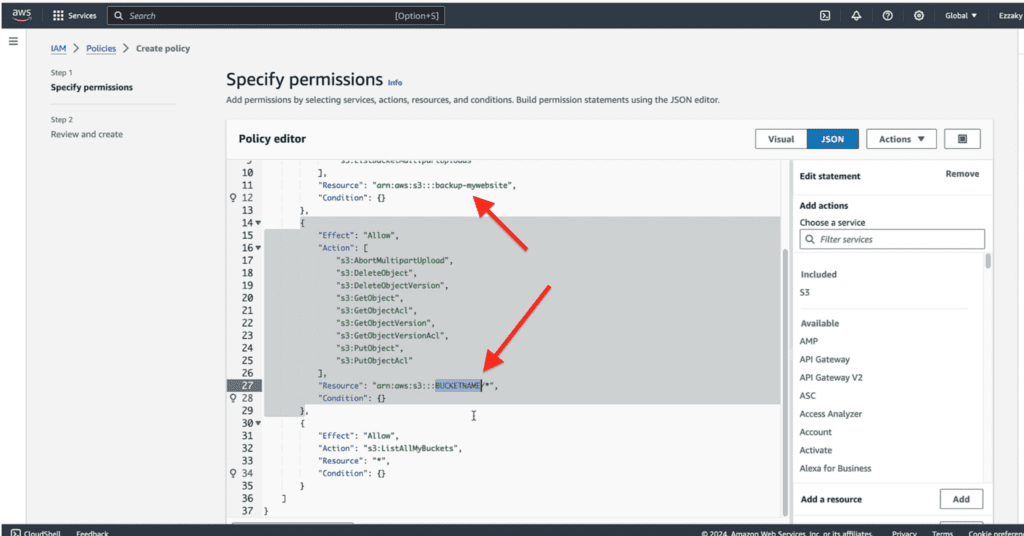
Make sure to replace “BUCKETNAME” with the unique name you’ve chosen for your bucket.
Click “Next” afterward.
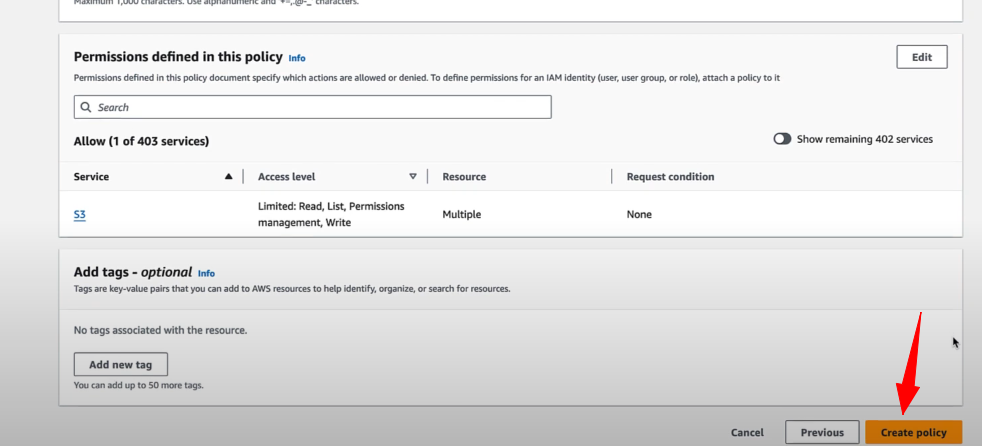
Choose a name for your policy.
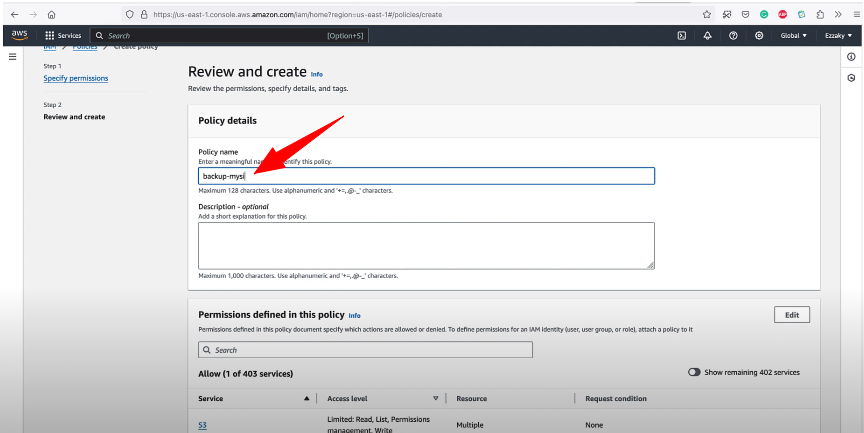
After naming your policy, click “Create Policy.”
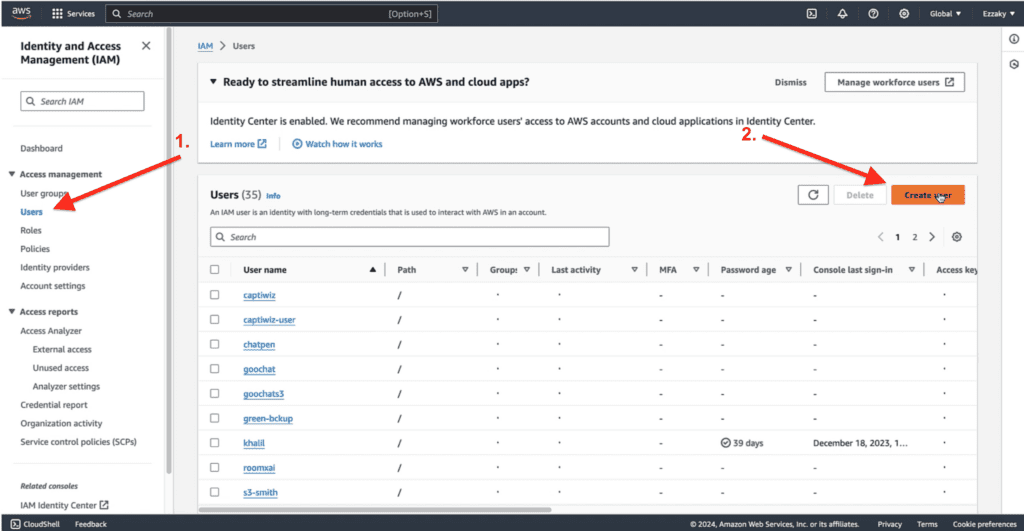
Step 4: Create a User
Navigate to “Users,” click on “Create User,” and then proceed to click “Create User” again.
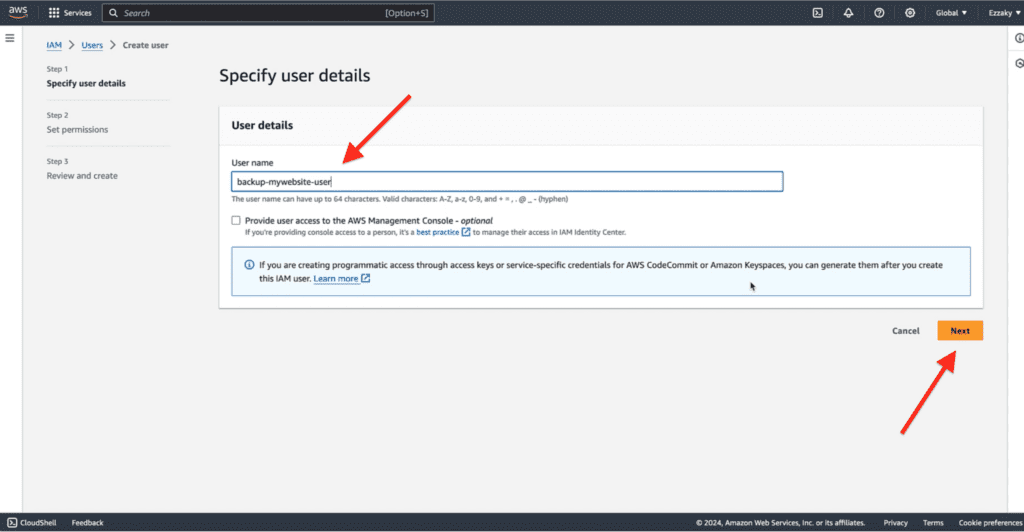
Select a username and click “Next.”
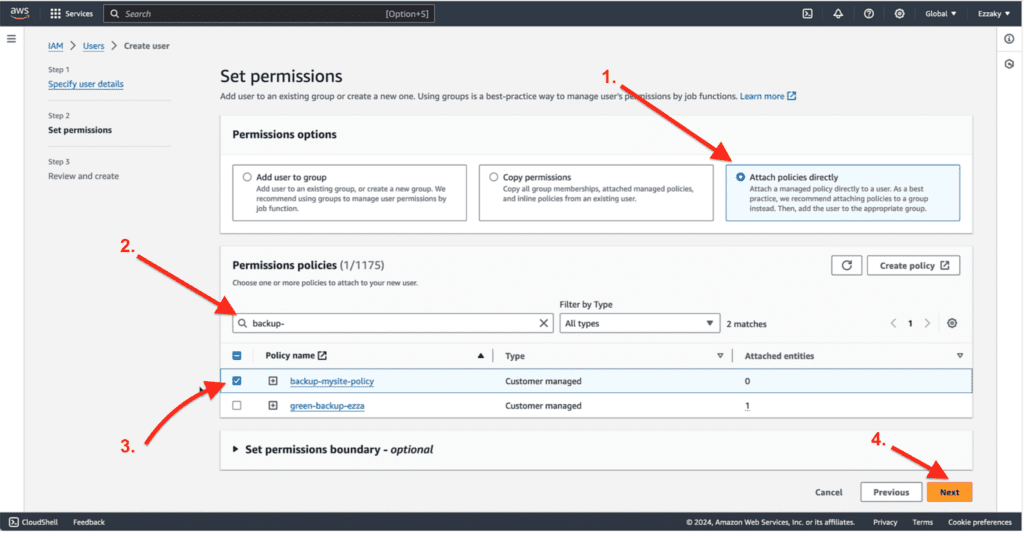
Then choose “Attach policies directly,” search for the policy you just created, check it, and click “Next.”
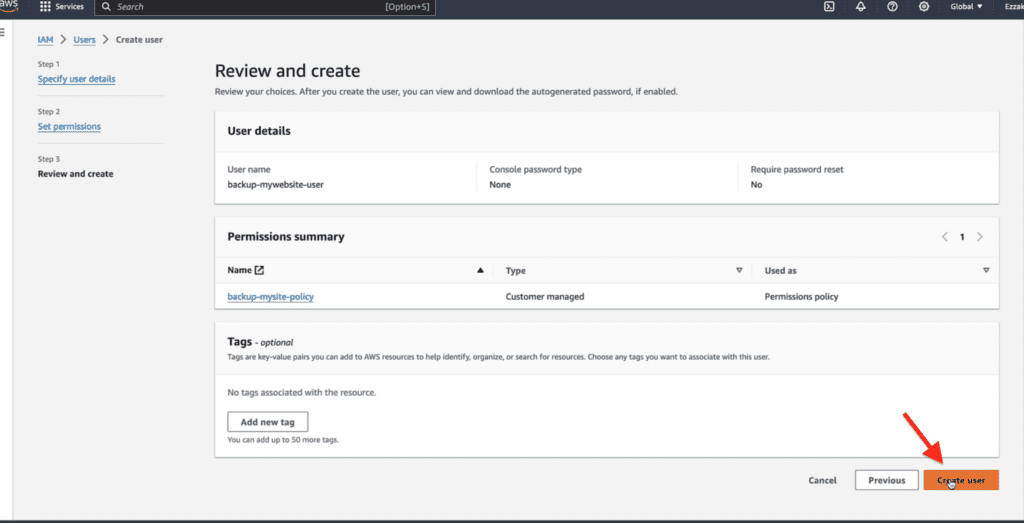
After configuring the policies, proceed to create the user.
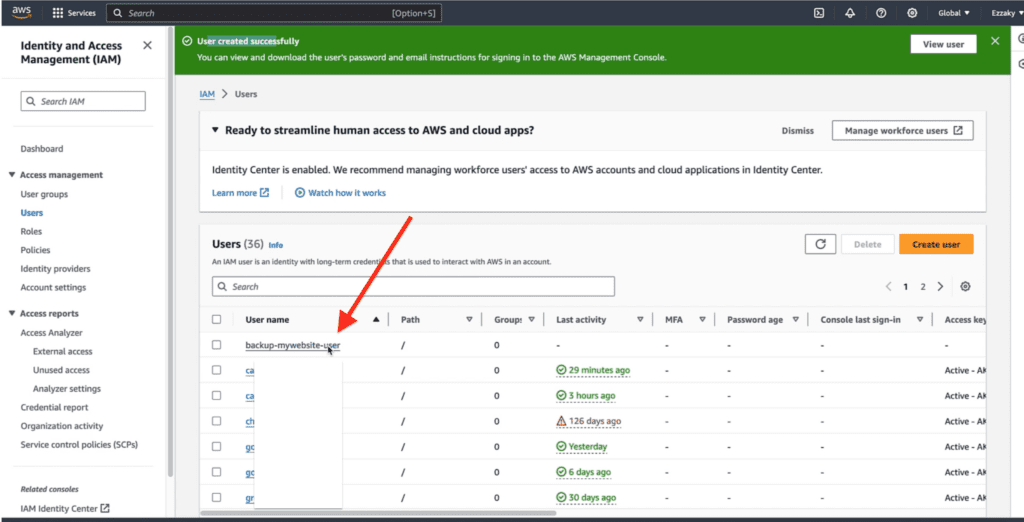
After creating the user, select it.
Navigate to security credentials.
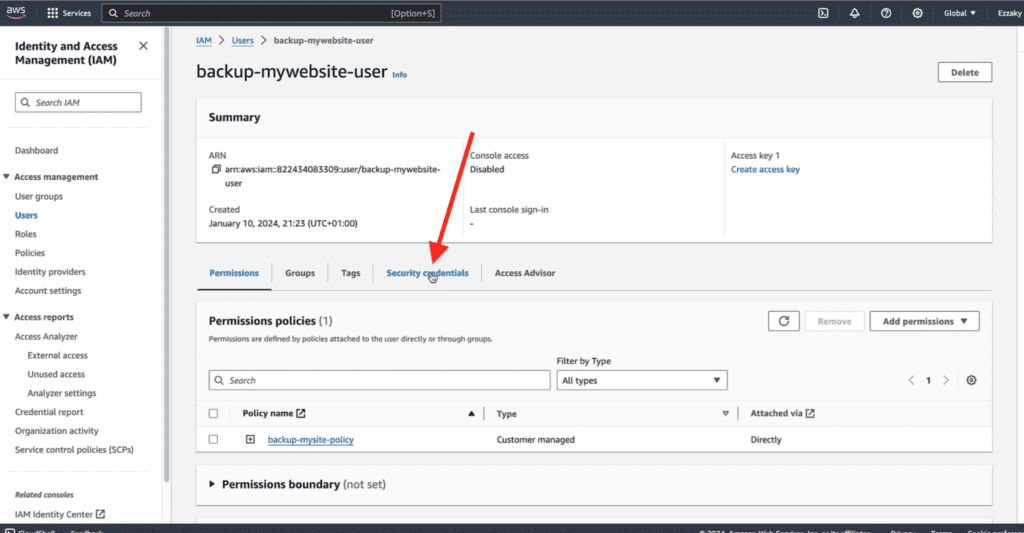
Scroll down and select “Create Access Key.”

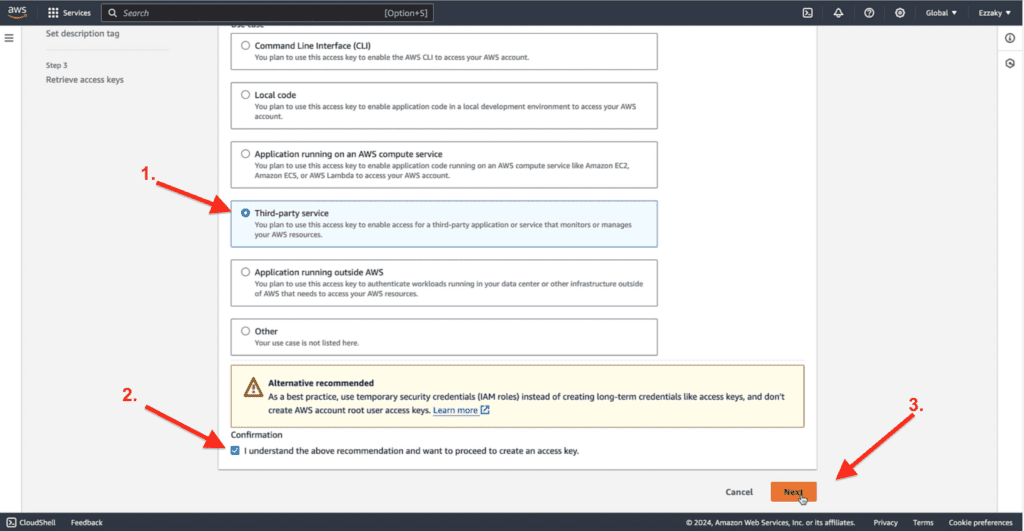
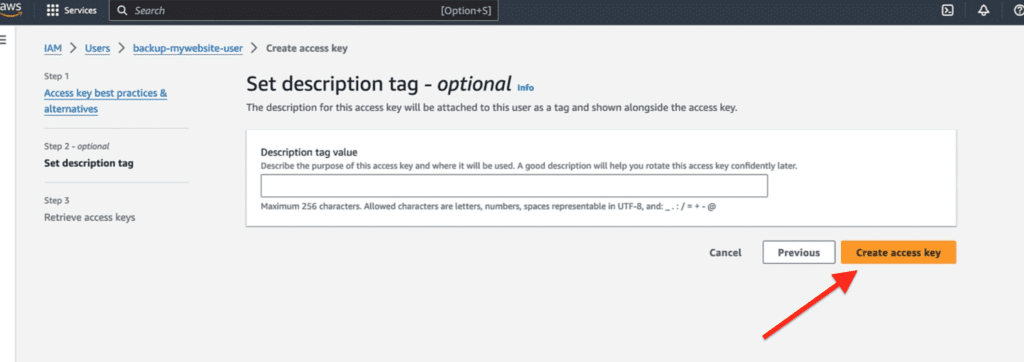
Select the third-party service, confirm your choice, and then click “Next.”
Click on “Create Access Key.”
Voila! Your access keys are now created. Copy the access key .
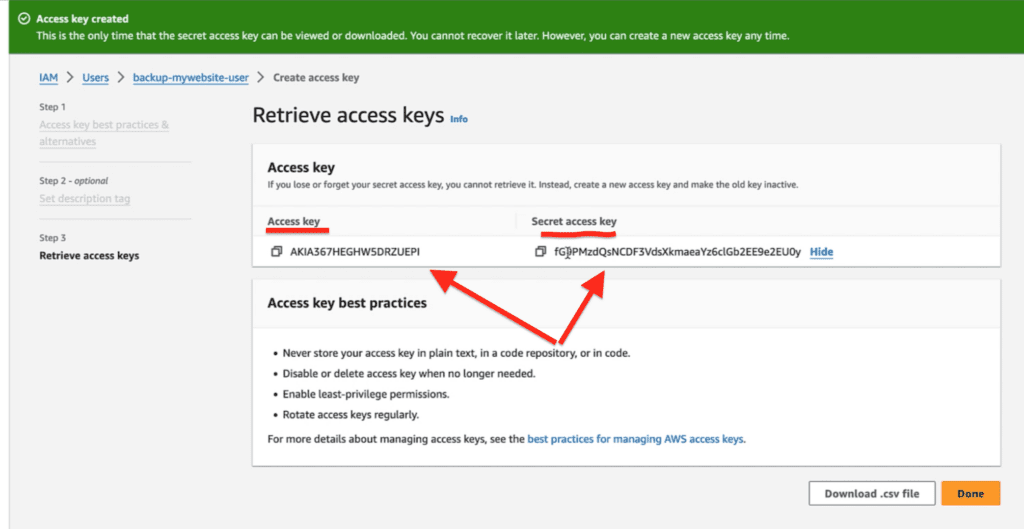
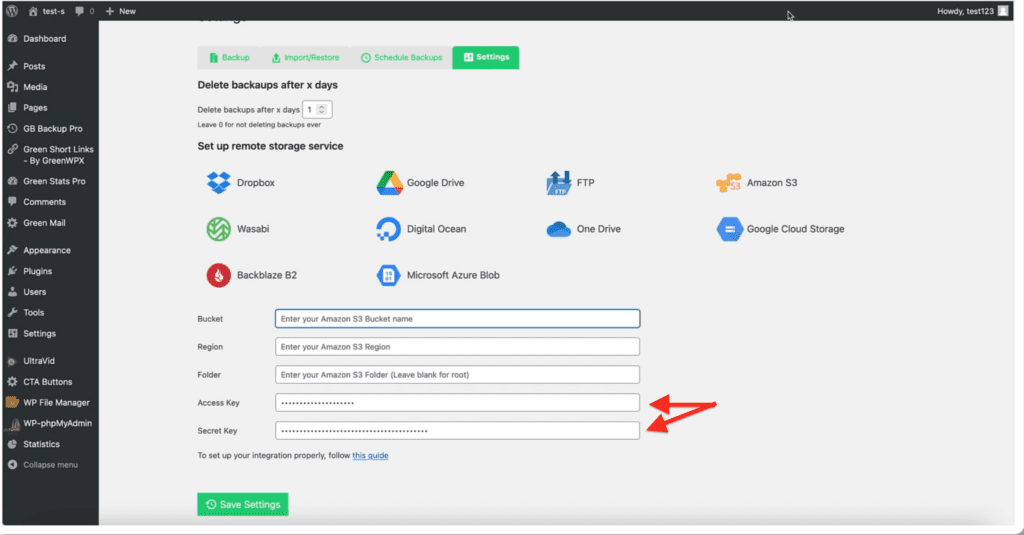
Navigate to your green backup settings, paste the access key under Amazon S3. Then, go back, reveal the secret access key, copy it, and paste it.
To obtain the region code, go to Amazon S3, click on the bucket, then select your newly created bucket. Click on “Properties,” and copy the region code.
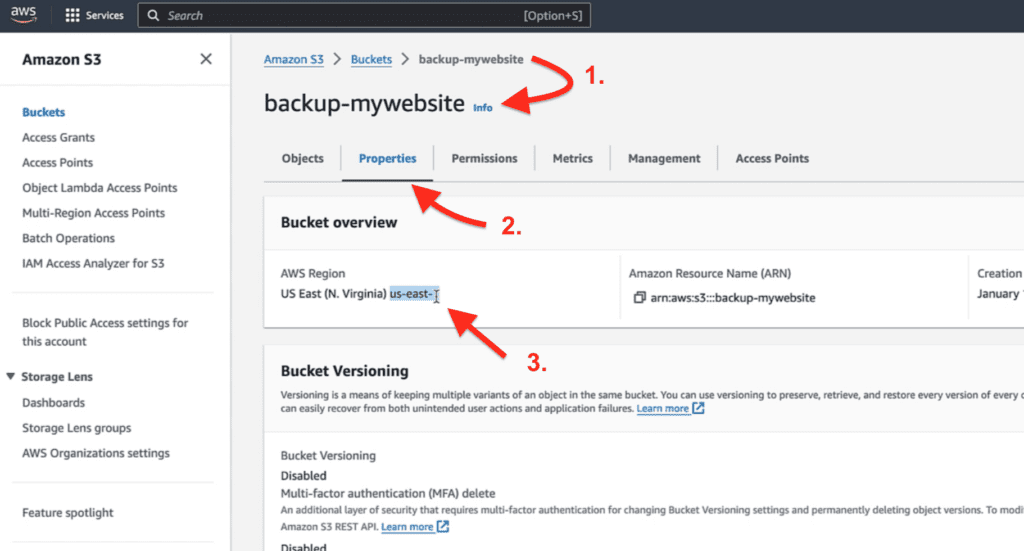
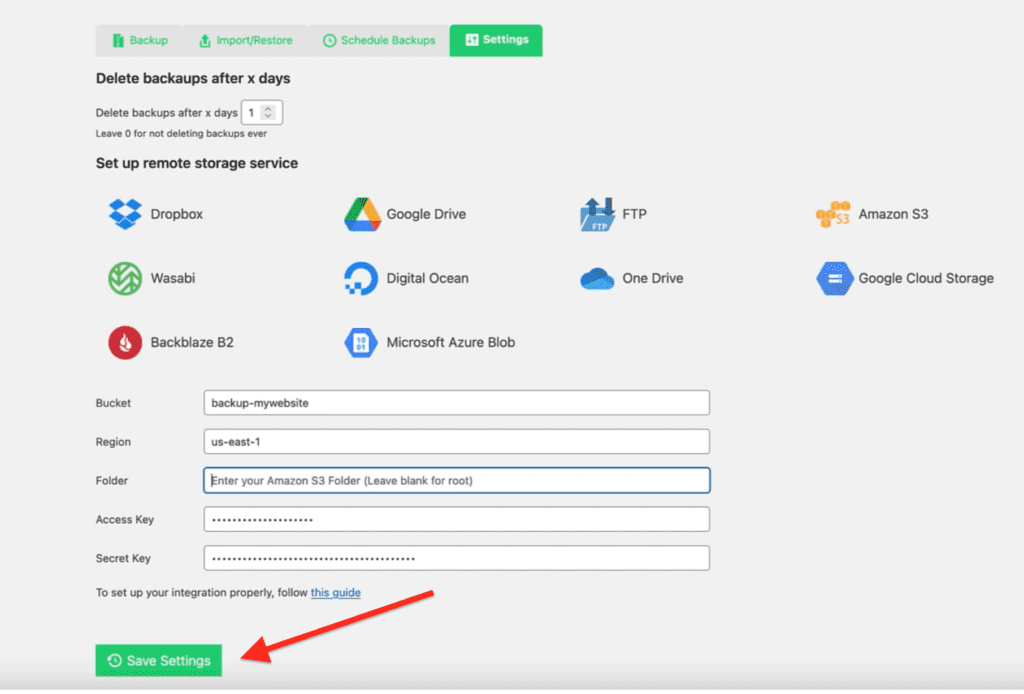
Now, paste your bucket name and region code from your Amazon S3 settings.
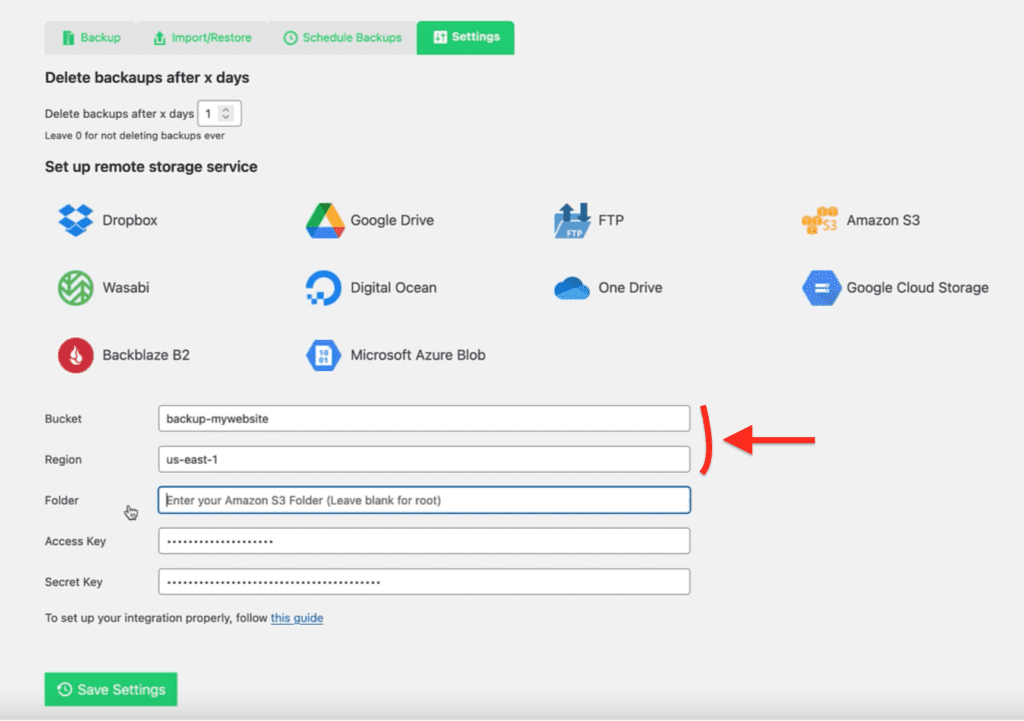
Optionally, you can designate a folder within your bucket to store backups.
Click on “Save Settings.”
Step 5: Create an Amazon S3 Backup
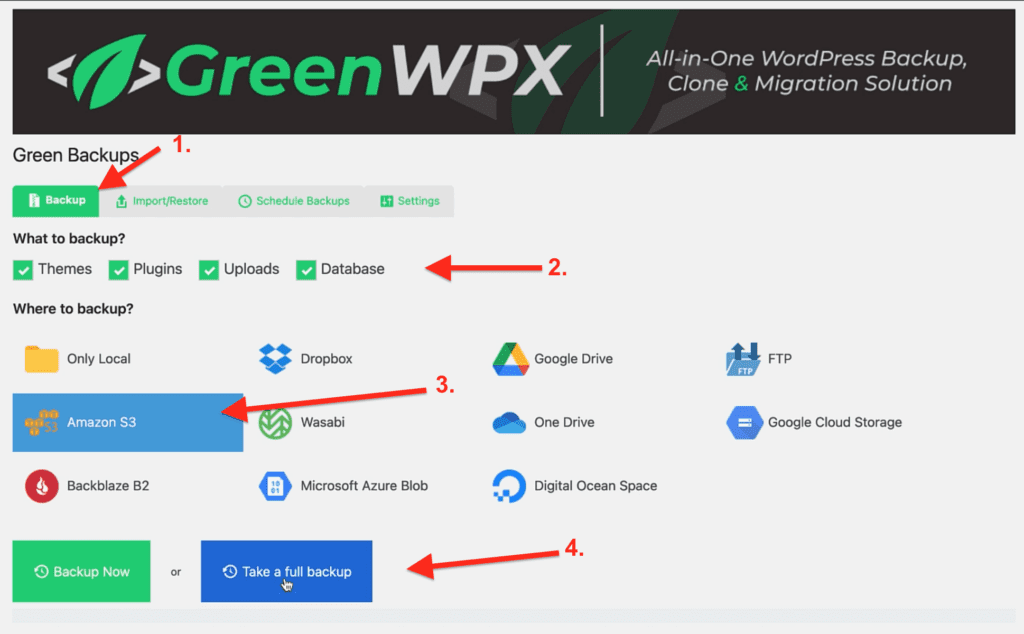
To create an Amazon S3 backup with the connection established, go to the “Backups” tab in Green Backup and customize your preferences. Choose what to back up, whether it’s themes, plugins, uploads folder, and database, or a full backup. Select Amazon S3 as the storage location, and wait for the backup progress bar to complete.
Wait for the backup progress bar to complete.
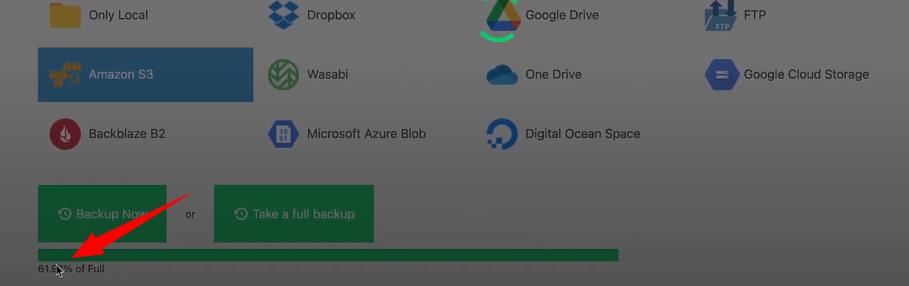
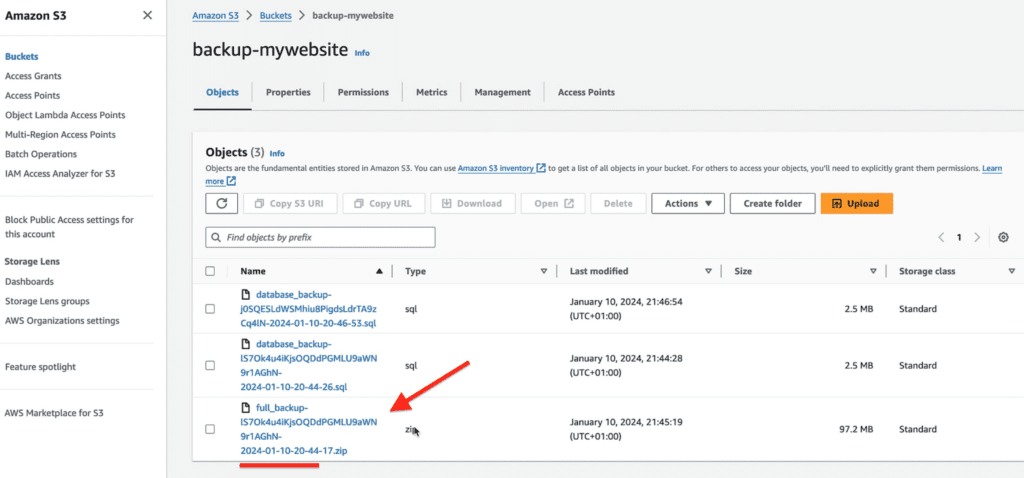
After completion, verify your Amazon S3 bucket to confirm the successful upload. Getting backups to Amazon S3 provides peace of mind. Now, let’s set up automated backups.
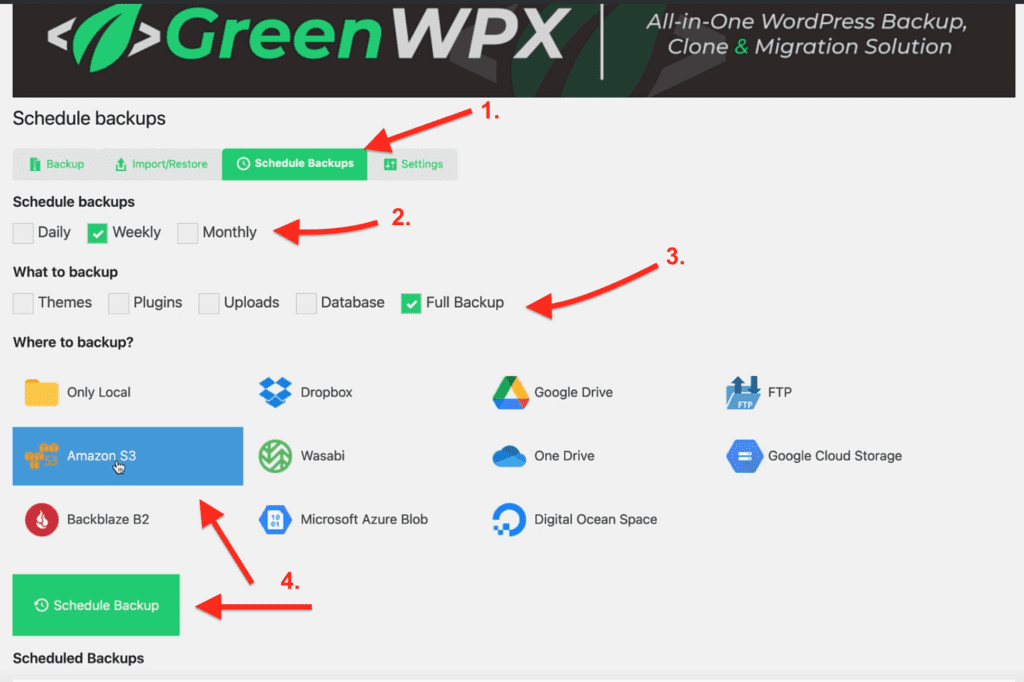
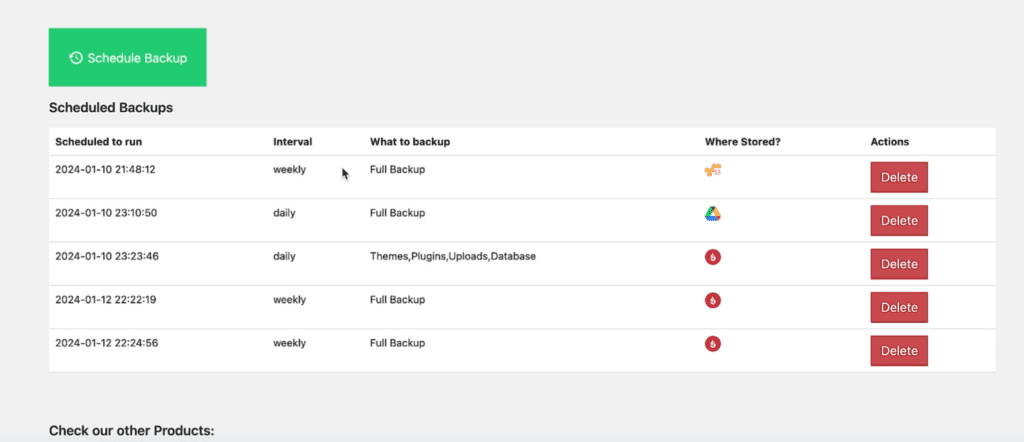
Step 6: Set Up Automatic Backups to Amazon S3
In the “Schedule” tab, create a new schedule, set your preferred frequency, choose Amazon S3 as the storage location, and enable the schedule restore from Amazon S3.
How to Restore Your Amazon S3 Backup
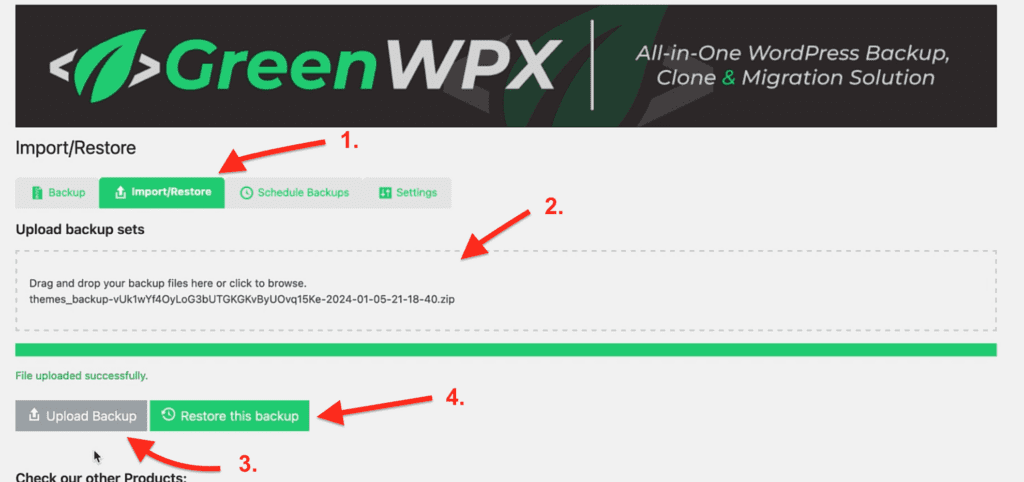
In your Amazon S3 account, find the bucket containing Green Backup files. Choose the archive file and download it. If you can access your WordPress dashboard, navigate to Green Backup » Import and upload the archive file. If not, employ cPanel or an FTP client to upload both the archive and installer files to your website. After uploading, follow the Green Backup installation wizard to restore your site.
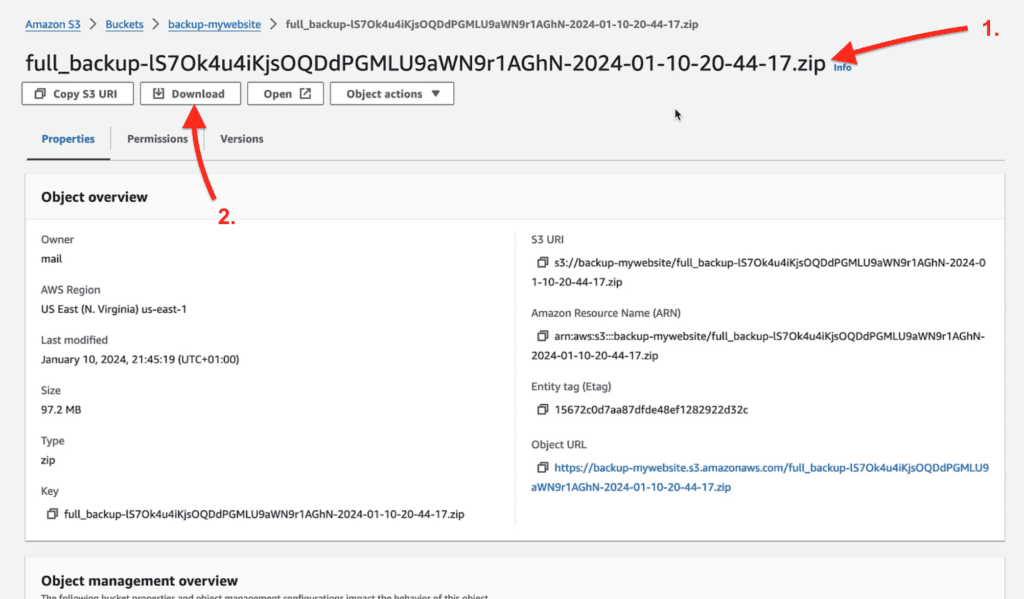
If you need to restore your site, it’s a breeze. Download the backup from Amazon S3, identified by the file name containing the date and time it was taken. Utilize the import feature in Green Backup to restore it, bringing your WordPress site back to the state specified in the file name. And there you have it.
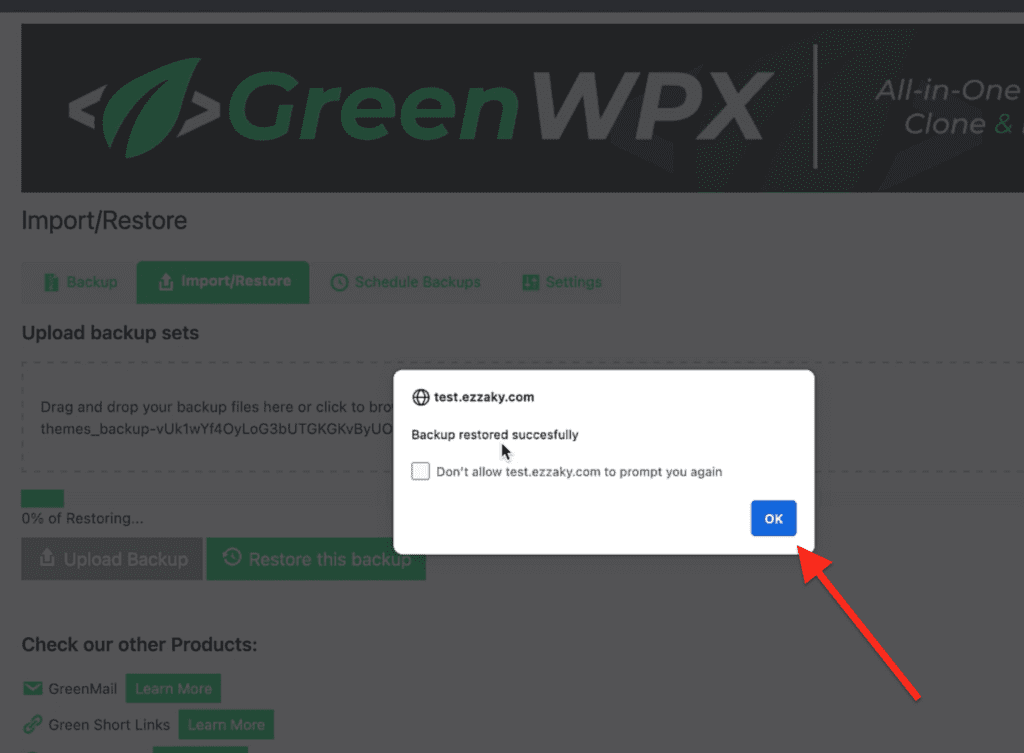
Finally, click “Okay.”
Conclusion
Congratulations! You’ve successfully set up Green Backup to seamlessly back up your WordPress site to Amazon S3. Your website’s security is now in good hands. If you found this tutorial helpful, give it a thumbs up, and consider upgrading to Green Backup Pro for even more robust backup features.
Happy backing up!
Download Green Backup Pro Now!