If you’re a WordPress site owner, safeguarding your valuable content through regular backups is paramount. In this step-by-step guide, we’ll show you how to effortlessly back up your WordPress site to Microsoft Azure Blob Storage using the robust Green Backup plugin.
Prerequisites: Get Green Backup Pro
Before we get started, make sure you have the Green Backup Pro version to unlock the full backup potential. Head over to Green Backup Pro to upgrade your plugin.


Step 1: Install Green Backup Pro
Begin by installing Green Backup Pro on your WordPress site. Activate the plugin and navigate to the Green Backup settings, paying special attention to the DigitalOcean Spaces tab.
Step 1: Once you have purchased the right plan for you, log in to your GreenWPX member area to download the plugin and copy the activation key.


- Download and save the plugin zip file to your desktop.
- Copy your Serial key.
Step 2: Install the plugin on your WordPress site.
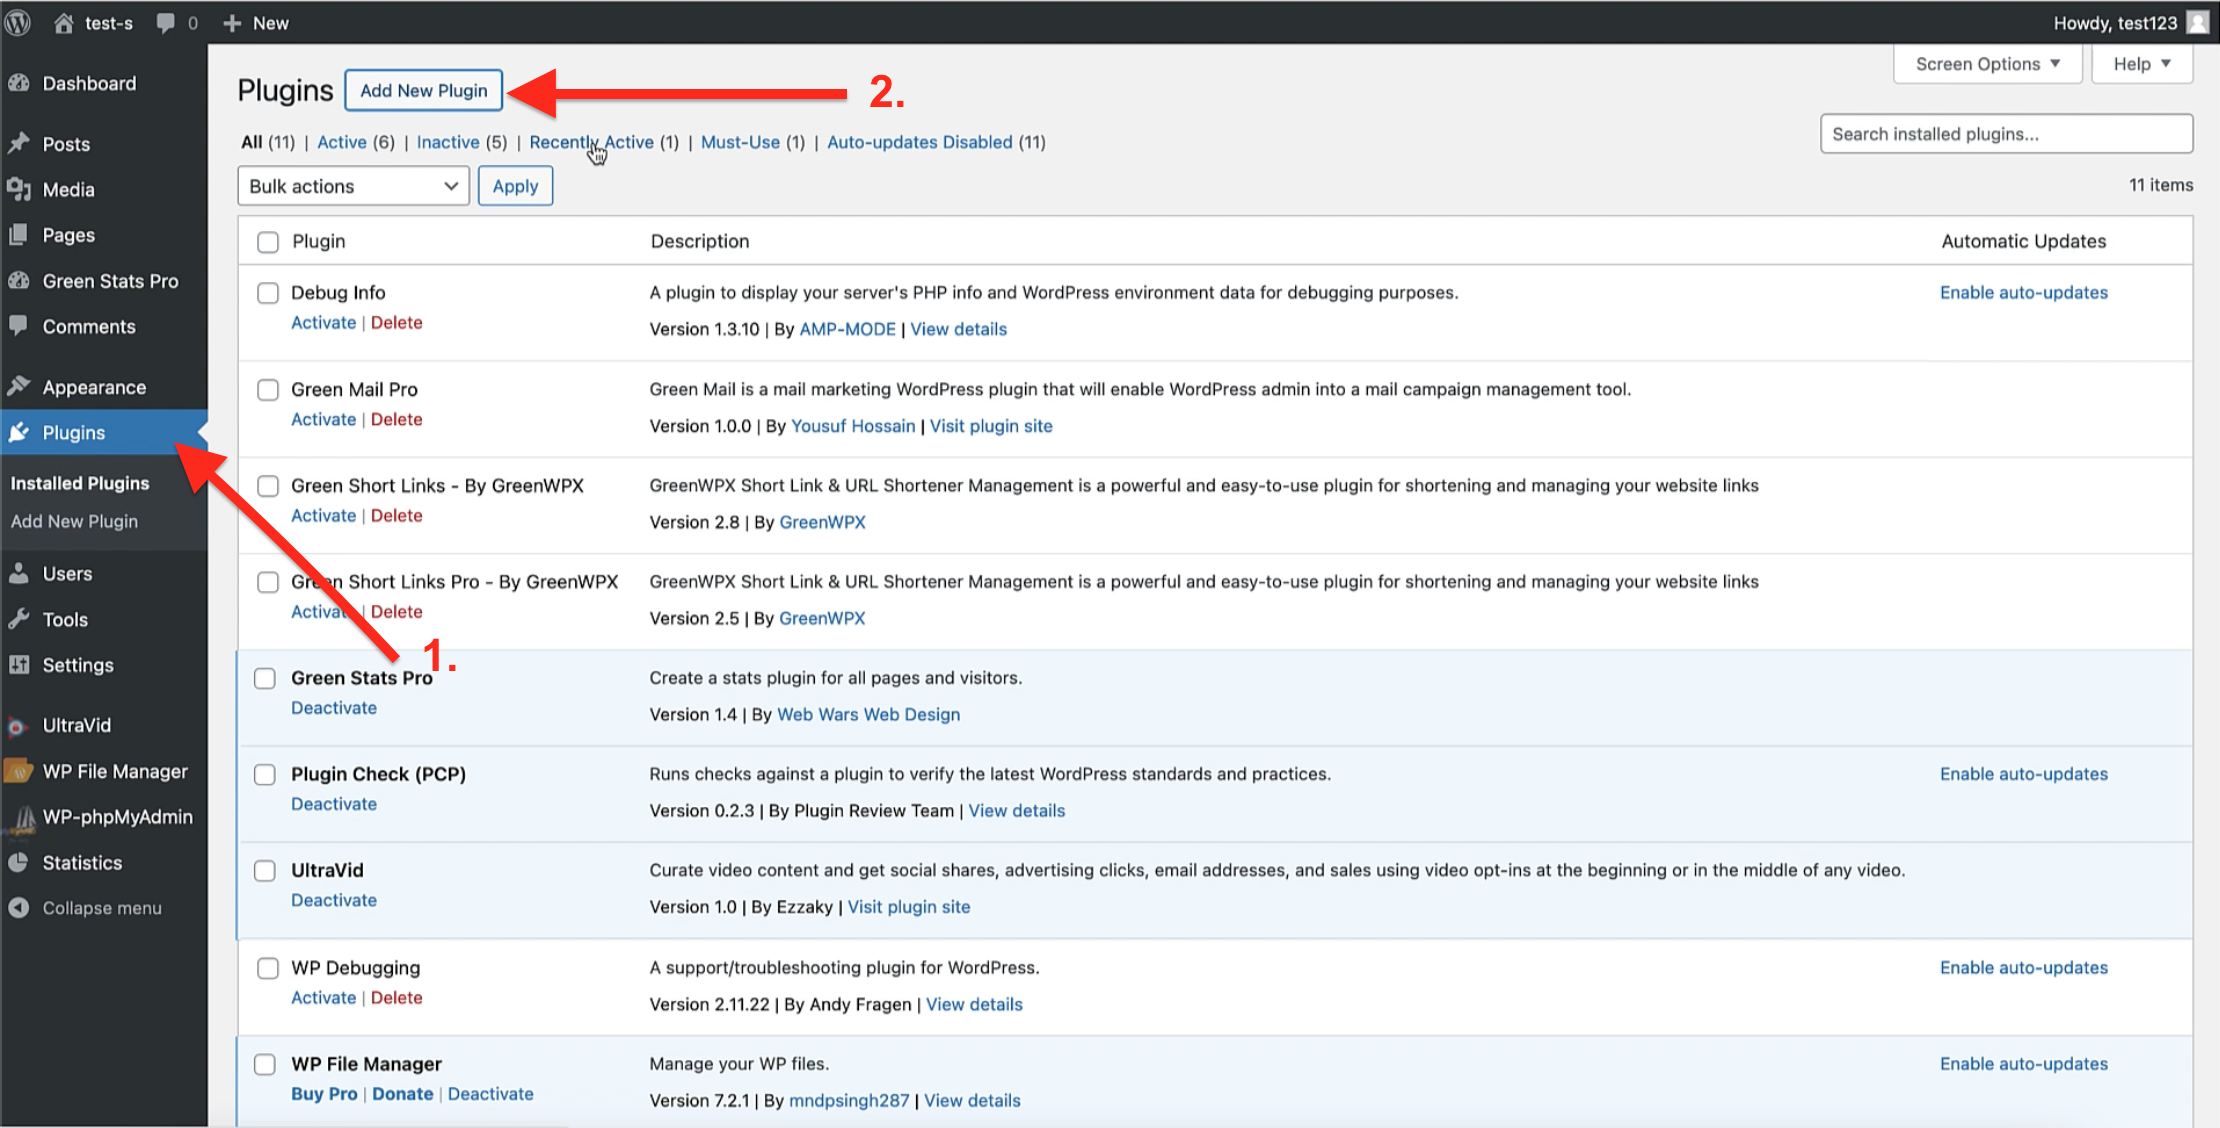

- On your WordPress Dashboard click on the Plugins on the left side menu.
- On The Plugins page click “Add New Plugin”.
Step 2.1 : Import the zip file of the downloaded plugin.
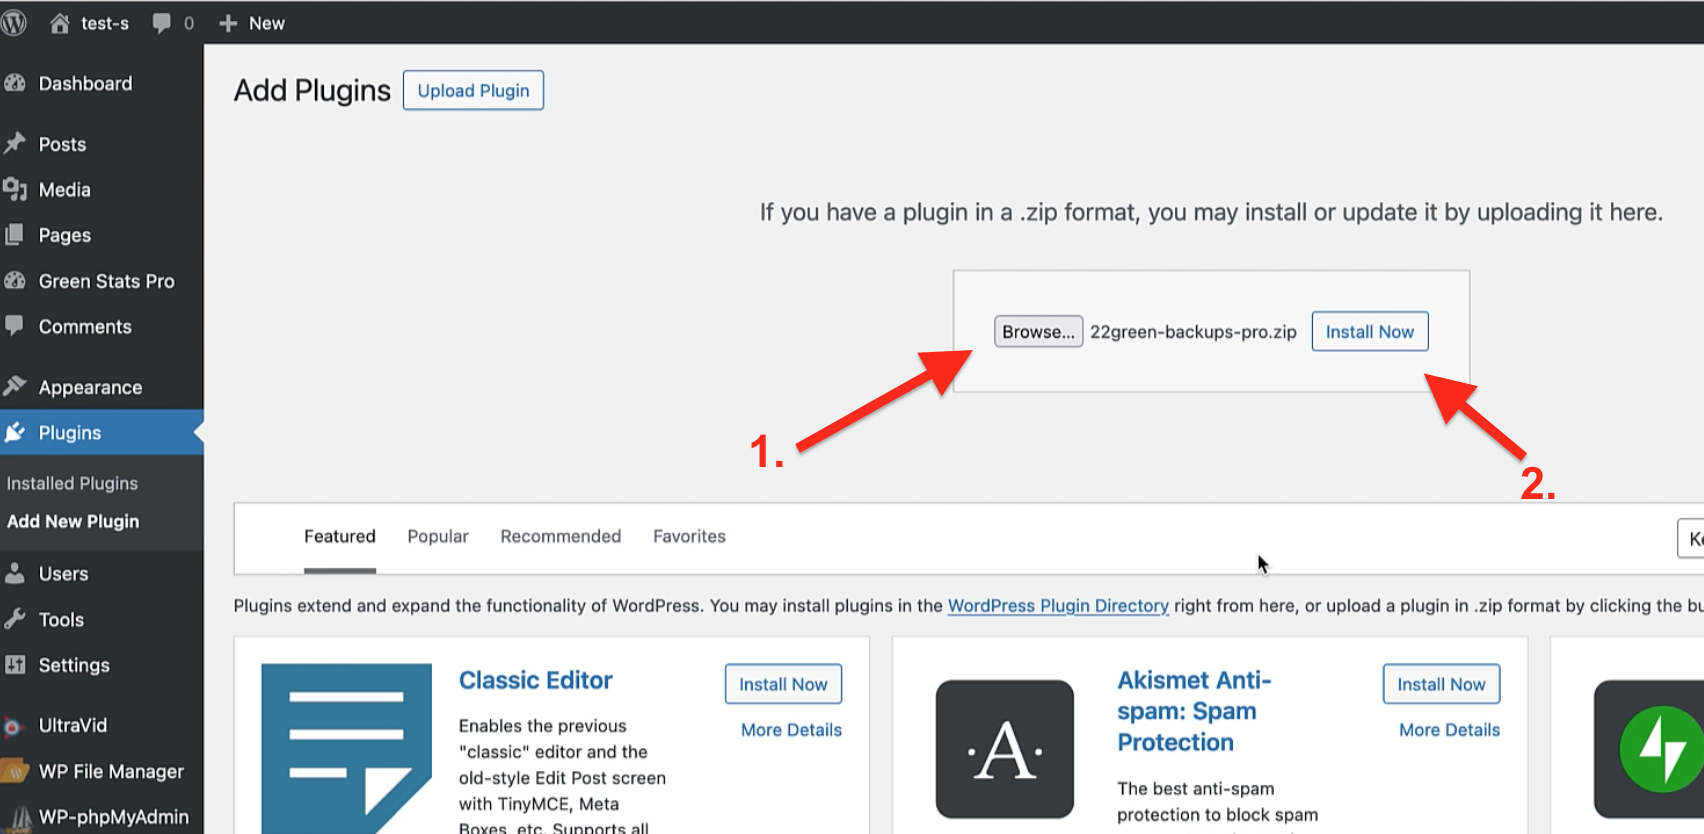

- Click to browse your desktop and choose the zip file of the plugin that you downloaded from the member area.
- Click “Install Now”
Then you will be redirected to this page, and click the “Activate Plugin” button.
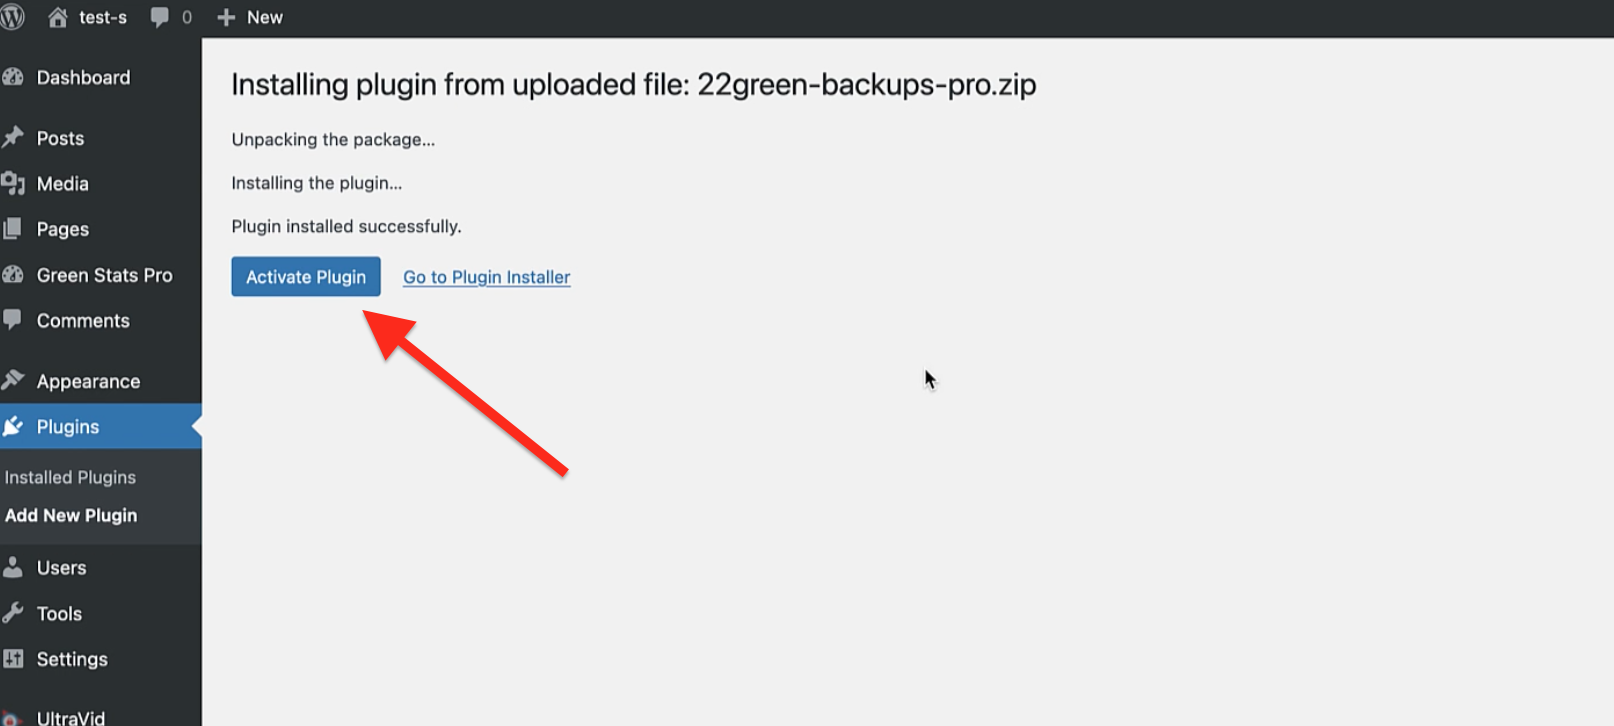

And the Plugin it will be Activated:
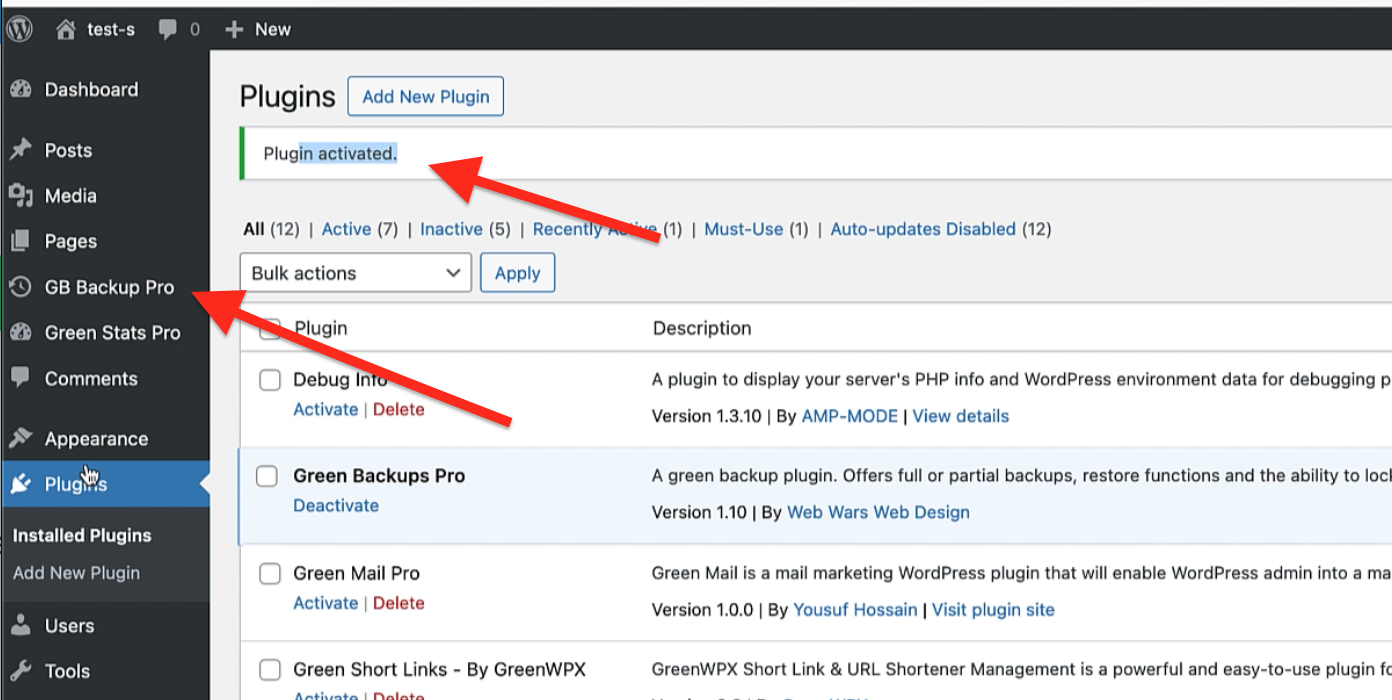

Step 3: Active The Pro Version:
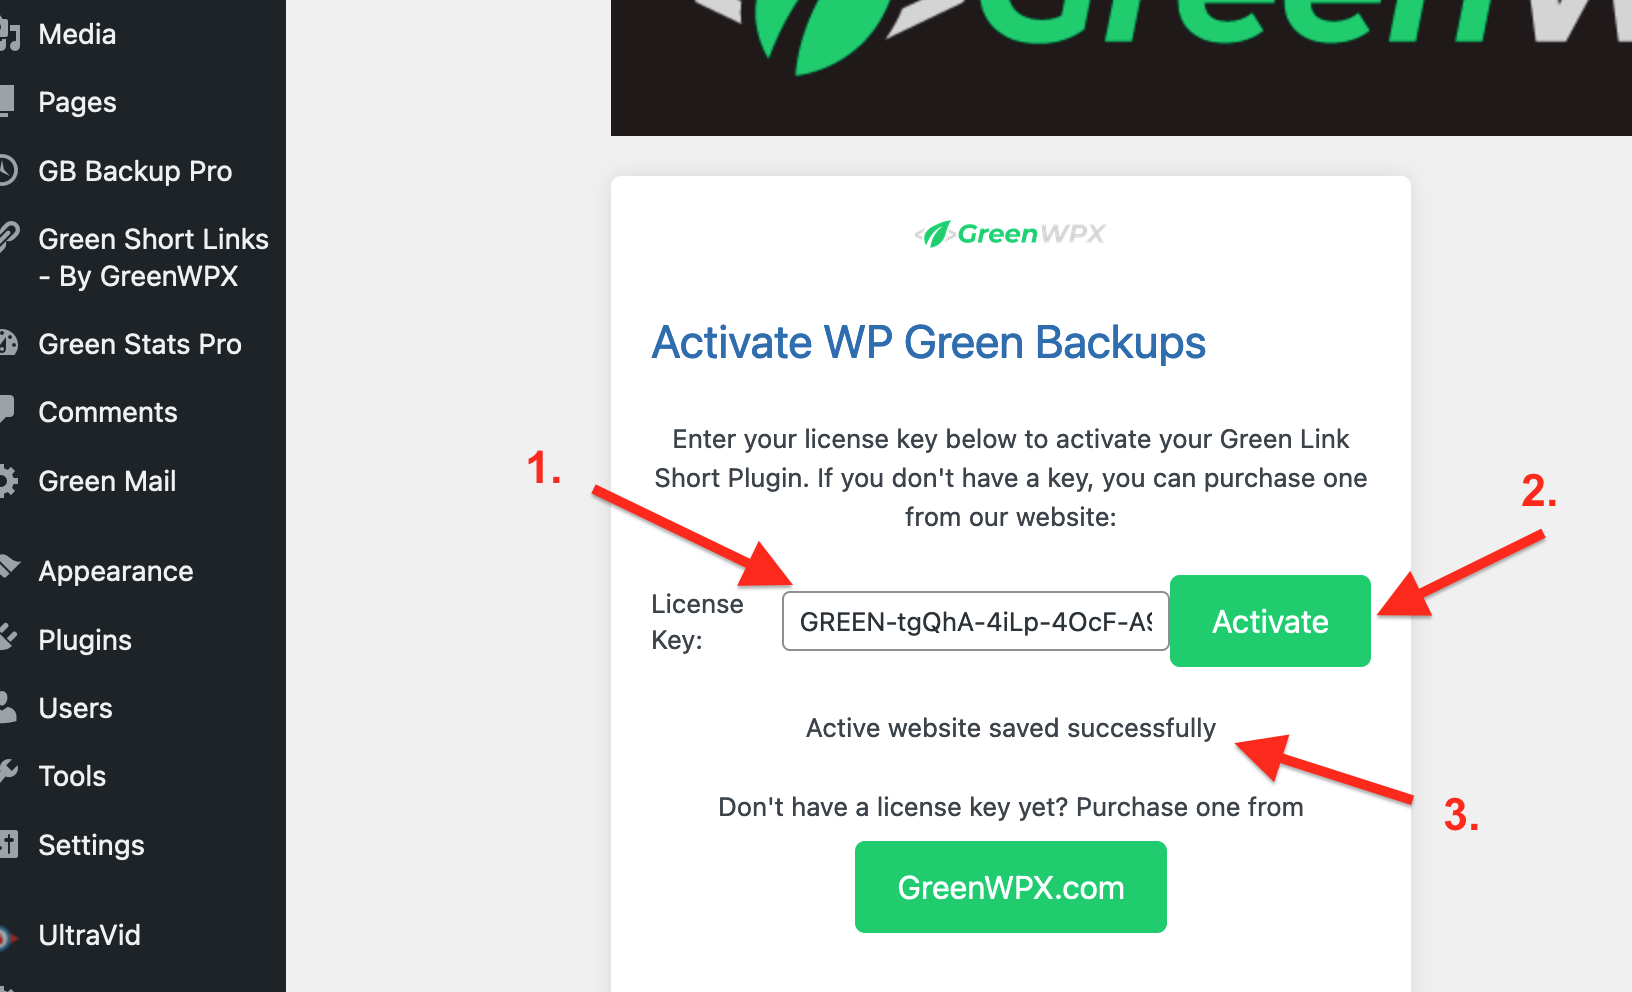

- Paste the license key that you obtained from the GreenWPX member area.
- Click the “Activate” button.
- Congratulations! Once you receive that message, you are good to go. Let’s move on to the next step.
Step 2: Set Up Microsoft Azure Blob Storage
Begin by searching for the Azure portal on Google and accessing the Microsoft Azure portal. If you don’t have a Microsoft Azure account, create one – it’s free.
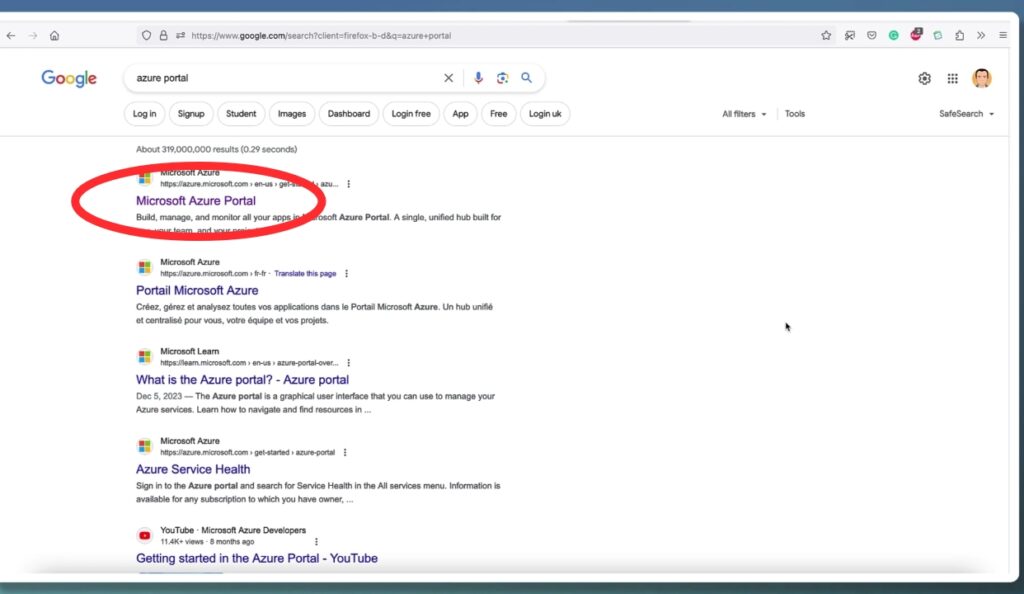

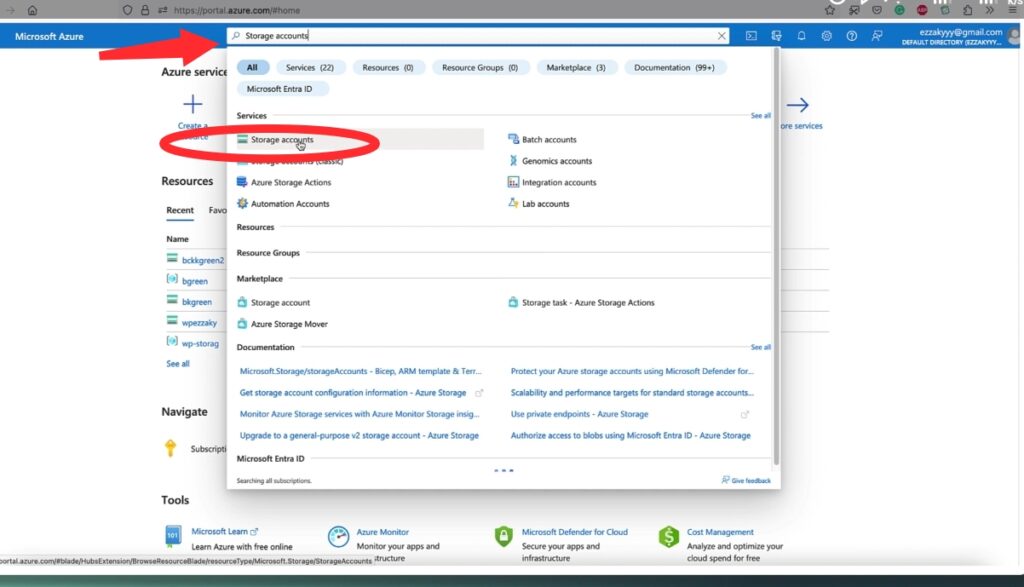
After logging in, go to the search bar and look for “storage accounts,” then click on it.

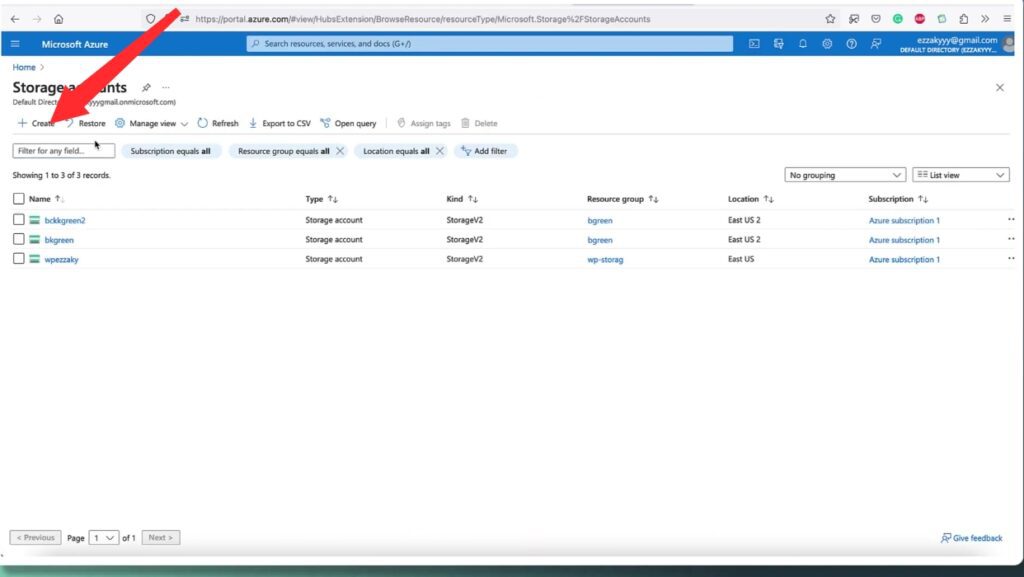
Next, click on the “Create” button.

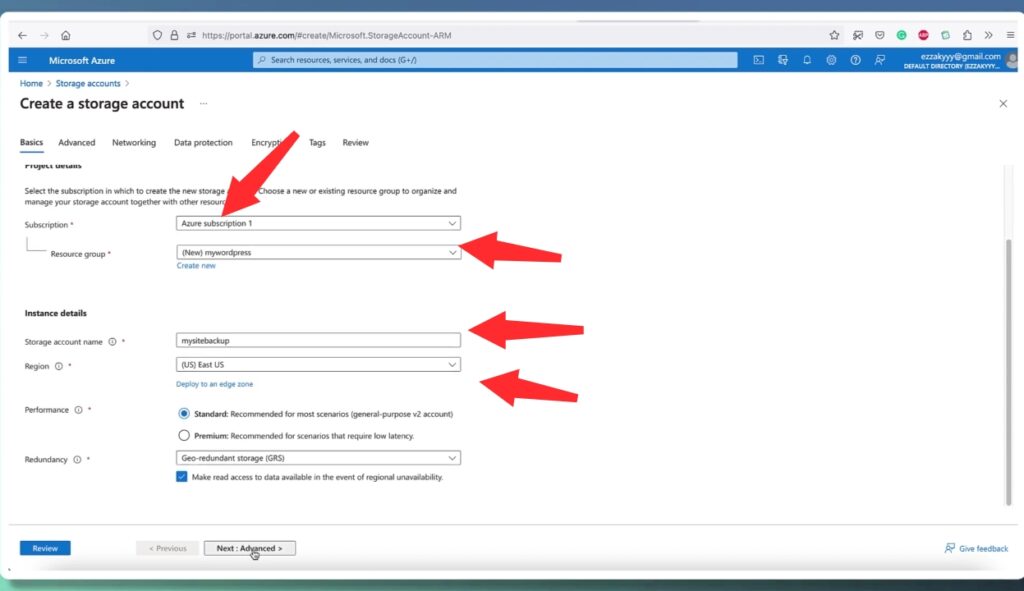
Choose your subscription, create a new Resource Group by giving it a name. Now, provide a unique name for your storage account and select the region closest to your server.

Keep the remaining settings as default and proceed to the next step.
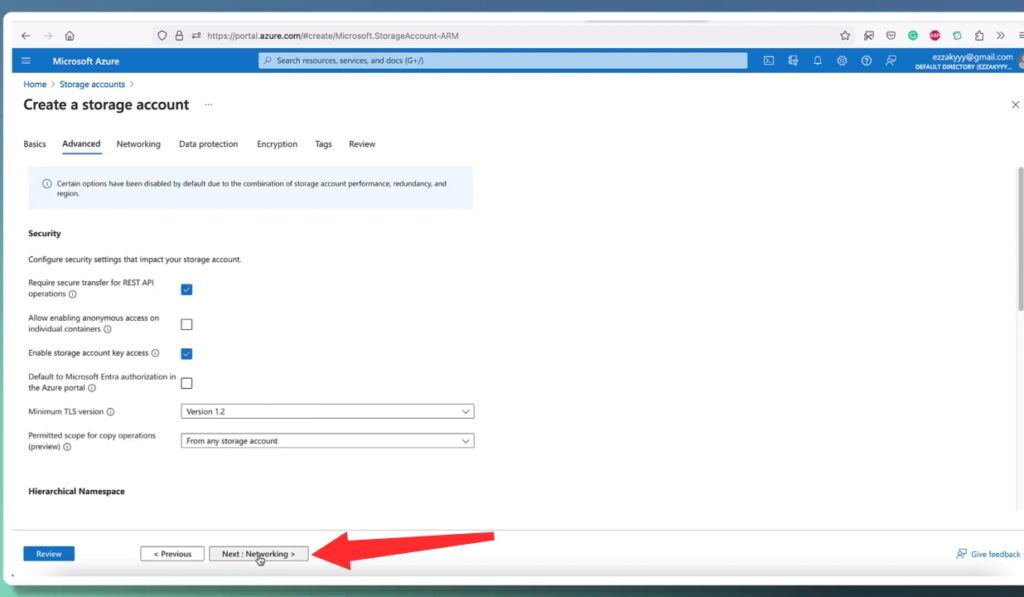

Click “Next” to proceed.
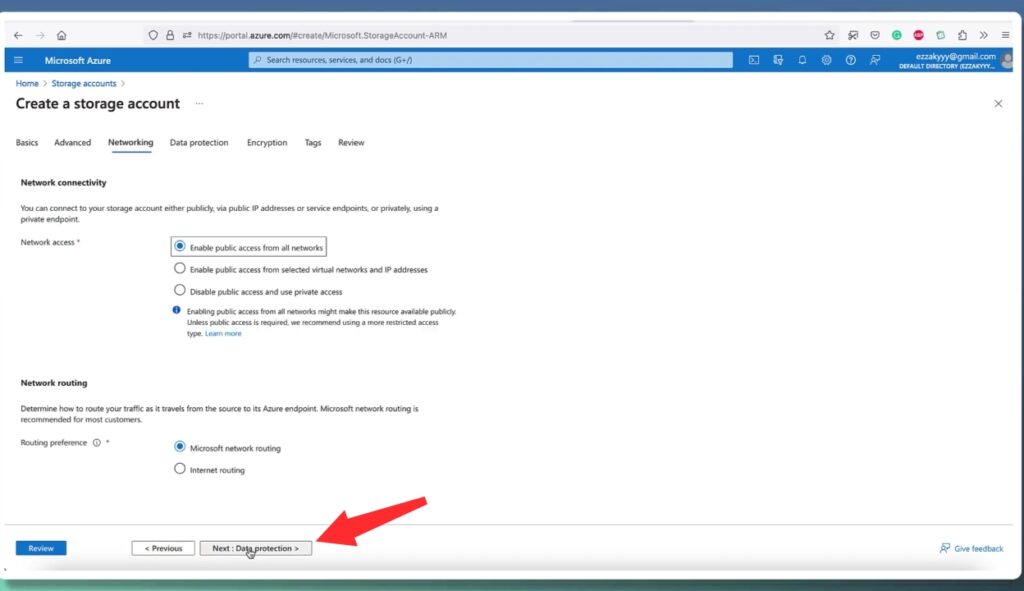

Click “Next” to continue.
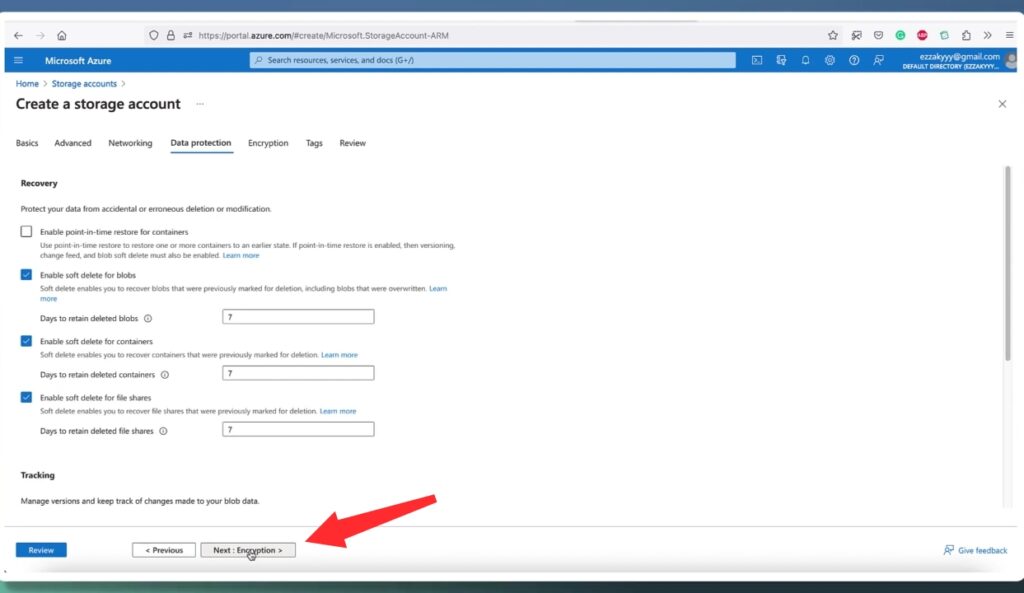

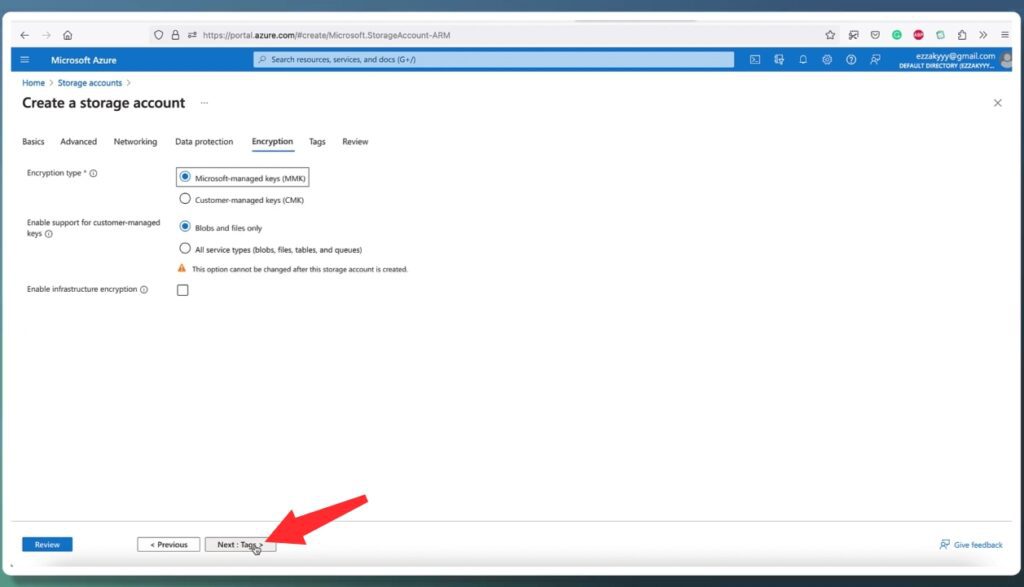
Click “Next” to proceed further.

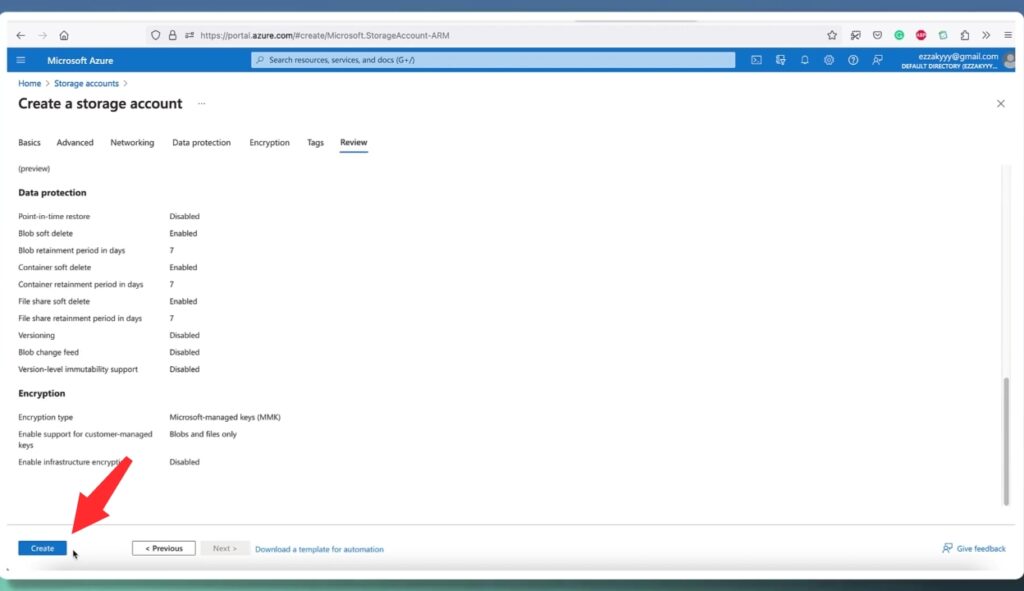
Review your settings and click “Create” to finalize.

Once the deployment is complete, go to the “Resources” section.
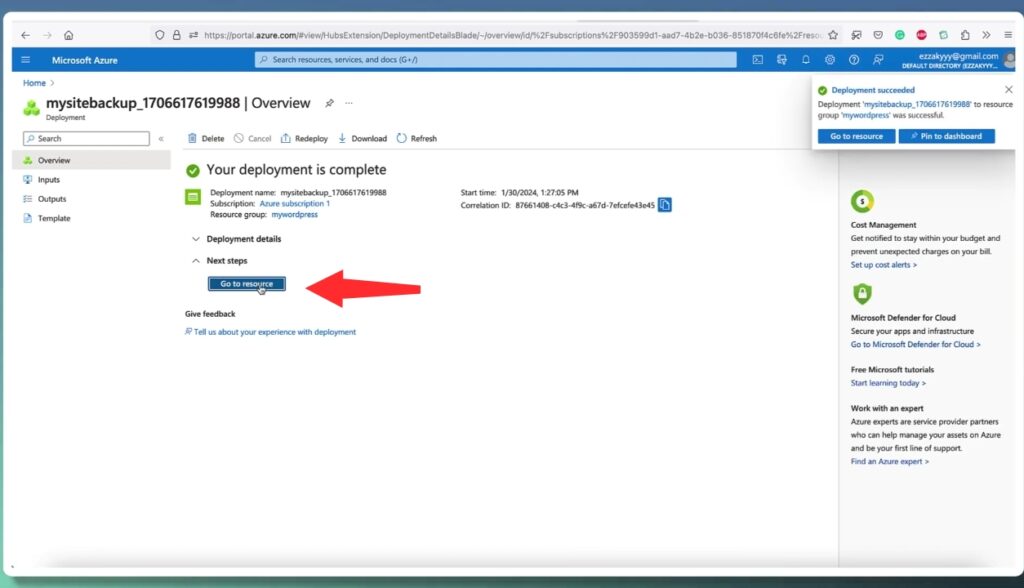

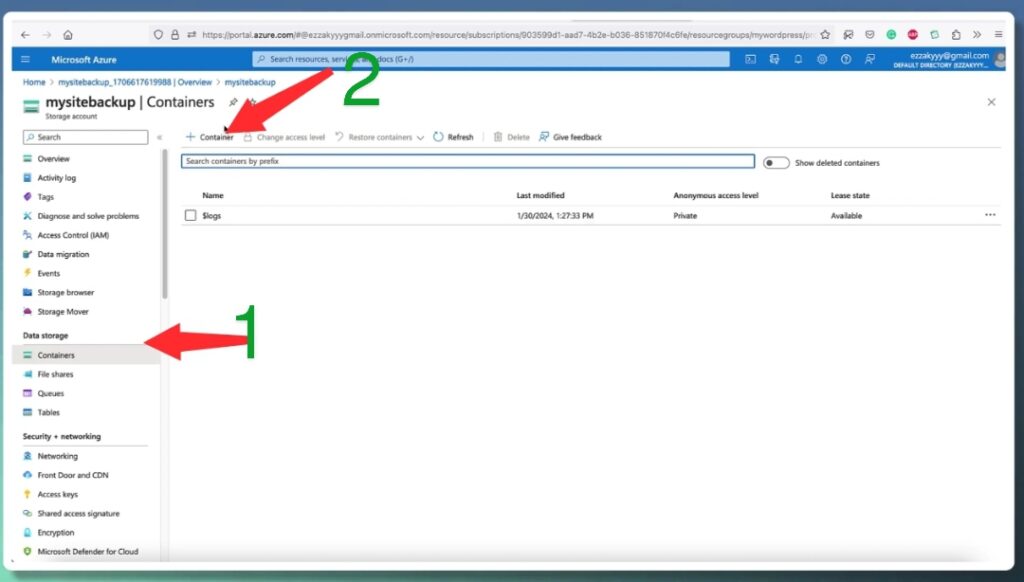
In the left menu, click on “Containers,” and then click on “Create Container.”

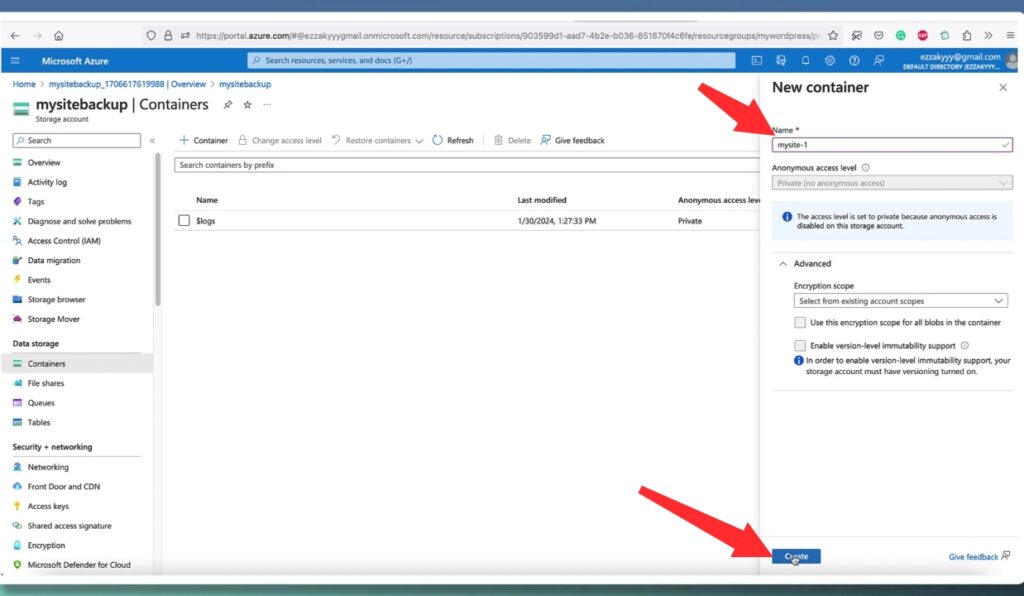
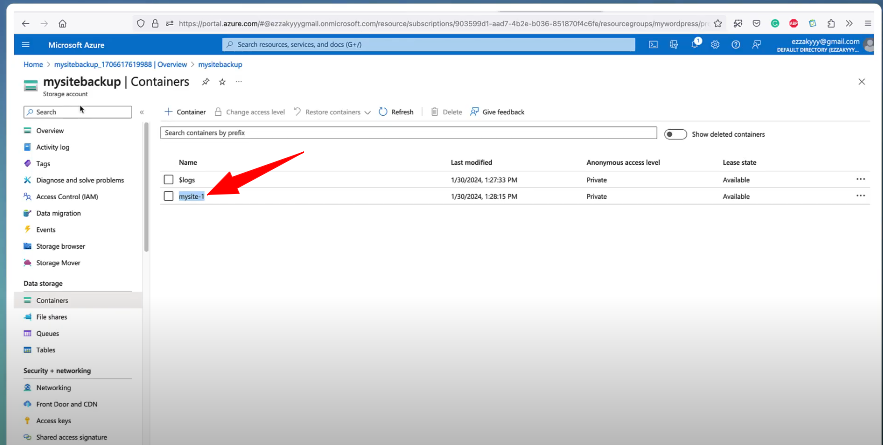
Name your container and click on “Create.”

Step 3: Connect Azure Blob Storage to Green Backup
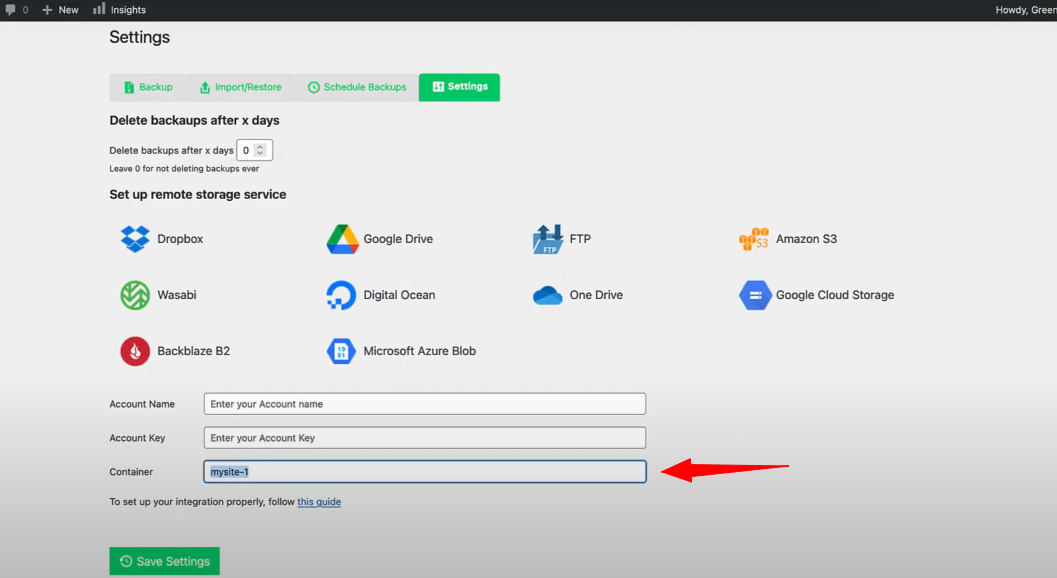
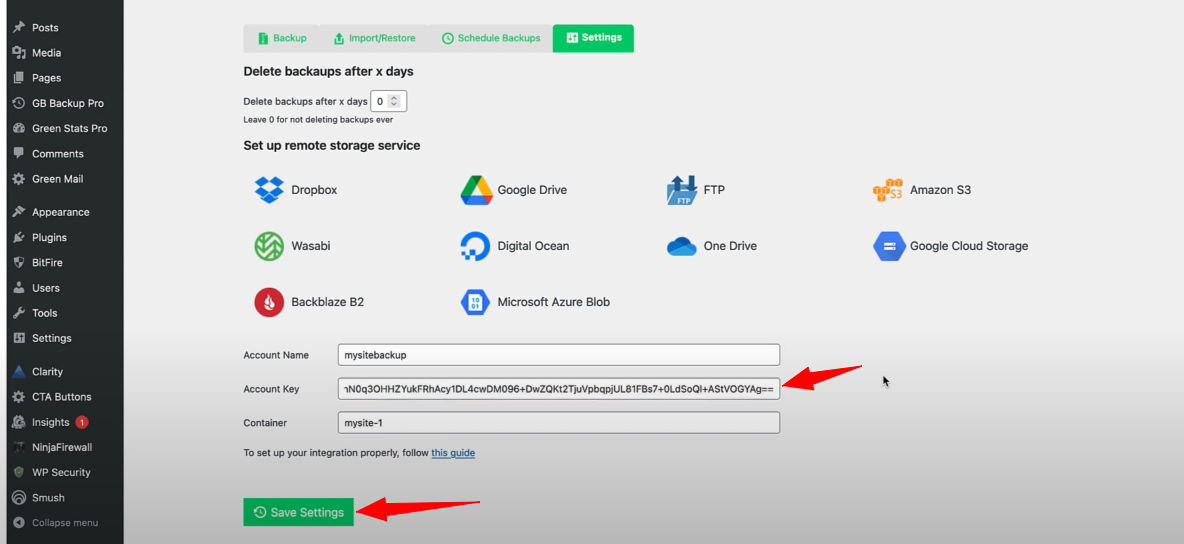
In Microsoft Azure, go to the left menu, click on “Containers,” then copy the container name.

Return to Green WPX settings, then paste the container name.

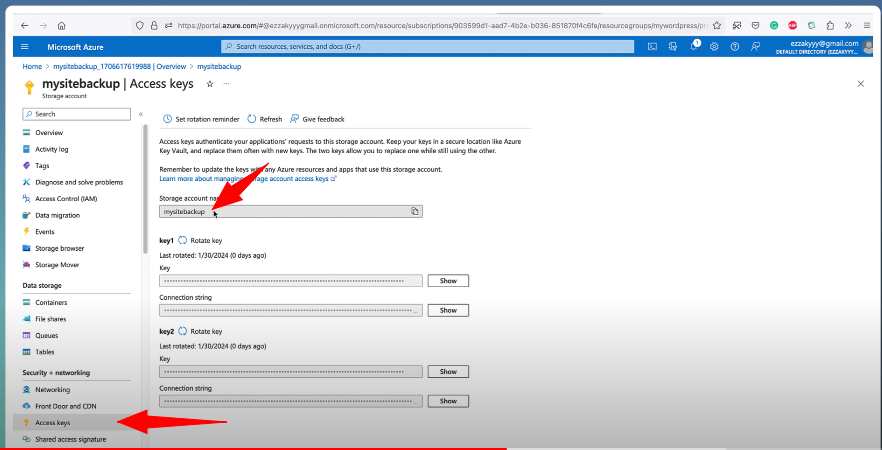
Navigate to “Access Keys” in the left menu, then copy the account name.

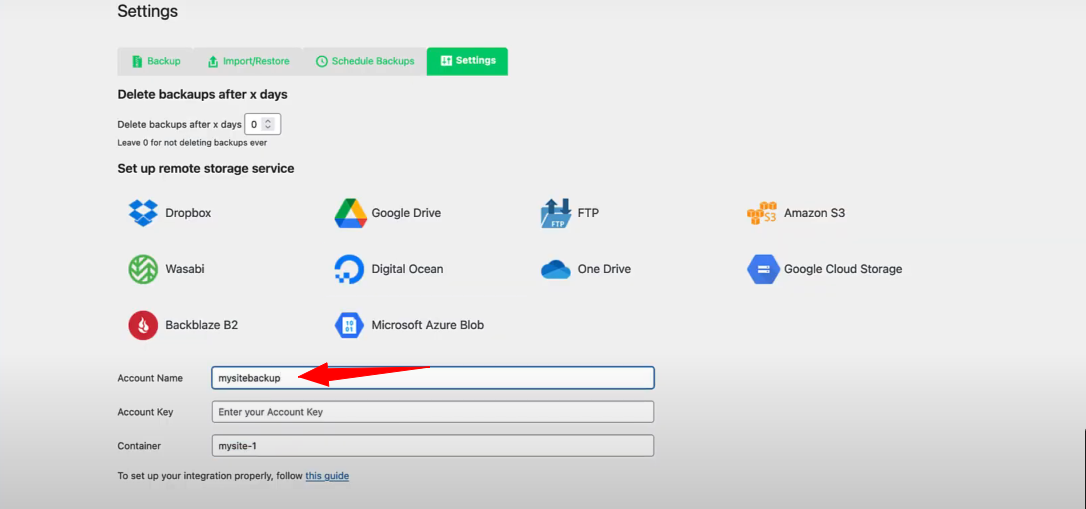
Return to Green WPX Pro settings, then paste the account name.

For the next step, copy the access key from your Microsoft Azure account. To do that, navigate to the left menu, then click on “Access Keys.”
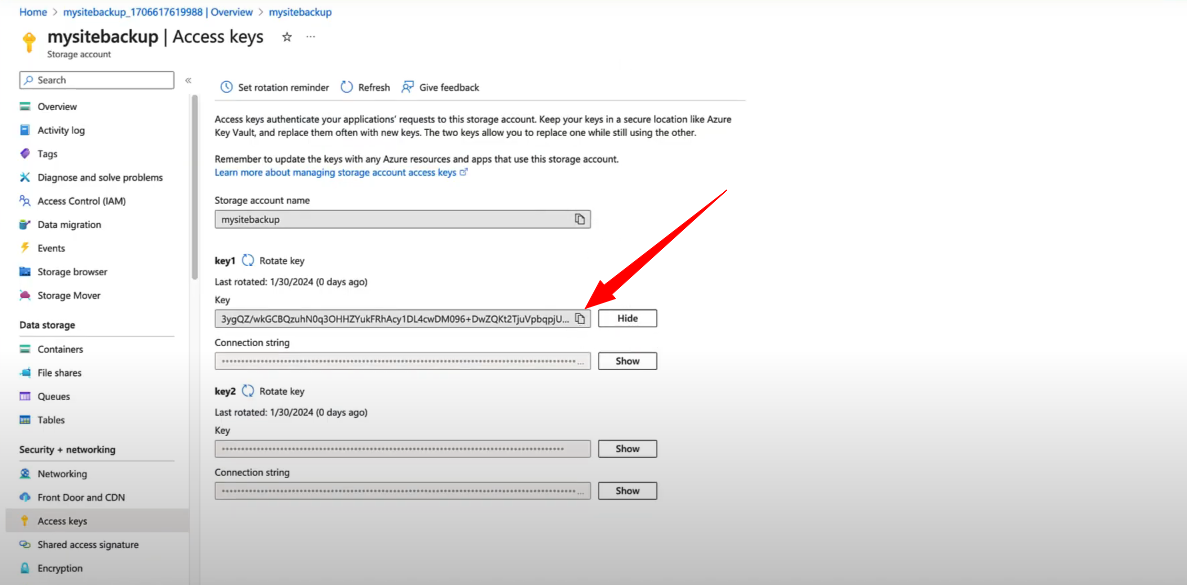

Return to Green WPX Pro and paste the key, then click “Save Settings.”

Step 4: Create an Azure Blob Storage Backup
With Green Backup Pro configured, go to the “Backups” tab. Create a new backup, choose Azure Blob Storage as the storage location. Select your desired backup components and click ‘Create Backup.’
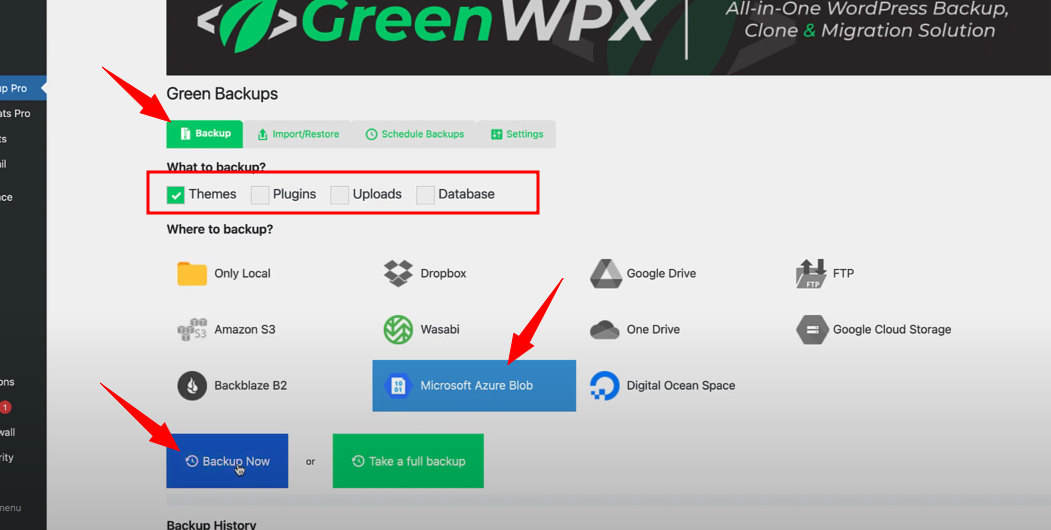

Watch the backup progress bar complete. Now, your WordPress site is securely stored on Azure Blob Storage.


After completion, verify your Azure storage container folder to confirm the successful upload.


Step 7: Schedule Backups to Azure Blob Storage
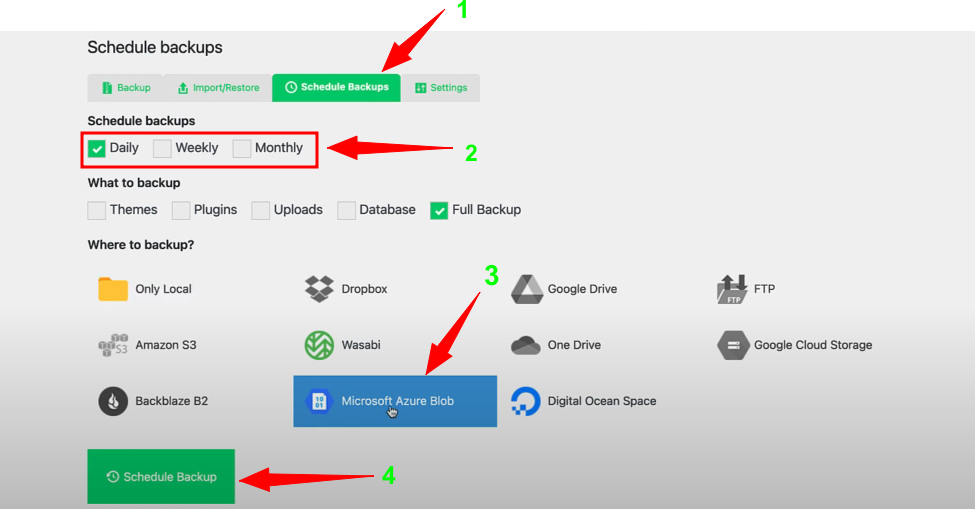
No more manual backups! In Green Backup settings, navigate to Schedule, add a new schedule. Choose Azure Blob Storage as the storage location, and customize the backup frequency (hourly, daily, weekly, or monthly). Enable the schedule, and you’re all set.

Step 8: Restore from Azure Blob Storage
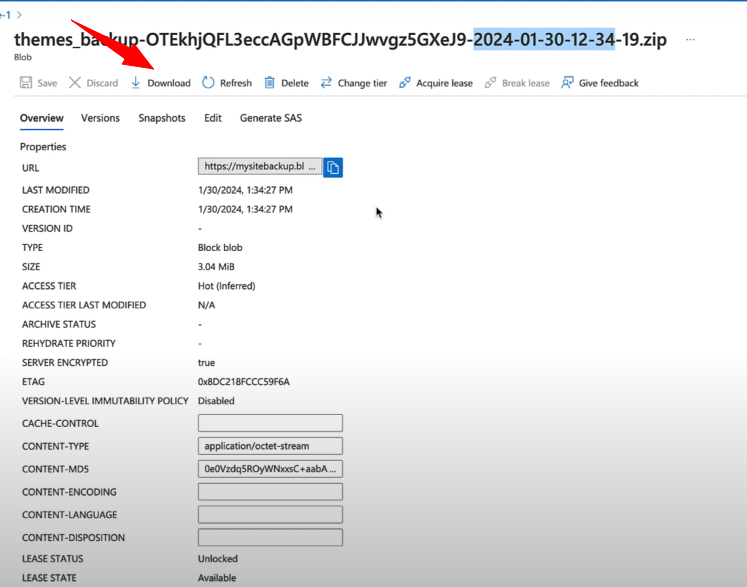
Accidents happen, but restoring your site is easy if you ever need to. Download the backup file from your Azure Blob Storage.
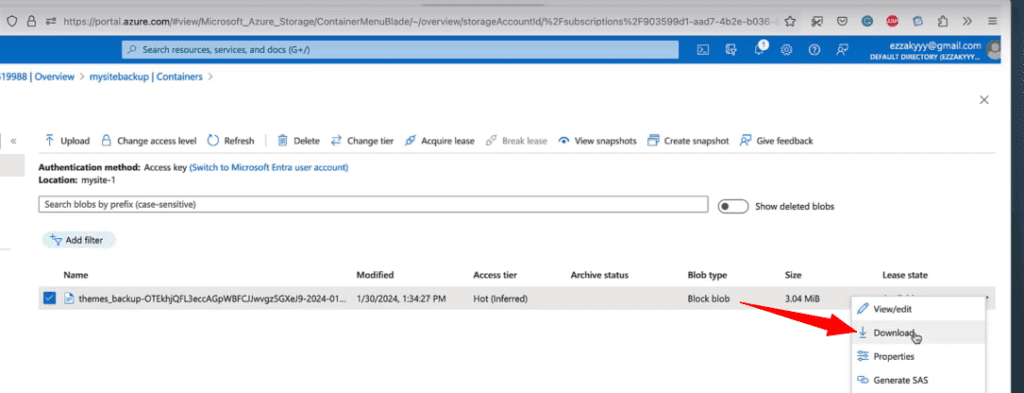

As you know, the file contains the date and time when it was taken.

Utilize the import feature in Green Backup to restore it.
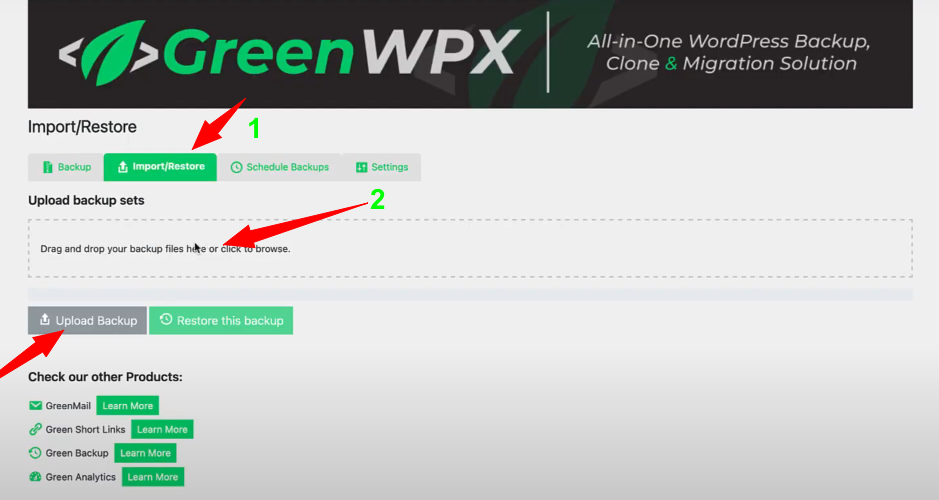

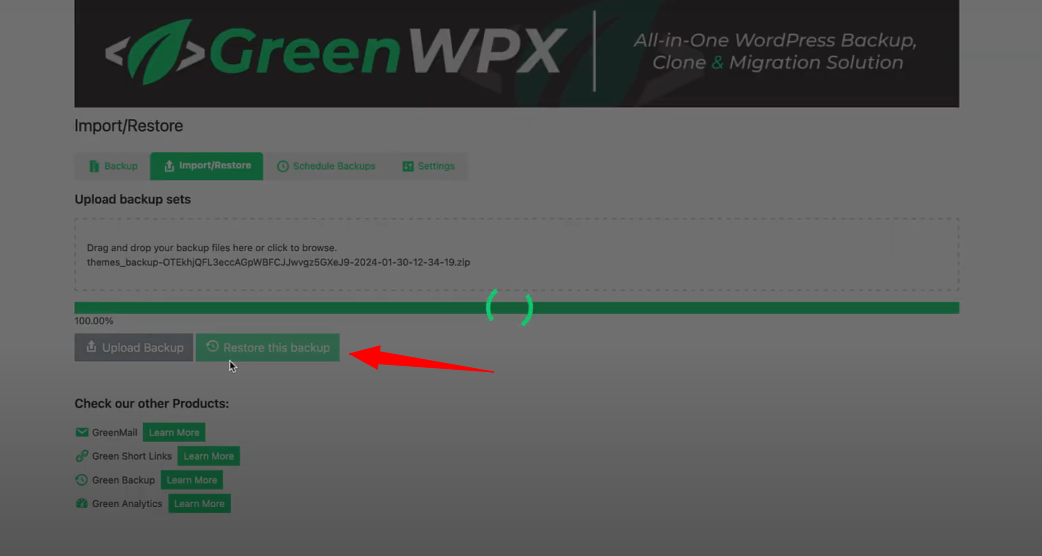
Click “Upload Backup,” and once the import is done, click “Restore This Backup.”

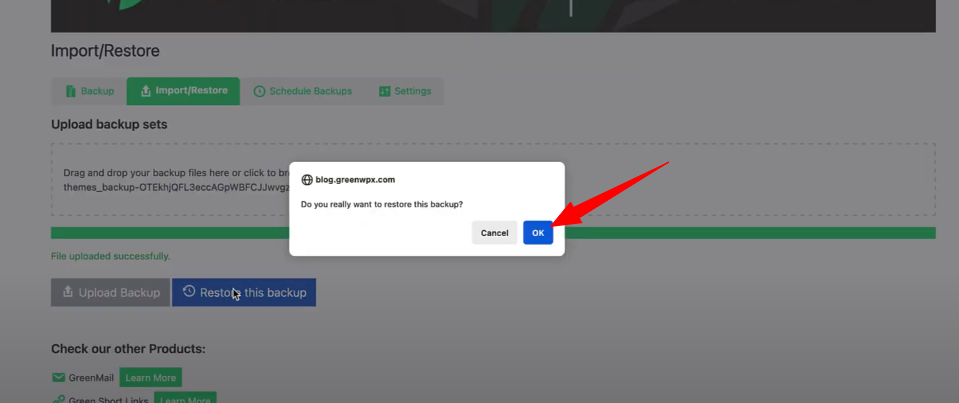
Finally, confirm by clicking “Okay,” and your WordPress site will be restored to the date and time specified in the file.

Conclusion
Congratulations! You’ve successfully configured Green Backup to seamlessly back up your WordPress site to Microsoft Azure Blob Storage. Your website’s security is now in excellent hands. If you found this tutorial helpful, give it a thumbs up, and consider upgrading to Green Backup Pro for more advanced backup features.
Download Green Backup Pro Now!Happy backing up!


