If you’re a WordPress site owner, ensuring the safety of your valuable content is paramount. In this step-by-step guide, we’ll show you how to effortlessly back up your WordPress site to Google Drive using the powerful Green Backup plugin.
Prerequisites: Get Green Backup Pro
Before we dive in, make sure you have the Green Backup Pro version to unlock the full backup potential. Head over to Green Backup Pro to upgrade your plugin.
Greetings, WordPress enthusiasts! In today’s guide, we’ll explore a crucial aspect for every website owner – backing up your WordPress site to Amazon S3 using the robust Green Backup Pro plugin. This step-by-step walkthrough ensures a seamless process, providing you with peace of mind regarding your website’s data integrity. Before we dive in, make sure you have the Green Backup Pro version. If not, obtain it from Green Backup Pro for an enhanced backup experience.
Stay tuned as we guide you through the installation and activation of Green Backup Pro, followed by the essential steps to seamlessly connect it with your Amazon S3 account. This comprehensive guide not only covers the setup but also delves into creating automated backups, ensuring your WordPress site is well-protected. If you’re ready to safeguard your website data effectively, let’s embark on this insightful journey! And don’t forget to check the link in the description for the Green Backup Pro version.
Download Green Backup Pro Now!
Step 1: Install Green Backup Pro
Begin by installing Green Backup Pro on your WordPress site. Activate the plugin and navigate to the Green Backup settings, paying special attention to the DigitalOcean Spaces tab.
Step 1: Once you have purchased the right plan for you, log in to your GreenWPX member area to download the plugin and copy the activation key.

- Download and save the plugin zip file to your desktop.
- Copy your Serial key.
Step 2: Install the plugin on your WordPress site.
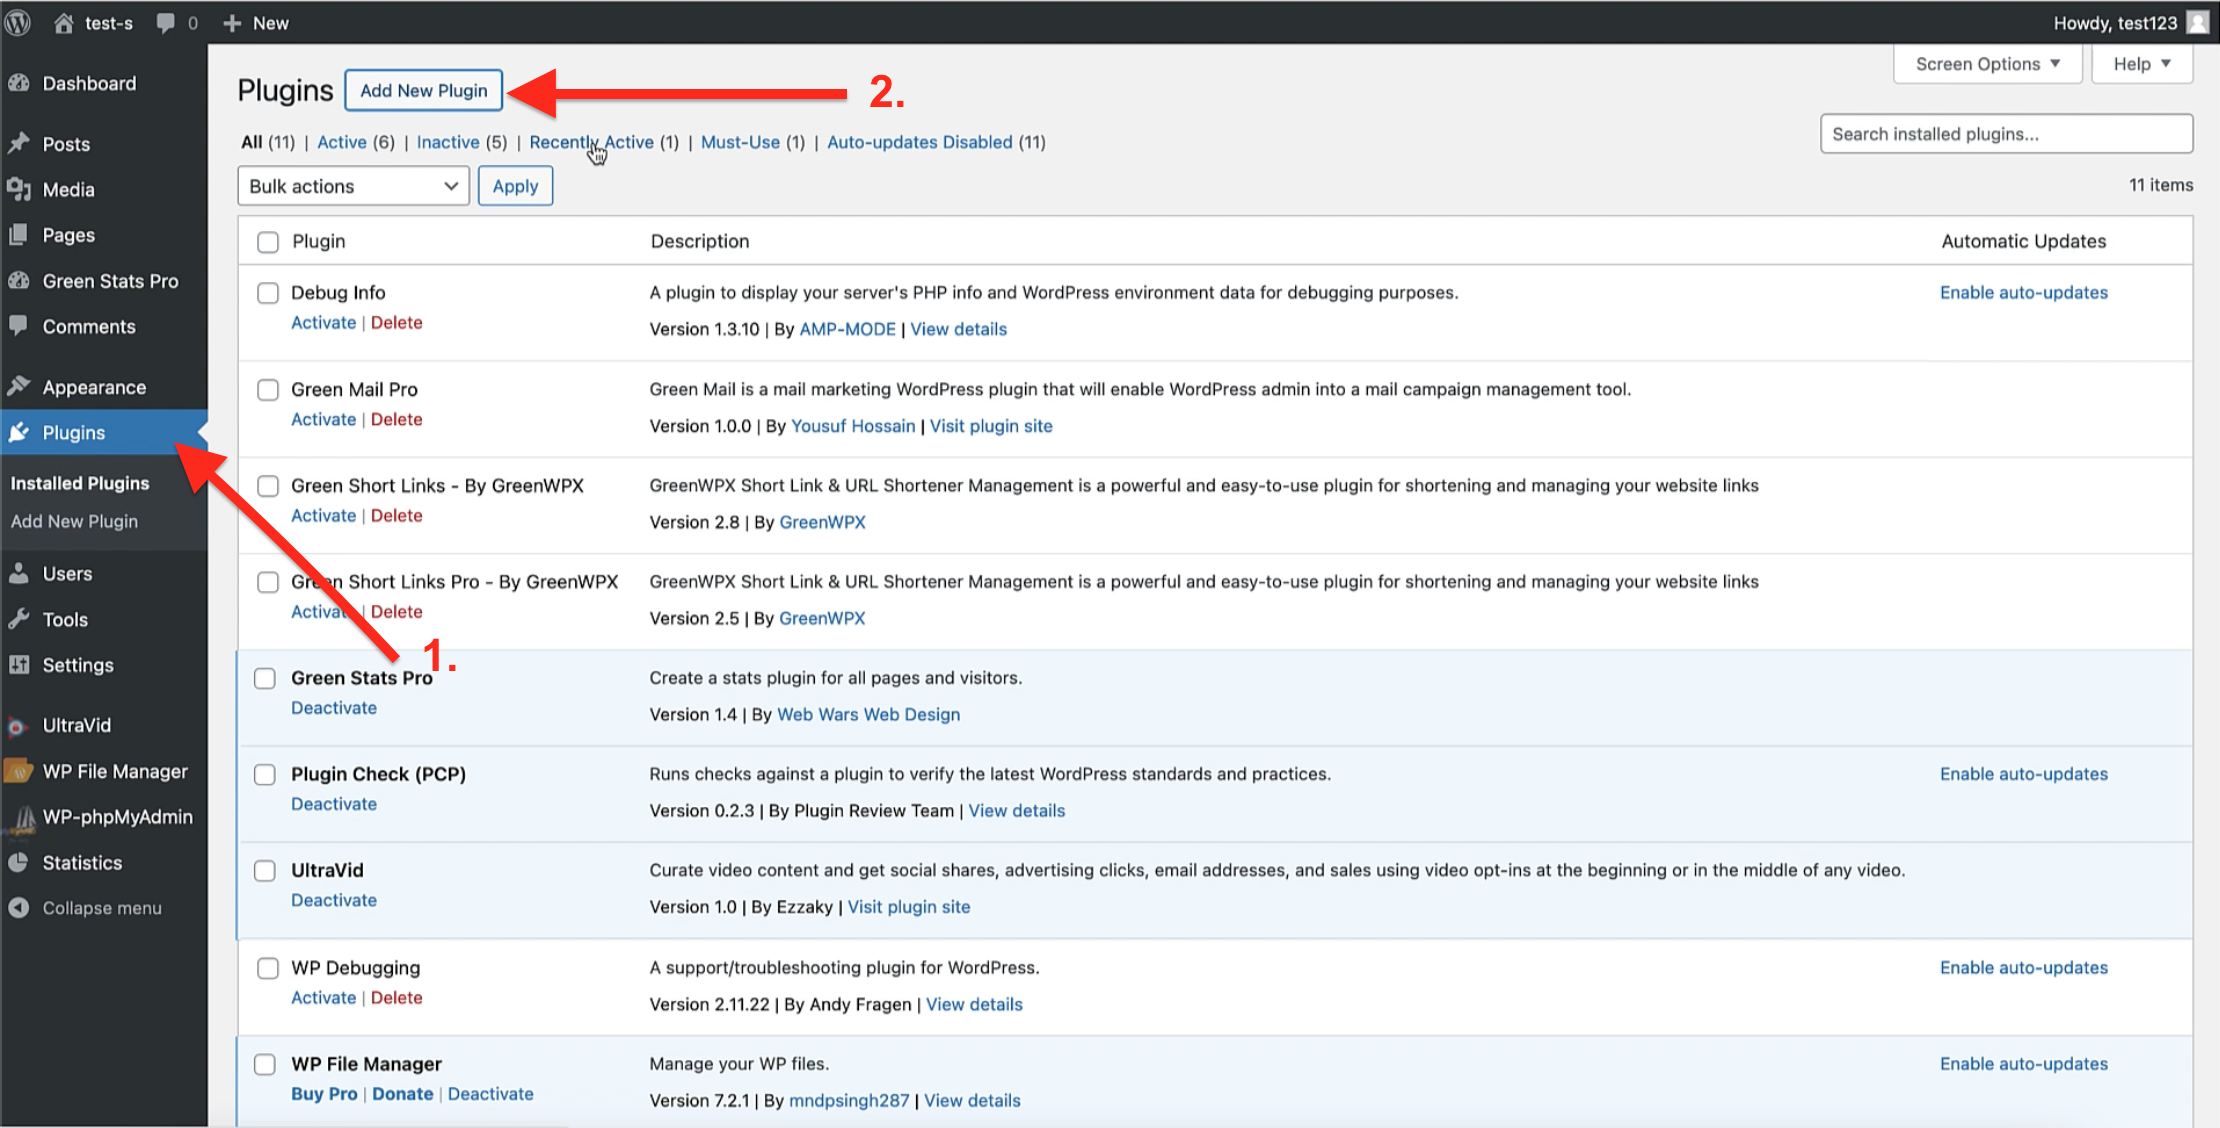
- On your WordPress Dashboard click on the Plugins on the left side menu.
- On The Plugins page click “Add New Plugin”.
Step 2.1 : Import the zip file of the downloaded plugin.
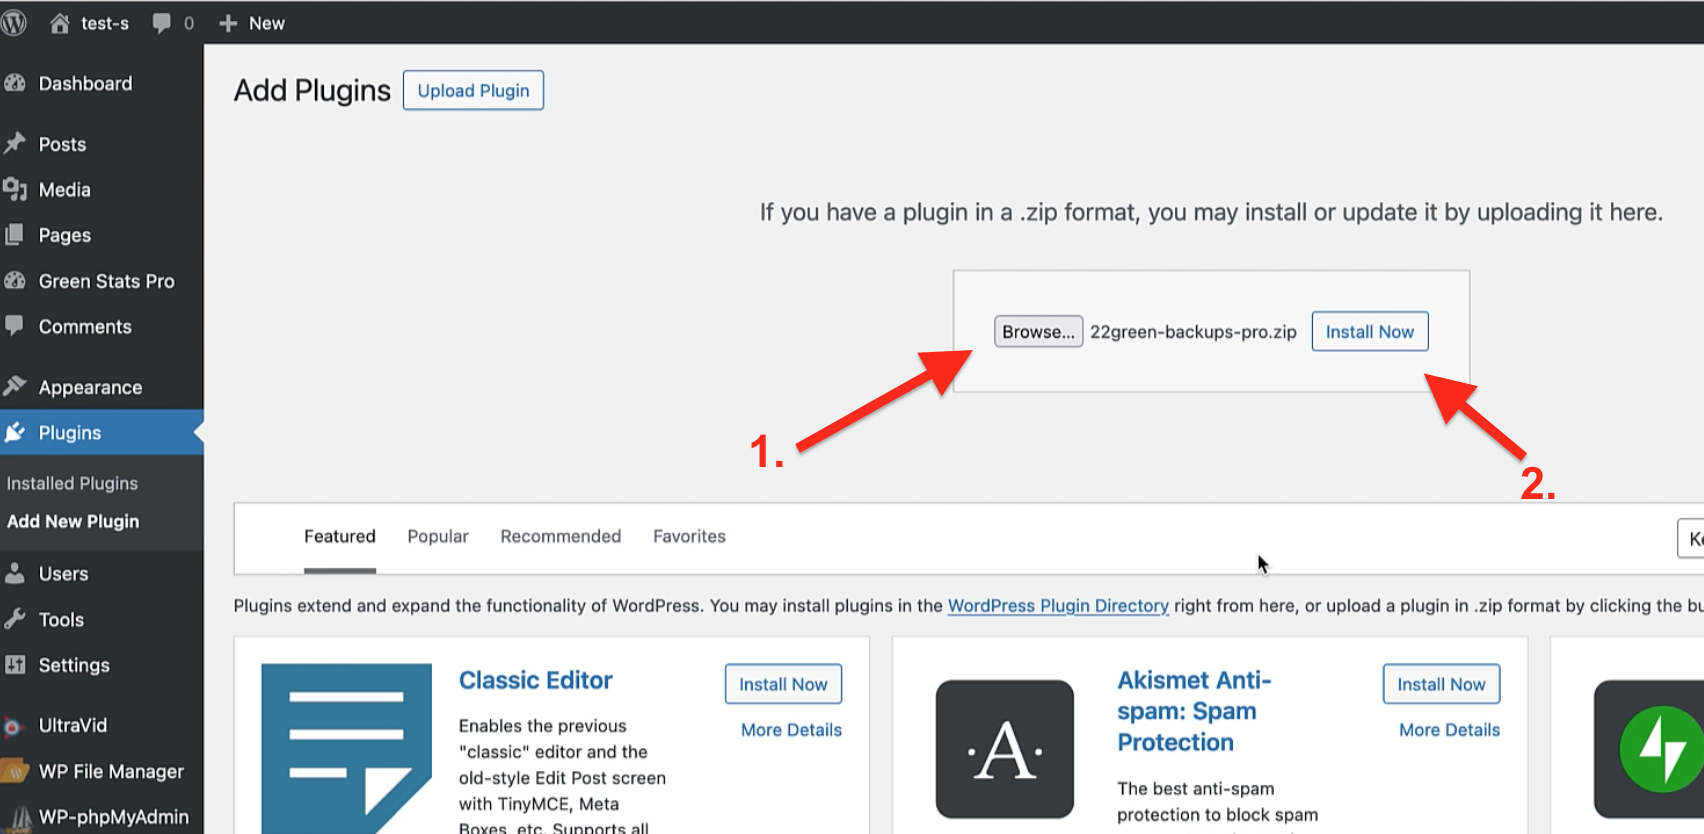
- Click to browse your desktop and choose the zip file of the plugin that you downloaded from the member area.
- Click “Install Now”
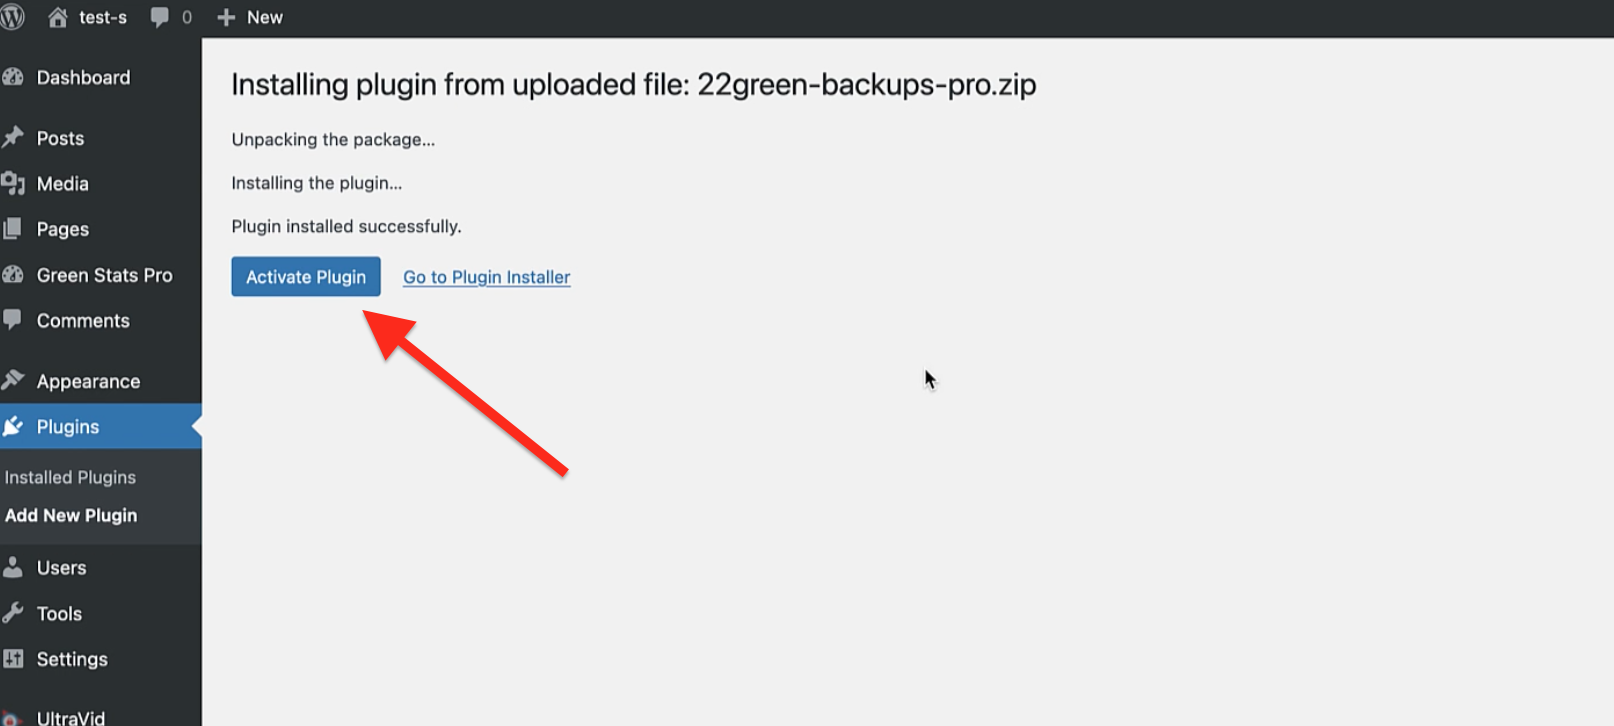
Then you will be redirected to this page, and click the “Activate Plugin” button.
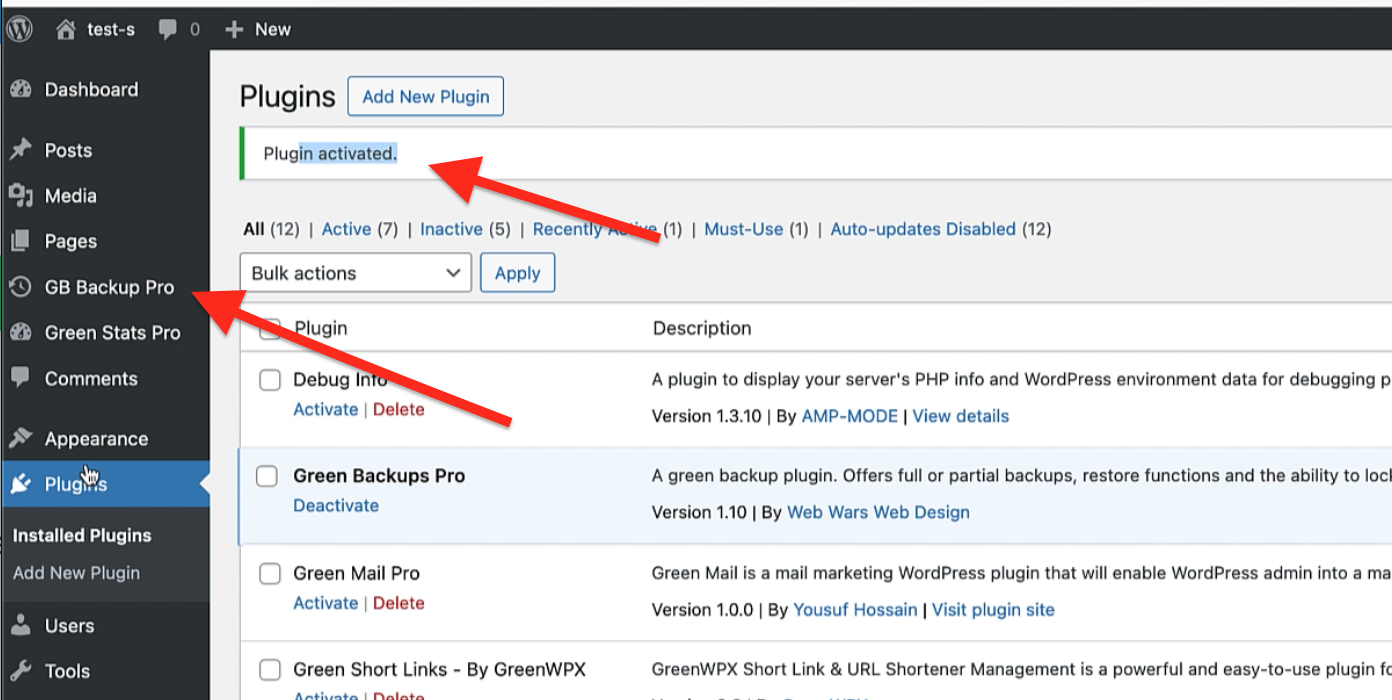
And the Plugin it will be Activated:
Step 3: Active The Pro Version:
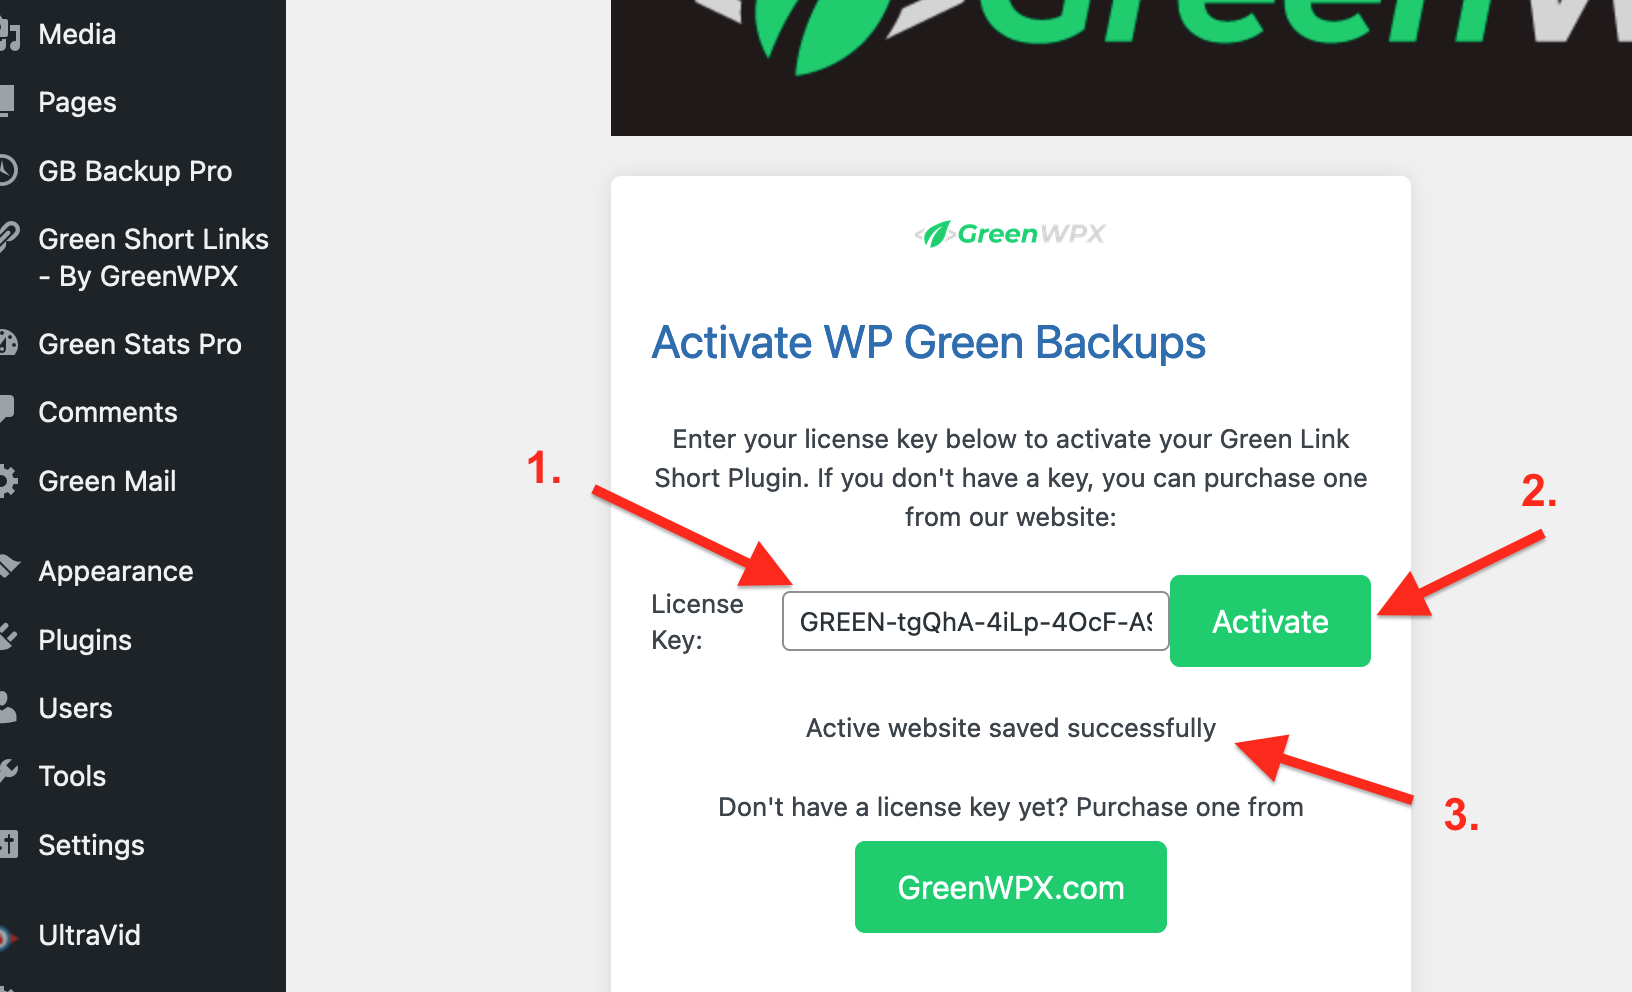
- Paste the license key that you obtained from the GreenWPX member area.
- Click the “Activate” button.
- Congratulations! Once you receive that message, you are good to go. Let’s move on to the next step.
Step 2: Register a Google Cloud App
To enable backup to Google Drive, you need to register a Google Cloud App. Follow these simple steps:
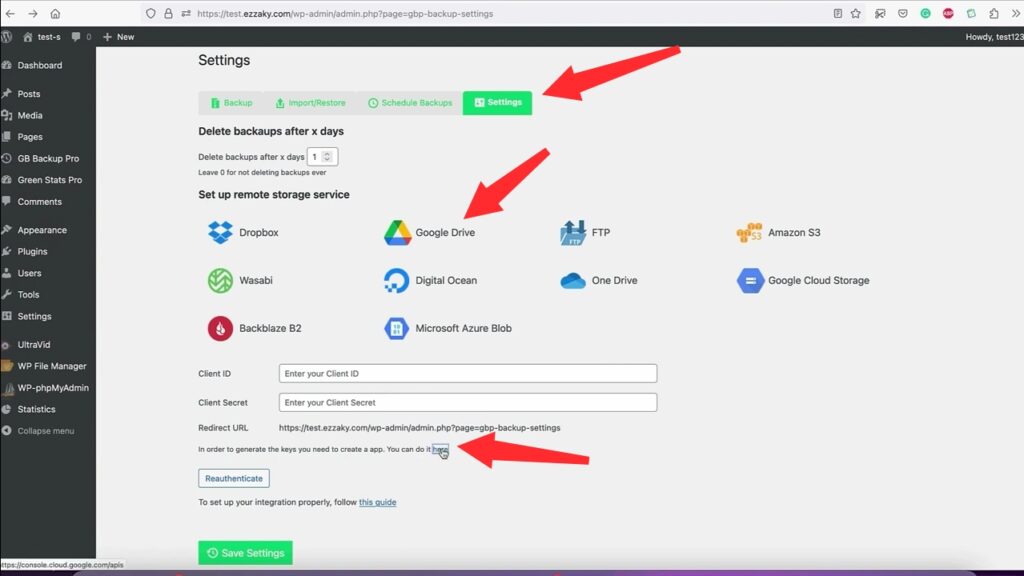
In your WordPress dashboard, navigate to Green Backup settings. Under the Google Drive tab, you’ll notice it’s asking for the client ID and client secret. To obtain these keys, we need to create a Google app in the Google console. First, click on the provided link or search for Google Console API in Google. This will take you to the Google API console.
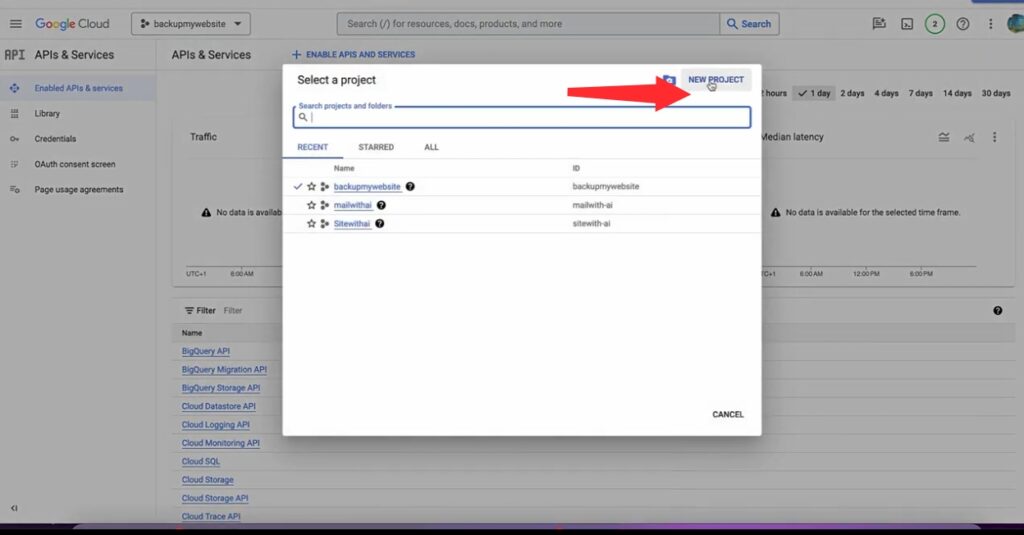
Once you log in click ” create project”.
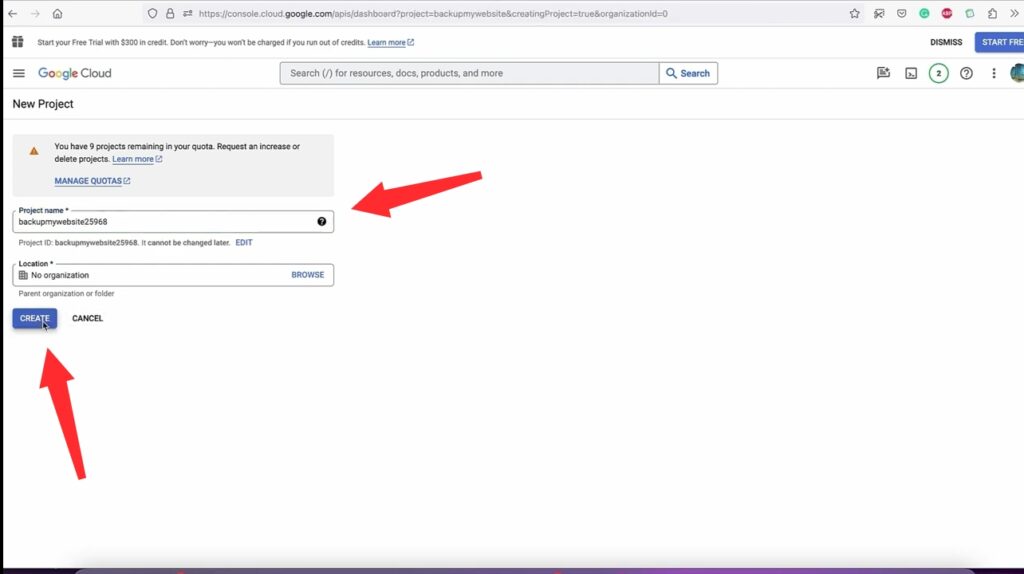
Give the project a name, then click create and wait a few seconds.
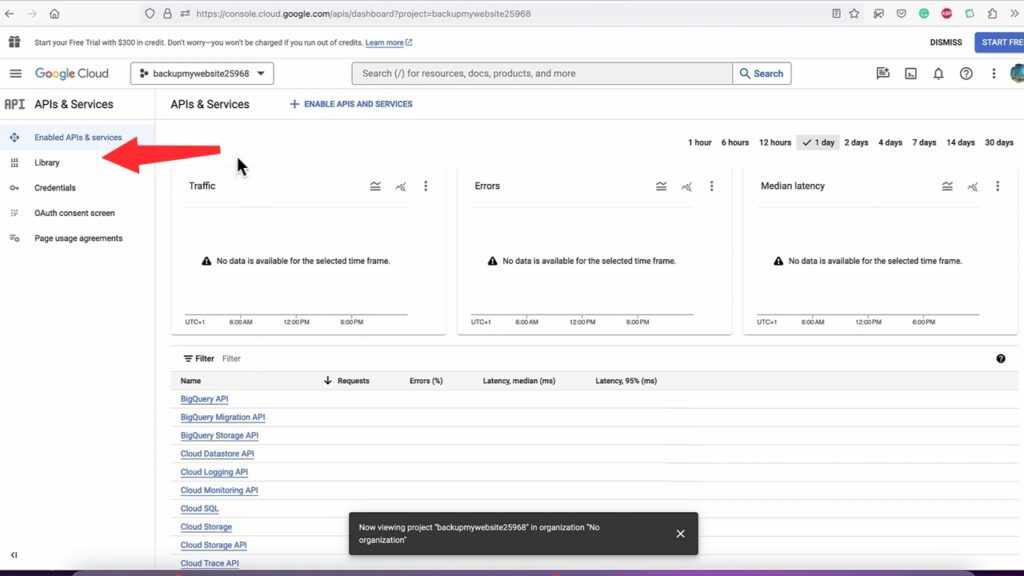
Once the project is created, select it.


Go to the ”library” .
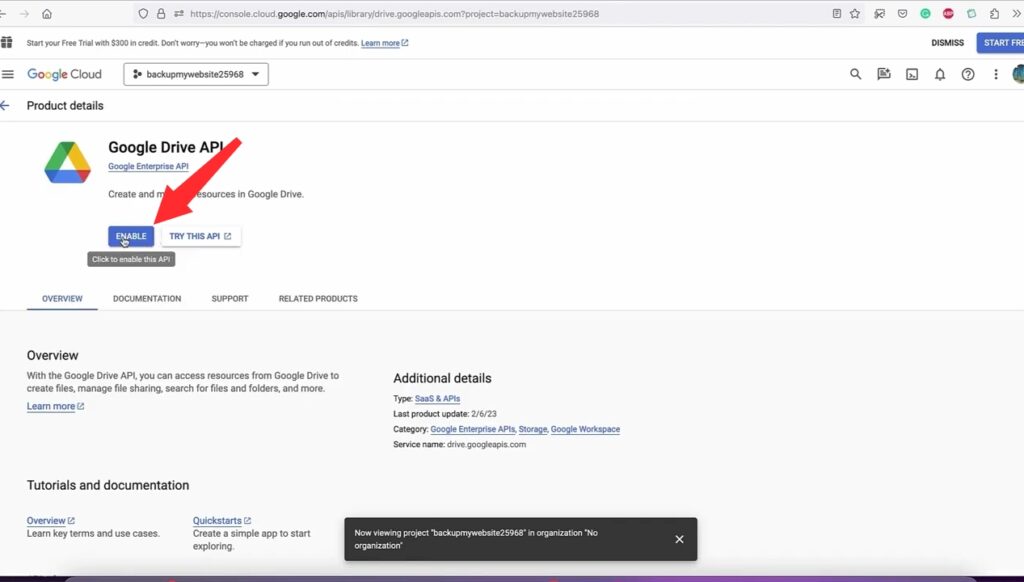
And search for ”Google Drive API” enable it by clicking on enable for the oversight.
Select it.
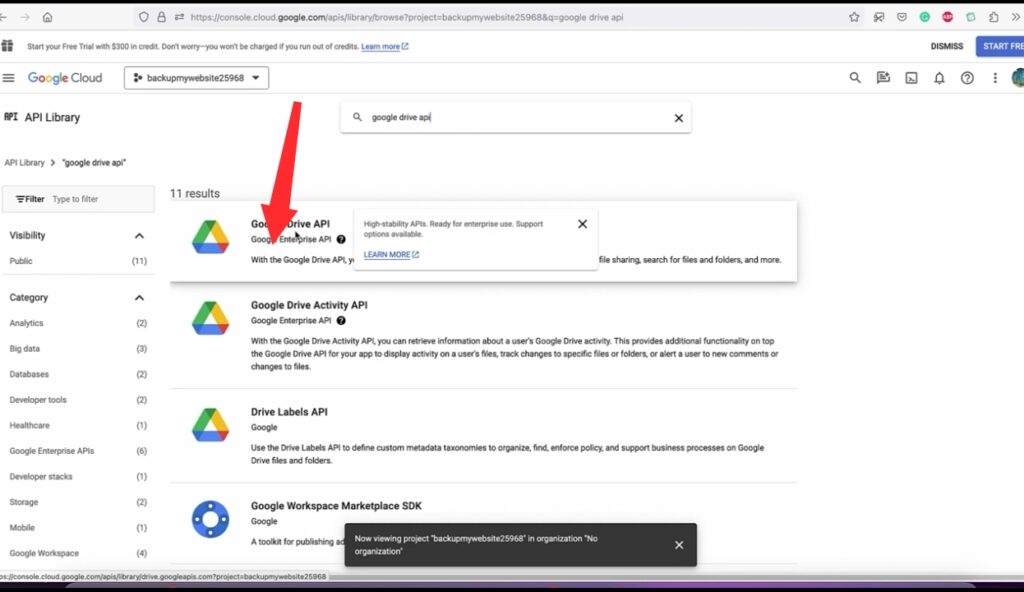
Enable it by clicking on the ‘Enable’ button.
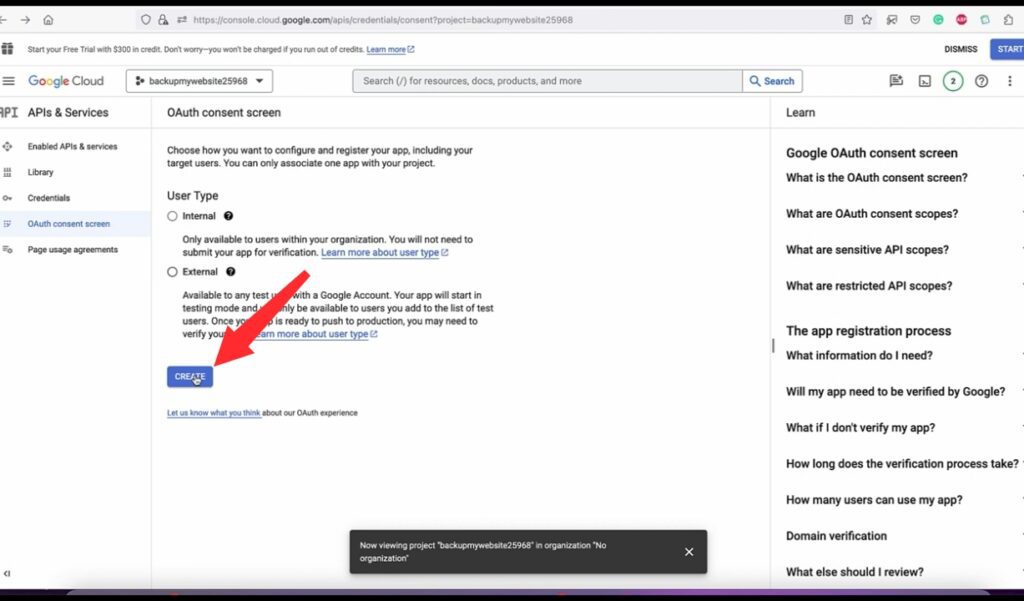
Next, navigate to the OAuth consent screen .
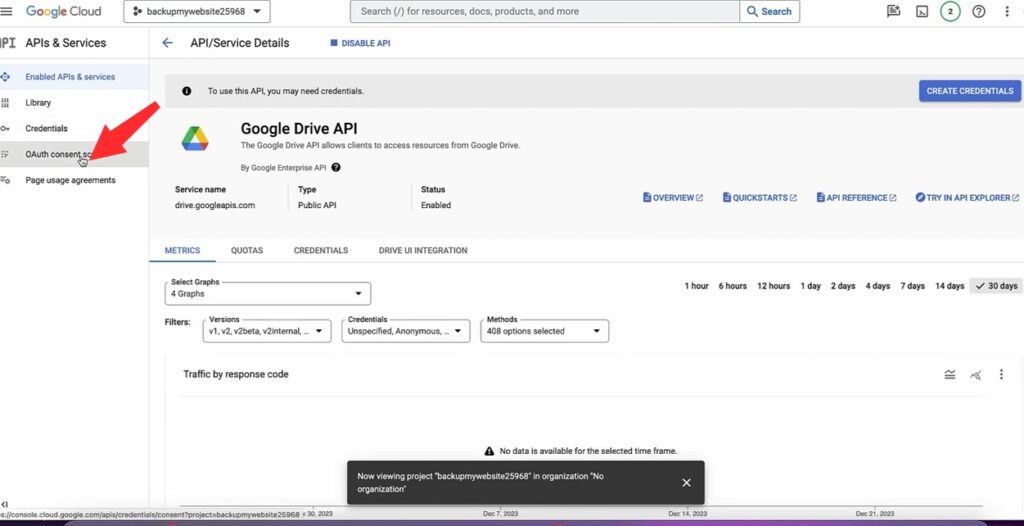
And click on “Create” .
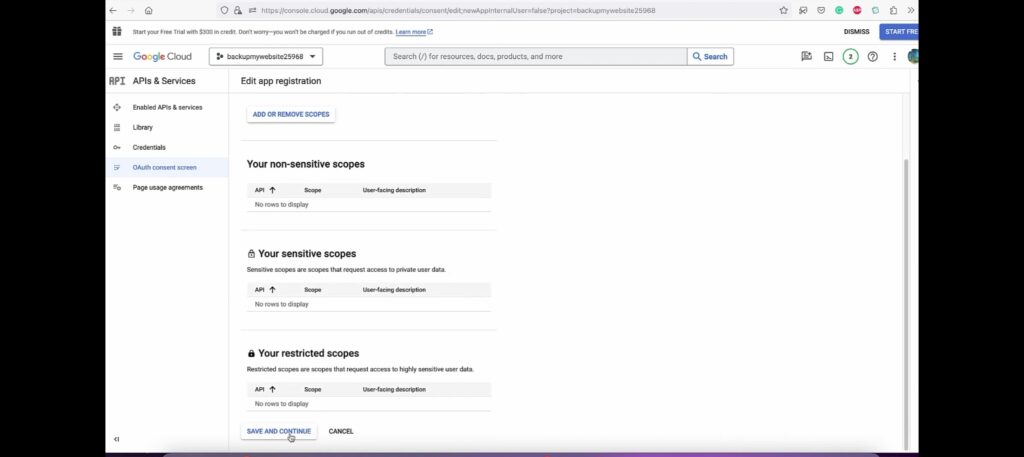
Give your app a name, select your support email, add your domain name without “www” or “https,” and finally, add your email.
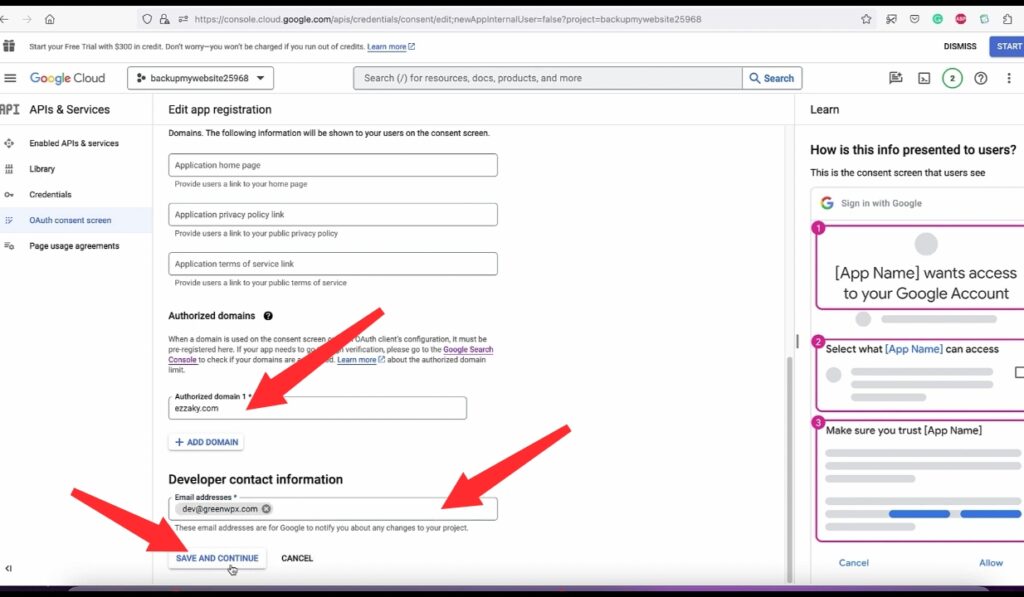
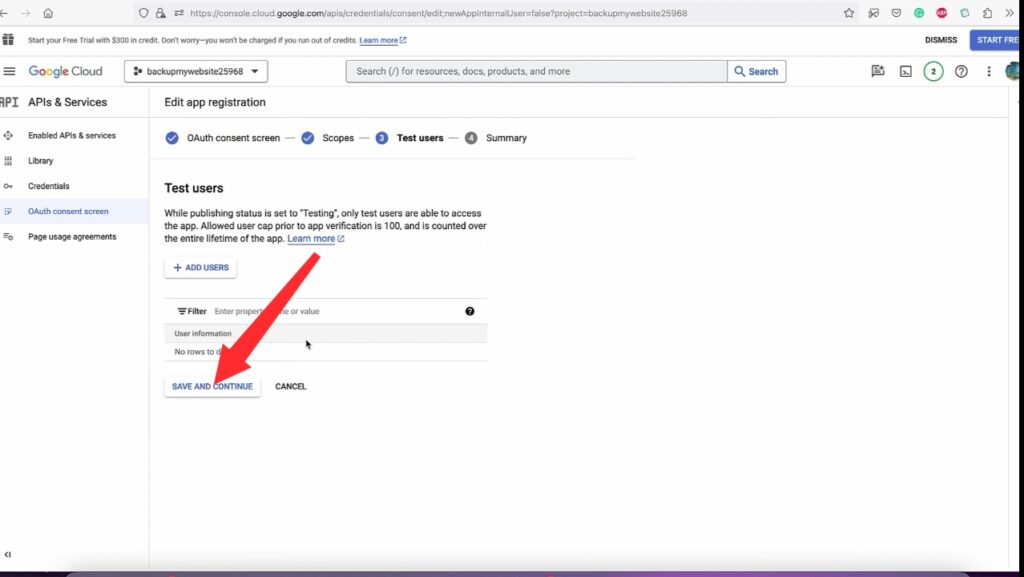
Next Click “save and Continue” to proceed.
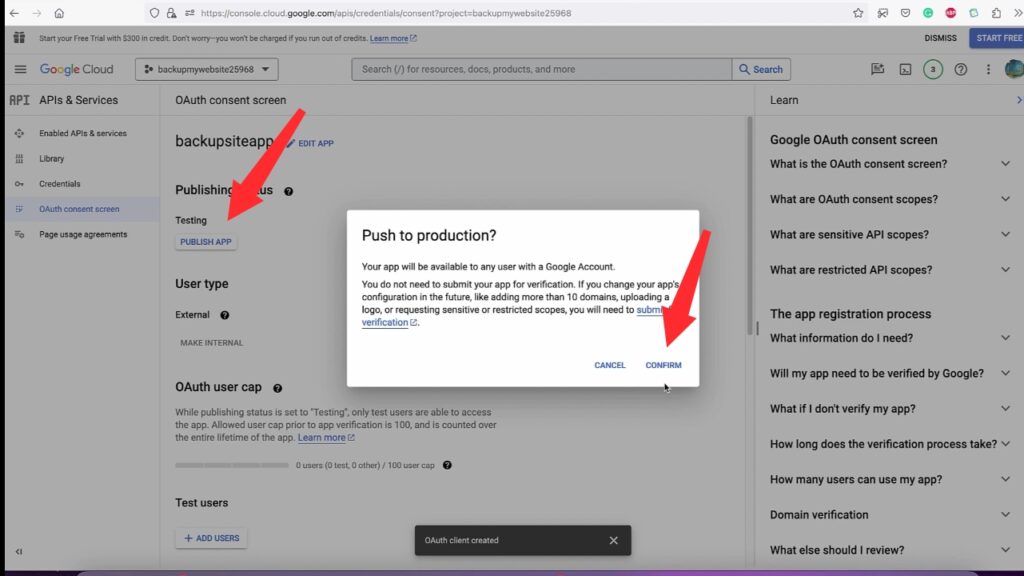
Make sure to publish your app by clicking on the “Publish” button.
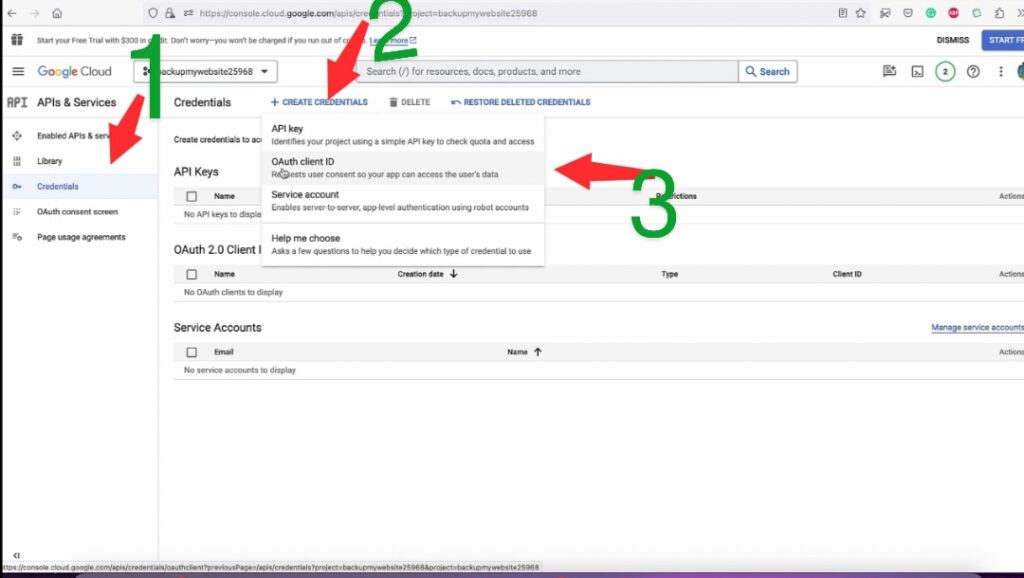
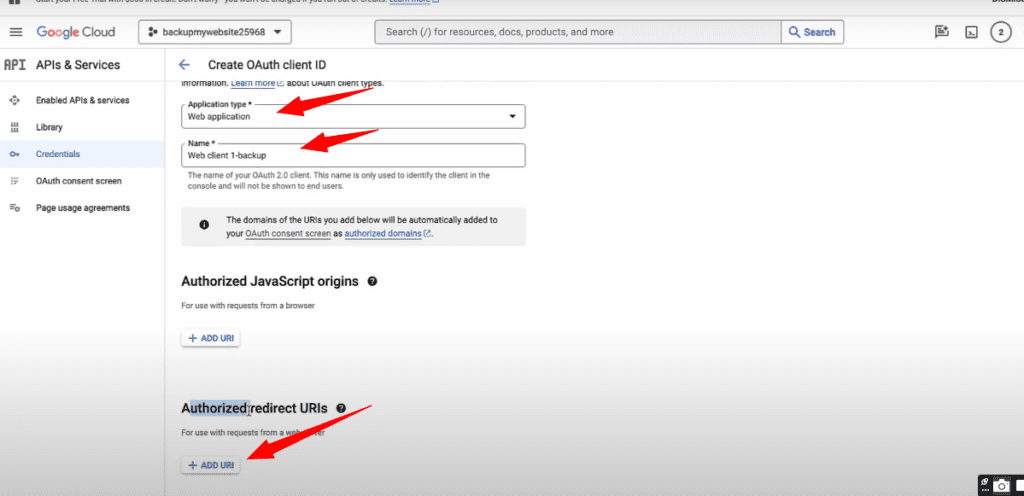
Now, navigate to the credentials tab and click on “Create credentials.” Choose “OAuth client ID.”
Select “Web application” as the type, give it a name, and add the authorized redirect URLs.
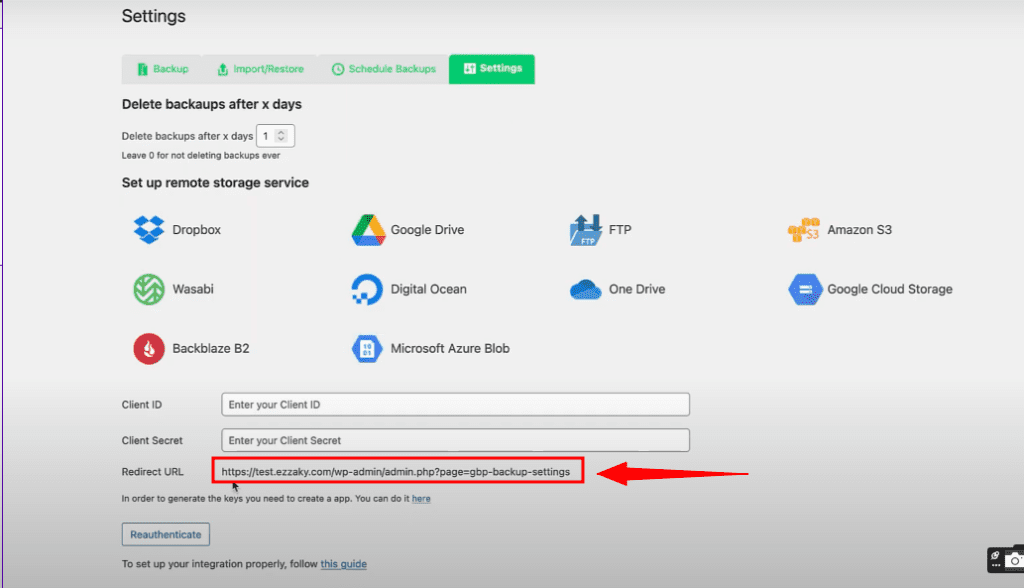
You can find this link in your Green Backup settings under Google Drive. Copy it.
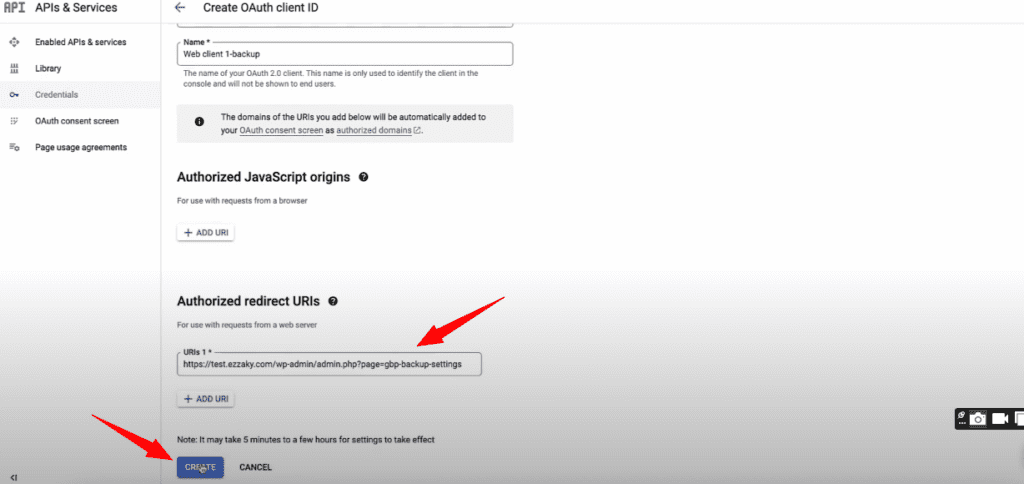
Paste it here, then click “Create.”
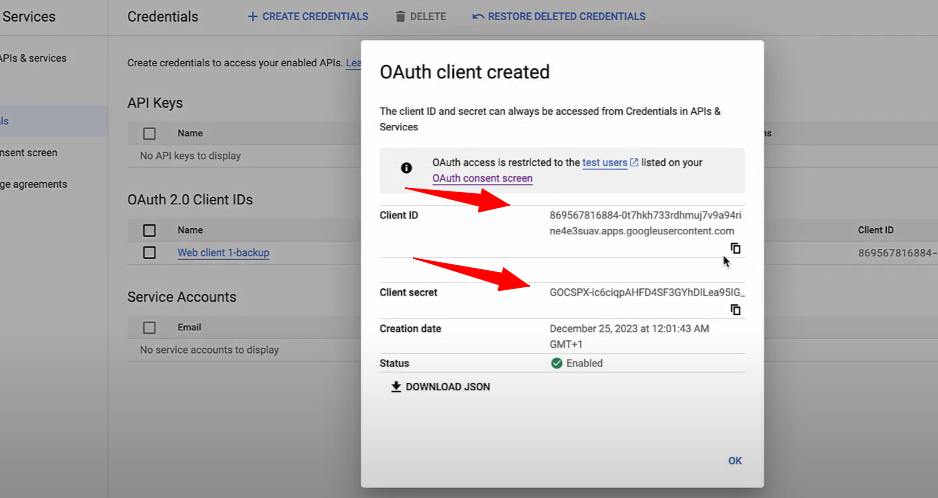
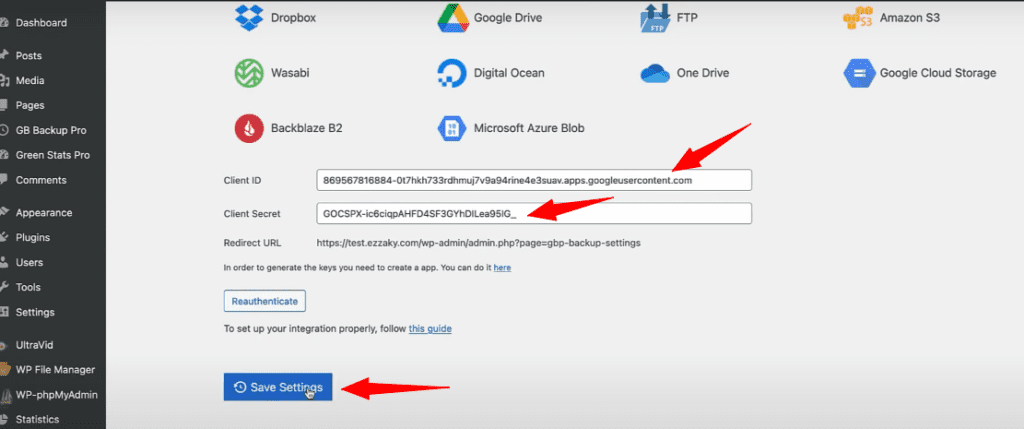
Here are your keys. Copy the client ID and client secret. Let’s head back to Green Backup settings.
Paste the client ID and client secret into your Google Drive Green Backup settings. Click “Save Settings.”
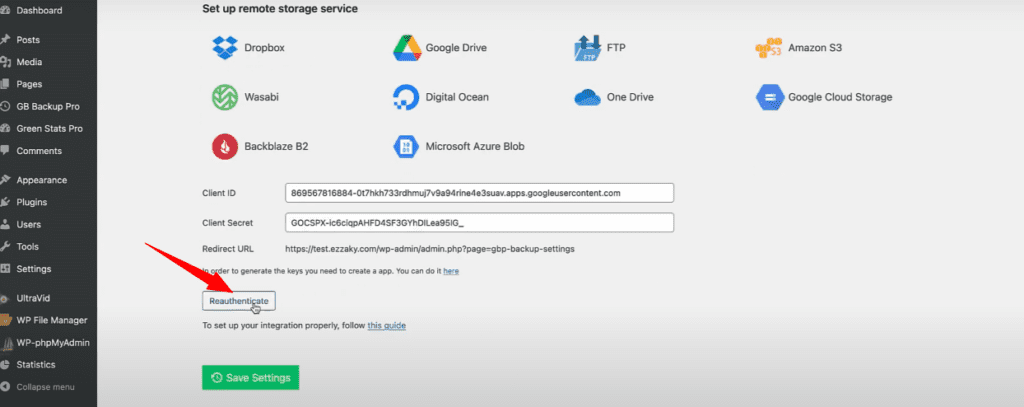
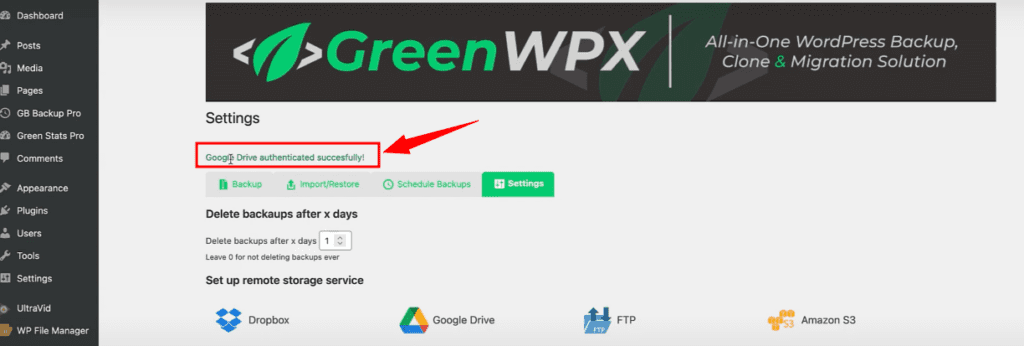
After saving, click on “Reauthenticate.”
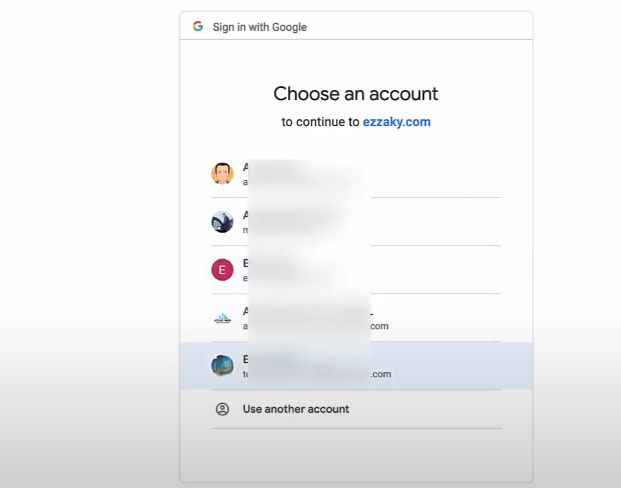
Choose the Google account with Drive access. Click it.
Click “Continue.”
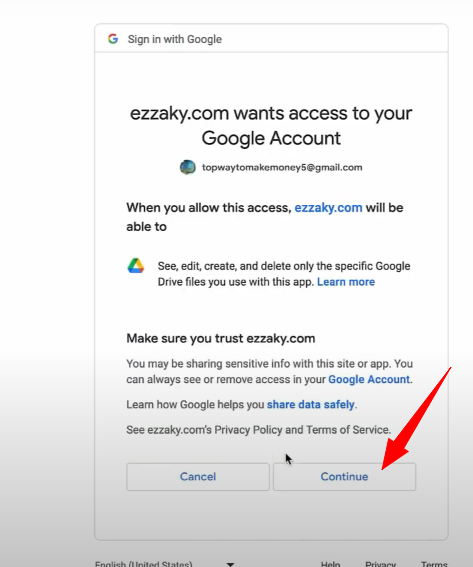
Voila! Your Google Drive integration is successful.
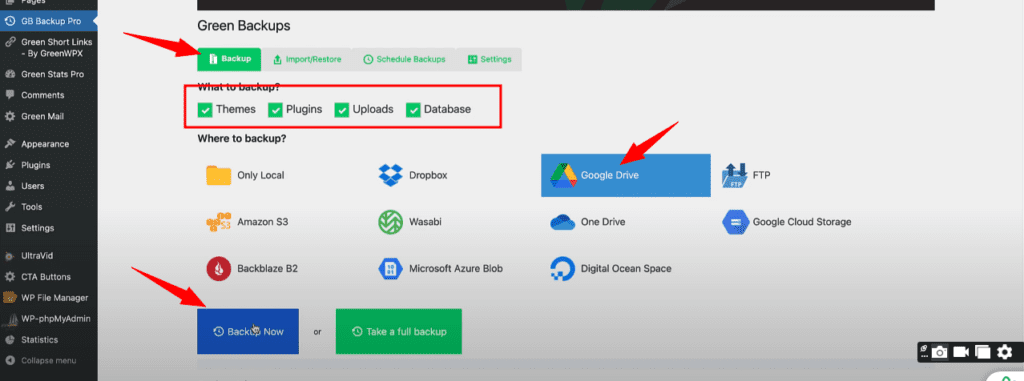
Step 3: Take Your First Google Drive Backup
To create a Google Drive backup with the connection set up, head to the Backups tab in Green Backup. Choose Google Drive as the storage location and customize your backup preferences. Decide what to backup—themes and plugins, uploads folder and database, or a full backup. Watch as the backup progresses.
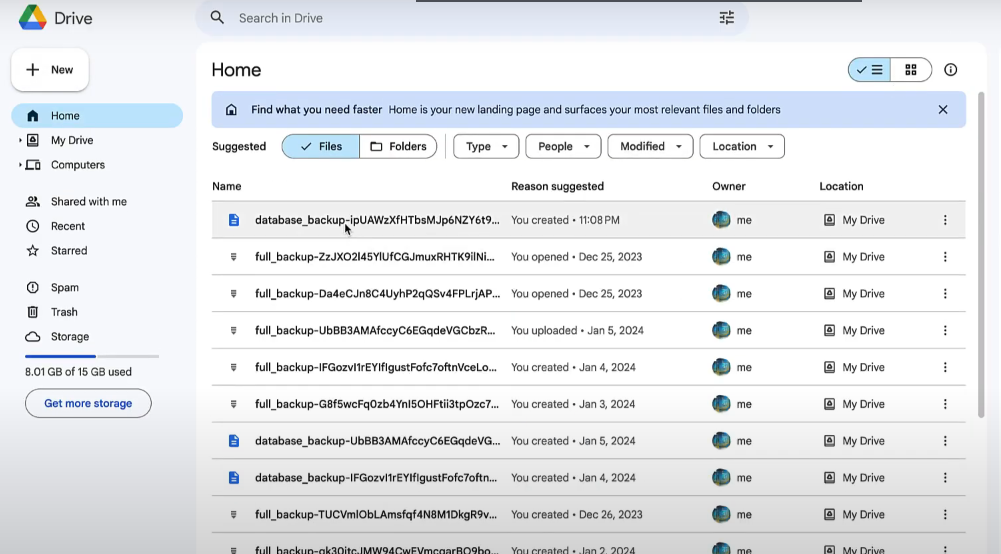
Watch as the backup progress bar completes, and once it’s done, you can check your Google Drive to confirm that the backup has been securely uploaded.
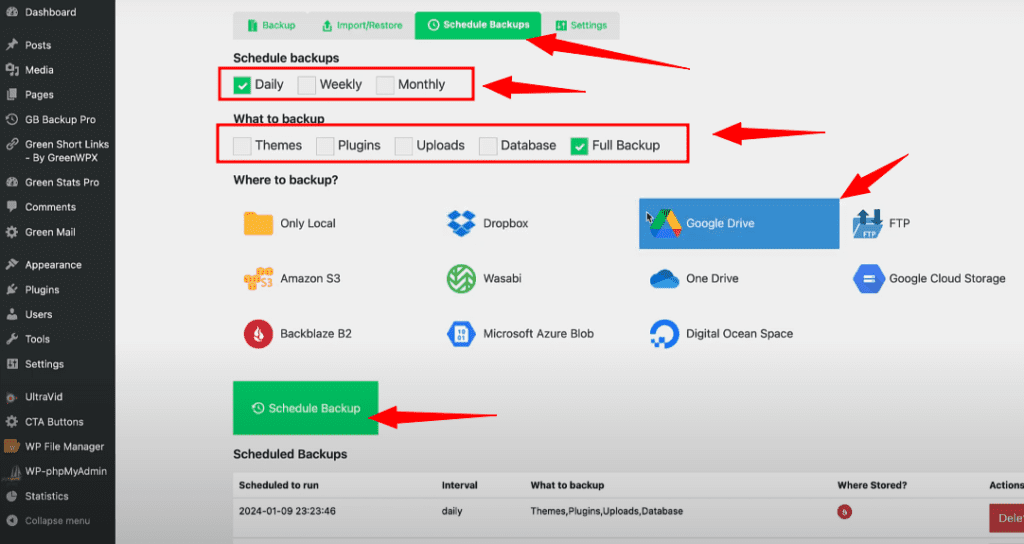
Step 4: Schedule Backups to Google Drive
To schedule backups to Google Drive and automate peace of mind, head to the Schedule tab. Create a new schedule and set your preferred frequency. Choose Google Drive as the storage location, and enable the schedule.
Step 5: Restore from Google Drive
To restore from Google Drive, accidents happen, but if you ever need to restore your site, it’s a breeze. Download the backup from Google Drive based on the file name, which contains the data and time it was taken.
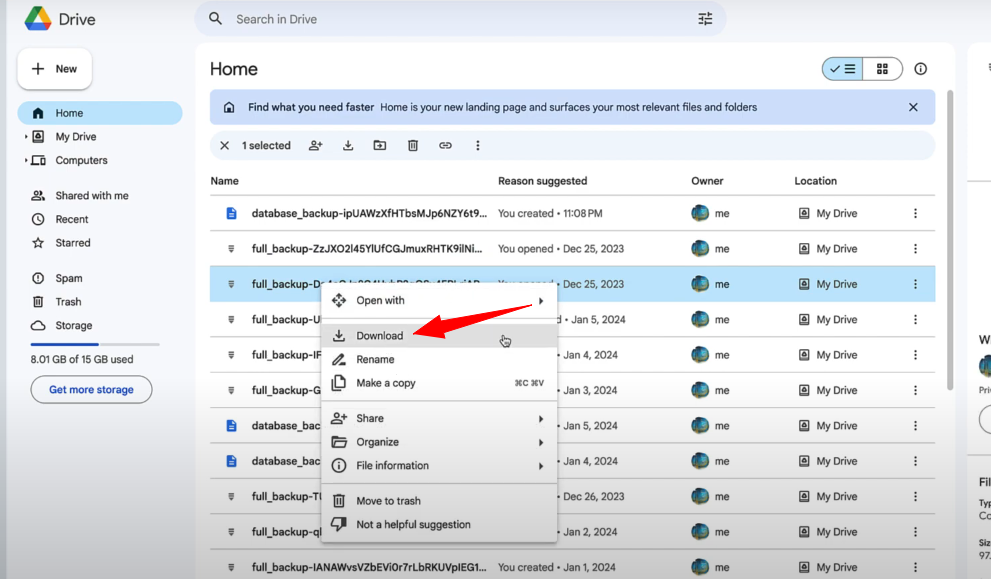
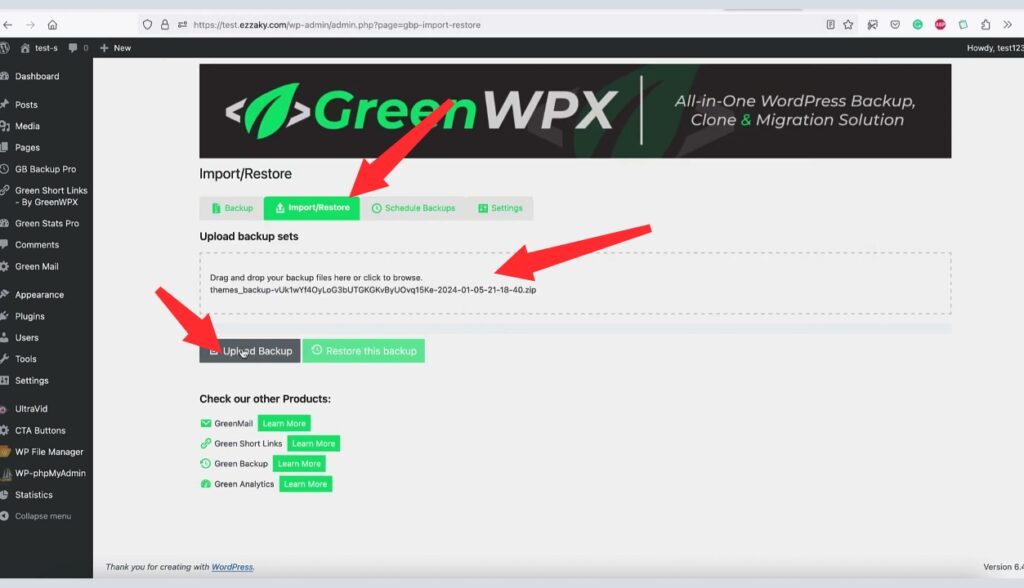
Use the import feature in Green Backup to restore it, and your WordPress site will be back to the date and time specified in the file name.

Conclusion
Congratulations! You’ve successfully configured Green Backup to seamlessly back up your WordPress site to Google Drive. Your website’s security is now in good hands. If you found this tutorial helpful, give it a thumbs up, and consider upgrading to Green Backup Pro for additional backup features.
Download Green Backup Pro Now!Happy backing up!